31
ENG
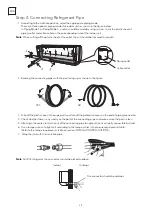
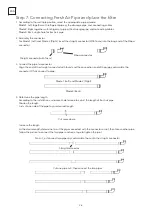
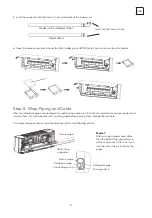
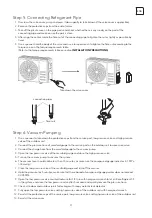
Step 5: Connecting Refrigerant Pipe
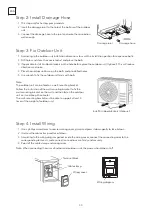
Step 6: Vacuum Pumping
1. Unscrews the valve cover, grasp and press it down gently to take it down(if the valve cover is applicable).
2. Remove the protective caps from the end of valves.
3. Take off the plastic cover in the pipe ports and check whether there is any sundry on the port of the
connecting pipe and make ensure the port is clean.
4. After align the center, rotate the flare nut of the connecting pipe to tighten the nut as tightly as possible by
hand.
5. Use a spanner hold the body of the valve and use a torque wrench to tighten the flare nut according to the
torque values in the torque requirements table.
(Refer to the torque requirements table on section
INSTALLATION PRECAUTIONS)
1. Use a spanner to take down the protective caps from the service port, low pressure valve and high pressure
valve of the outdoor unit.
2. Connect the pressure hose of manifold gauge to the service port on the outdoor unit low pressure valve.
3. Connect the charge hose from the manifold gauge to the vacuum pump.
4. Open the low pressure valve of the manifold gauge and close the high pressure valve.
5. Turn on the vacuum pump to vacuum the system.
6. The vacuum time should not be less than 15 minutes, or make sure the compound gauge indicates -0.1 MPa
(-76 cmHg)
7. Close the low pressure valve of the manifold gauge and turn off the vacuum.
8. Hold the pressure for 5 minutes, make sure that the rebound of compound gauge pointer does not exceed
0.005 MPa.
9. Open the low pressure valve counterclockwise for 1/4 turn with hexagonal wrench to let a little refrigerant fill
in the system, and close the low pressure valve after 5 seconds and quickly remove the pressure hose.
10. Check all indoor and outdoor joints for leakage with soapy water or leak detector.
11. Fully open the low pressure valve and high pressure valve of the outdoor unit with hexagonal wrench.
12. Reinstall the protective caps of the service port, low pressure valve and high pressure valve of the outdoor unit.
13. Reinstall the valve cover.
Take down the valve cover
connection pipes
flare nuts
Содержание TT37AF-1232IAW
Страница 353: ......
Страница 354: ...www tesla info ...

