background image


BASIC OPERATION


43


CH2

1

 Ω

 -1000

 Ω


Others 

OPP

 fixed 50W, not adjustable                                                

OVP/OCP

 indentical to Source                                              

Parameter 
setting 

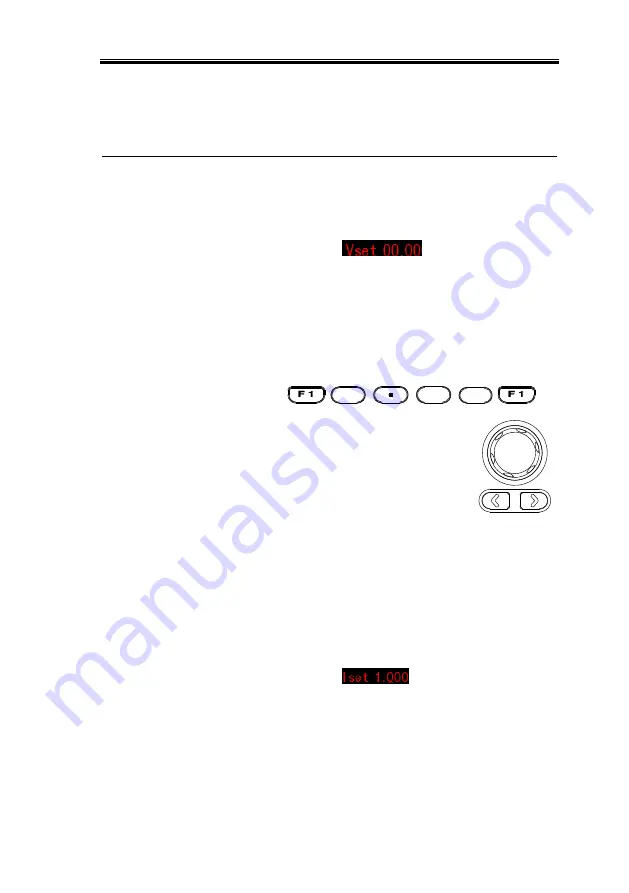
Vset 

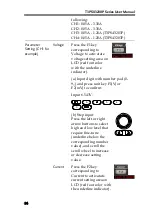
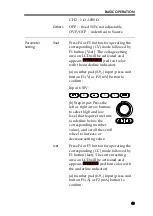
Press F4 or F5 button for operating the 
corresponding (CV) mode followed by 
F1 button (Vset). The voltage setting 
area on LCD will be activated and 
appears 

 (red font color 

with the underline indicator).                                        


(a) number pad (0-9,.) input; press unit 
button F1 (V) or F2 (mV) button to 
confirm: 


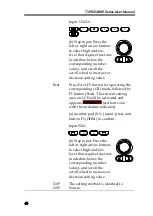
Input 6.54V: 

6

5

4


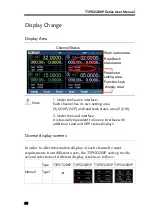
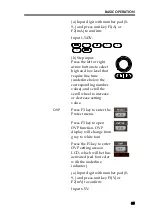
(b) Step input: Press the 
left or right arrow buttons 
to select high and low 
level that require fine tune 
(underline below the 
corresponding number 
value), and scroll the scroll 
wheel to increase or 
decrease setting value. 


Iset 

Press F4 or F5 button for operating the 
corresponding (CC) mode followed by 
F1 button (Iset). The current setting 
area on LCD will be activated and 
appears 

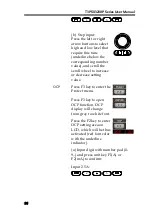
 (red font color with 

the underline indicator).                                    


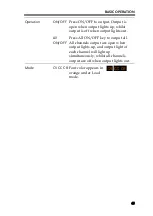
(a) number pad (0-9,.) input; press unit 
button F1 (A) or F2 (mA) button to 
confirm: 


Содержание T3PS13206P

Страница 1: ... ...

Страница 2: ...pied reproduced or translated to another language without prior written consent of Teledyne LeCroy company The information in this manual was correct at the time of printing However Teledyne LeCroy continues to improve products and reserves the rights to change specification equipment and maintenance procedures at any time without notice ...

Страница 3: ... Panel 22 Constant Voltage Constant Current Crossover Characteristics 24 GETTING STARTED 25 Start Up 26 Load Connection 27 Turning the Output On Off 28 BASIC OPERATION 29 Display Change 30 Source Function 33 Load Function 42 Sequence Function 46 Delay Function 57 Monitor Function 66 Recorder Function 69 Enternal I O Control 72 FILE OPERATION 76 Save Recall 77 Restore Factory Default Settings 80 ...

Страница 4: ... 82 System Settings 83 Firmware Upgrading 85 Description of Using Flash Drive 86 REMOTE CONTROL 87 Connection Usage 88 Command Syntax 96 Command List 100 Command Details 107 SCPI Status Registers SCPI 178 Errors 188 APPENDIX 192 Replacing the Fuse 192 Specifications 193 ...

Страница 5: ...l or on the instrument WARNING Warning Identifies conditions or practices that could result in injury or loss of life CAUTION Caution Identifies conditions or practices that could result in damage to the T3PSX3200P Series or to other properties DANGER High Voltage Attention Refer to the Manual Protective Conductor Terminal Earth ground Terminal Do not dispose electronic equipment as unsorted munic...

Страница 6: ... rated measurement category CAT per IEC EN 61010 1 2010 Power Supply WARNING AC Input voltage range 100V 120V 220V 230V 10 Frequency 50Hz 60Hz To avoid electrical shock connect the protective grounding conductor of the AC power cord to an earth ground Fuse WARNING Fuse type 100V 120V T6 3A 250V 220V 230V T3 15A 250V To prevent fire replace the fuse only with the specified type and rating Disconnec...

Страница 7: ...ution or only dry non conductive pollution occurs The pollution has no influence Pollution degree 2 Normally only non conductive pollution occurs Occasionally however a temporary conductivity caused by condensation must be expected Pollution degree 3 Conductive pollution occurs or dry non conductive pollution occurs which becomes conductive due to condensation which is expected In such conditions ...

Страница 8: ...be connected to the terminal which is marked with the letter N or coloured Blue or Black The wire which is coloured Brown must be connected to the terminal marked with the letter L or P or coloured Brown or Red If in doubt consult the instructions provided with the equipment or contact the supplier This cable appliance should be protected by a suitably rated and approved HBC mains fuse refer to th...

Страница 9: ...n features and an overview of the front and rear panel Use the Getting Started chapter on page 25 for start up instructions and how to setup the appropriate operation environment Introduction 10 Key Features 13 Front Panel 15 Rear Panel 22 Constant Voltage Constant Current Crossover Characteristics 24 ...

Страница 10: ...s output voltage or current are needed and for tracking mode definition systems where plus and minus voltages with insignificant error are required Independent Tracking Series Tracking Parallel The three output modes of T3PSX3200P series independent tracking series and tracking parallel can be selected through pressing the TRACKING key on the front panel In the independent mode the output voltage ...

Страница 11: ...ode independent or tracking mode output current overload or short circuit can be controlled via the front panel When in the CC mode independent mode only the maximum ceiling output voltage can be controlled via the front panel The power supply will automatically cross over from CV to CC operation when the output current reaches the target value The power supply will automatically cross over from C...

Страница 12: ... waveform output Under Load mode it is programmable for dynamic load below 1Hz For details see page 33 Remote Control To meet the various needs of customers the T3PSX3200P series is designed for USB and LAN remote control For details see page 87 Additional Function Control signal via external switch is available for user For details see page 72 ...

Страница 13: ...eration Digital panel control Output on off control ON OFF and each channel can be controlled separately Digital voltage and current settings Key Encode 10 groups of save recall settings and 2 groups of power on settings 10 groups of save recall Sequence 10 groups of save recall Delay 10 groups of save recall Record CH1 CH2 workable in Load Mode 7 types display modes available with 5 contents and ...

Страница 14: ...ction Features Overvoltage and overcurrent protection OVP OCP Overtemperature protection OTP Polarity Reverse Protection Overload Protection OPP in Load mode Interface Remote Control RS 232 USB remote control Control I O LAN remote control ...

Страница 15: ...32V 3A CH4 System ON OFF CH2 GND COM SERIES OUTPUT SLAVE CH1 CH4 0 15V 1A 0 7 4 1 T3PS43203P Programmable DC Power Supply 32V 3A LCD Number pad Scroll wheel Arrow keys Function keys USB host Front panel output terminals Power button The panel above is the example of T3PS43203P For other models refer to page 21 Display Display Interface T3PS43203P model ...

Страница 16: ...annel Status Power display V I setting Voltage display Current display OVP OCP setting area Channel no Color of channel remains the original when not being set Color of channel blinks between the original and orange when being set Channel status Display active channel state Power supply CH1 CH2 CH3 CH4 green or red Load Mode CH1 CH2 orange Voltmeter Indicators Displays the output voltage with up t...

Страница 17: ...3P CH4 Setting Display Displays the voltage and current settings CH1 CH2 CH3 CH4 CH3 T3PS33203P displays setting of voltage only Display OVP OCP settings CH1 CH2 CH3 CH4 The CH3 OVP of T3PS33203P is a fixed value approx 5 5V non configurable and with only on or off switch available for user OCP is available only for USB output port approx 3 1A ...

Страница 18: ...ns appear on the display when Sequence Delay Monitor Recorder is activated the corresponding SEQ DLY MON REC icons appear on the display Function Keys Power Button Turns the power on or off On Off Channel select buttons CH2 CH1 CH3 CH4 Each channel has its own button and promptly switchable among CH1 CH4 setting Output buttons Individual output ON OFF The ON OFF button is operational individually ...

Страница 19: ...ystem key System It is used to set functions including Interface Beep Backlight etc For details refer to page 83 Advance key Advance System It is used for certain advanced functions like Sequence Delay Monitor Recorder etc Memory key Memory Advance It is used to operate several functions including save and recall etc for set parameters For details refer to page 76 Lock key Memory Lock It is used t...

Страница 20: ...inal or load input terminal CH3 terminal 0 5V 1A CH3 Power output terminal 3A MAX Power output terminal T3PS33203P only Warning The output current from the 2 terminals should Not exceed 5A for T3PS33203P CH4 terminal CH4 0 15V 1A Power output terminal GND terminal GND Ground terminal Voltage feedback terminal SENSE S S Sense terminal of power output for T3PS13206P only ...

Страница 21: ...OFF 8 9 MASTER 0 32V 3A CH1 CH2 GND COM SERIES OUTPUT PARALLEL OUTPUT SLAVE Programmable Power Supply 0 4 1 System GPP 2323 32 V 3 A 7 T3PS23203P Programmable DC Power Supply 32 V 3A CH2 T3PS33203P System ON OFF CH2 SLAVE 0 32V 3A 3A MAX 5V 3 3V 2 5V 1 8V 5A Lock ON OFF Enter Advance Memory ON OFF ON OFF ALL CH3 8 5 2 9 6 3 0 32V 3A COM SERIES OUTPUT PARALLEL OUTPUT CH1 MASTER 0 CH1 GND GPP 3323 3...

Страница 22: ... WATTS AC 230V 250V T 3 15A 220V 120V 250V BEFORE REPLACING FUSE DISCONNECT POWER CORD REPLACE FUSE FUSE RATING AS SPECIFIED AC SELECTOR 220V 230V 120V 100V AC input socket and line fuse LAN port Item Description Alternate input switch AC SELECTOR 220V 230V 120V 100V AC voltage selection 100V 120V 220V 230V 10 frequency 50 60Hz AC input socket and line fuse The AC input accepts 100V 120V 220V 230V...

Страница 23: ...OVERVIEW 23 RS 232 port RS 232 RS232 port for remote control See page 88 for details Control I O port Control I O 5 ports in all for input output control See page 72 for details of configuration ...

Страница 24: ...ge level until the current reaches the set current level The status indicator will show CV on the LCD when in CV mode Constant Current Mode When the output current reaches the set current level the unit switches operation to constant current mode The status indicator will show CC on the LCD display In CC mode the current level is maintained and the voltage level is limited to less than the set vol...

Страница 25: ...G STARTED 25 GETTING STARTED This chapter describes the start up procedures and the preparation that is necessary before operating the power supply Start Up 26 Load Connection 27 Turning the Output On Off 28 ...

Страница 26: ...0 60Hz AC SELECTOR 220V 230V 120V 100V Connecting the AC power cord The fuse is a slow blow fuse 3 15A 220V 230V 6 30A 100V 120V Confirm that the fuse is of the correct type and rating before connecting the power cord Turning the power on Press the power button The LCD will display the line frequency of the AC power supply Turning the power off To turn the power off press the power button again ...

Страница 27: ... panel source connections MASTER 0 32V 3A CH1 USB Type A only Greater than 4A 3A MAX Use the GTL 105A cables for the sense connections S S Wire Gauge Load wires must have enough current capacity to minimize cable loss and load line impedance Voltage drop across a wire should not excess 0 5V The following list is the wire current rating at 450A cm2 Wire Size AWG Maximum Current A 20 2 5 18 4 16 6 1...

Страница 28: ...Press ALL ON OFF key when it needs to output or turn off all channels simultaneously ALL ON OFF ALL ON OFF Command Set Refer to page 100 for more details on remote commands chapter Automatic Output Shut Down Any of the following actions will cause the output to be automatically shut down Toggle between power output and load mode Independent Tracking Series Tracking Parallel operation Recall the sa...

Страница 29: ...acking Series and Tracking Parallel Modes 39 Load Function 42 Sequence Function 46 Set Sequence Output 46 Set Group Parameter 48 Construct Templet 50 Menu Tree 52 Save and Recall 54 Delay Function 57 Set Delay Output 57 Set Group Parameter 59 Menu Tree 61 Save and Recall 64 Monitor Function 66 Set Monitor 66 Recorder Function 69 Set Recorder 69 Enternal I O Control 72 Key Function Description 73 ...

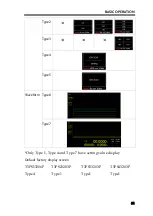
Страница 30: ...ea V I OVP OCP and read back status area V I W 2 Under the Load interface It is basically equivalent to Source interface with additional Load and OPP status displays Diverse display screens In order to offer information display of each channel to meet requirements from different users the T3PSX3200P series provide several selections of different display screens as follows Type T3PS13206P T3PS23203...

Страница 31: ...RATION 31 Type2 Type3 Type4 Type5 Waveform Type6 Type7 Only Type 1 Type 4 and Type 7 have setting value display Default factory display screen T3PS13206P T3PS23203P T3PS33203P T3PS43203P Type4 Type1 Type1 Type1 ...

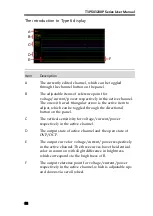
Страница 32: ... can be toggled through the directional button on the panel C The vertical sensitivity for voltage current power respectively in the active channel D The output state of active channel and the open state of OVP OCP E The output curve for voltage current power respectively in the active channel The three curves have the identical color in common with slight difference in brightness which correspond...

Страница 33: ... range is as the following CH1 0 000V 33 000V CH2 0 000V 33 000V CH3 0 000V 5 500V T3PS43203P CH4 0 000V 16 000V T3PS43203P Iset Set limited current of active channel The range is as the following CH1 0 0000A 3 2000A CH2 0 0000A 3 2000A CH3 0 0000A 1 1000A T3PS43203P CH4 0 0000A 1 1000A T3PS43203P OVP Set OVP The range is as the following CH1 0 5V 35 0V CH2 0 5V 35 0V CH3 0 5V 6 0V T3PS43203P CH4 ...

Страница 34: ... the underline indicator a Input digit with number pad 0 9 and press unit key F1 V or F2 mV to confirm Input 6 543V 6 5 4 3 b Step input Press the left or right arrow buttons to select high and low level that require fine tune underline below the corresponding number value and scroll the scroll wheel to increase or decrease setting value Current Press the F2 key corresponding to Current to activat...

Страница 35: ...ow the corresponding number value and scroll the scroll wheel to increase or decrease setting value OVP Press F3 key to enter the Protect menu Press F3 key to open OVP function OVP display will change from gray to white font Press the F1 key to enter OVP setting area on LCD which will be thus activated red font color with the underline indicator a Input digit with number pad 0 9 and press unit key...

Страница 36: ...l the scroll wheel to increase or decrease setting value OCP Press F3 key to enter the Protect menu Press F3 key to open OCP function OCP display will change from gray to white font Press the F2 key to enter OCP setting area on LCD which will be thus activated red font color with the underline indicator a Input digit with number pad 0 9 and press unit key F1 A or F2 mA to confirm Input 2 5A 2 5 ...

Страница 37: ...nd output light of each channel will light up simultaneously whilst all channels output are off when output lights out State description CV CC Constant voltage displays in green CV while constant current displays in red CC OVP OCP OVP OCP displays in white when OVP is not in activation OVP OCP displays in red and output is off when OVP is activated OVP OCP displays in gray when OVP OCP functions a...

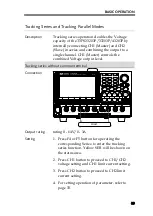
Страница 38: ... Supply 32V 3A CH4 Load CH1 Load CH2 Load CH3 Load Voltage Current Rating T3PS13206P 32V 6A x 1 T3PS23203P 33203P 43203P CH1 CH2 32V 3A x 2 CH3 1 8V 2 5V 3 3V 5V 5A x 1 T3PS33203P USB Port Output 3A T3PS33203P 5V 1A x 1 T3PS43203P CH4 15V 1A x 1 Setting 1 Press F4 or F5 button to enter the independent output mode 2 For setting operation of parameter refer to page 33 Output The independent button O...

Страница 39: ...ON OFF ON OFF Advance CH3 ON OFF Lock ALL ON OFF Enter 8 5 2 9 6 3 PARALLEL OUTPUT MASTER 0 32V 3A CH4 System ON OFF CH2 GND COM SERIES OUTPUT SLAVE CH1 CH4 0 15V 1A 0 7 4 1 T3PS43203P Programmable DC Power Supply 32V 3A Load Output rating rating 0 64V 0 3A Setting 1 Press F4 or F5 button for operating the corresponding Series to enter the tracking series function Yellow SER will be shown on the s...

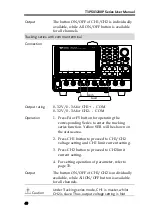
Страница 40: ...2V 3A com Load Output rating 0 32V 0 3A for CH1 COM 0 32V 0 3A for CH2 COM Operation 1 Press F4 or F5 button for operating the corresponding Series to enter the tracking series function Yellow SER will be shown on the status area 2 Press CH1 button to proceed to CH1 CH2 voltage setting and CH1 limit current setting 3 Press CH2 button to proceed to CH2 limit current setting 4 For setting operation ...

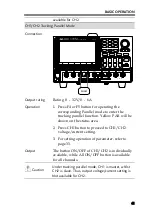
Страница 41: ...ing Rating 0 32V 0 6A Operation 1 Press F4 or F5 button for operating the corresponding Parallel mode to enter the tracking parallel function Yellow PAR will be shown on the status area 2 Press CH1 button to proceed to CH1 CH2 voltage current setting 3 For setting operation of parameter refer to page 33 Output The button ON OFF of CH1 CH2 is individually available while All ON OFF button is availa...

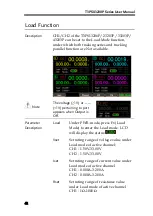
Страница 42: ...ining to port appears when Output is Off Parameter Description Load Under PWR mode press F6 Load Mode to enter the Load mode LCD will display the status Vset Set rating range of voltage value under Load mode of active channel CH1 1 50V 33 00V CH2 1 50V 33 00V Iset Set rating range of current value under Load mode of active channel CH1 0 000A 3 200A CH2 0 000A 3 200A Rset Set rating range of resist...

Страница 43: ...nit button F1 V or F2 mV button to confirm Input 6 54V 6 5 4 b Step input Press the left or right arrow buttons to select high and low level that require fine tune underline below the corresponding number value and scroll the scroll wheel to increase or decrease setting value Iset Press F4 or F5 button for operating the corresponding CC mode followed by F1 button Iset The current setting area on L...

Страница 44: ...erating the corresponding CR mode followed by F1 button Rset The current setting area on LCD will be activated and appears red font color with the underline indicator a number pad 0 9 input press unit button F1 OHM to confirm Input 52Ω 5 2 b Step input Press the left or right arrow buttons to select high and low level that require fine tune underline below the corresponding number value and scroll...

Страница 45: ...ut is off when output lights out All ON OFF Press All ON OFF key to output all All channels output are open when output lights up and output light of each channel will light up simultaneously whilst all channels output are off when output lights out Mode CV CC CR Font color appears in orange under Load mode ...

Страница 46: ...uration is 1s duration calculation Time x Groups x Cycles and the resolution is 1s Caution This feature is applicable to both CH1 and CH2 Set Sequence Output Parameter Description Cycles Cycle number 1 represents a cycle of single period whilst 2 indicate a cycle with 2 periods and so on The range is from 0 to 9999 or Infinite Start The number to execute 0 indicates the execution starts from the g...

Страница 47: ...nfinite button if Infinite execution is in need Start Under the Sequence function press F1 Set button followed by selecting F2 Start The setting on LCD is activated and appears in red font color Use number pad to set the parameters directly and then press the F1 Done button to confirm or use arrow keys along with scroll wheel to complete the setting Groups Under the Sequence function press F1 Set ...

Страница 48: ... unchanged until SEQ On so that Sequence starts to output Set Group Parameter Description Each Group consists of Voltage Current and Time Therefore properly confirm parameter of each group is correct before setting Sequence output Parameter Description No Voltage Current Time Group number Maximum 2047 Voltage setting of each group Range 0 33V Current setting of each group Range 0 3 2A Execution du...

Страница 49: ...r the Sequence function press F2 Edit button followed by selecting F4 Current The setting on LCD is activated and appears in red font color Use number pad to set the parameters directly and then press the F1 A or F2 mA button to confirm or use arrow keys along with scroll wheel to complete the setting Time Under the Sequence function press F2 Edit button followed by selecting F2 Time The setting o...

Страница 50: ...orms including Sine Pulse Ramp Stair Up Stair Dn Stair UpDn Exp Rise Exp Fall Max Value Set the max value of waveform voltage current Min Value Set the min value of waveform voltage current Start Set the initial group number of waveform Maximum 2037 Points Select the required points Range 10 2047 Inverted Invert the selected waveform Parameter Setting Object Press the F1 Object button to select Vo...

Страница 51: ... then press the F1 V A or the F2 mV mA button to confirm or use arrow keys along with scroll wheel to complete the setting Start Press the F5 More button and then press the F1 Start button The setting on LCD will be activated and appears in red font color Use number pad to set the parameters directly and then press the F1 Done to confirm or use arrow keys along with scroll wheel to complete the se...

Страница 52: ...4 Inverted button On inverted and Off non inverted appear on LCD in turn Simply stop at the status which is required Construct Construct Press the F5 Construct to complete construction Menu Tree Description User is able to understand the overall functions of Sequence via the menu tree which is shown in proper order by tiers The Return key is used for moving back to the parent menu See the construc...

Страница 53: ...Save Return Next Stair UpDn Return Exp Rise Recall Exp Fall Return Select Return Groups Voltage MaxValue Return Done V V A Return mV mV mA Last Return Next MinValue Return V A mV mA Return Endstate Current More A Start Done Return mA Points Done Return Last Interval Done Return Next Inverted Return Construct Infinite Save Return Return Return Return Note In the Memory menu Type CSV SEQ New File Se...

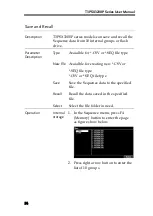
Страница 54: ...SV or SEQ file type New File Avaialble for creating new CSV or SEQ file type CSV or SEQ file type Save Save the Sequence data to the specified file Recall Recall the data saved in the specified file Select Select the file folder in need Operation Internal storage 1 In the Sequence menu press F4 Memory button to enter the page as figure show below 2 Press right arrow button to enter the list of 10 ...

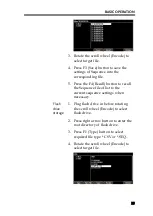
Страница 55: ...button to recall the Sequence file of list to the current sequence settings when necessary Flash drive storage 1 Plug flash drive in before rotating the scroll wheel Encode to select flash drive 2 Press right arrow button to enter the root directory of flash drive 3 Press F1 Type button to select required file type CSV or SEQ 4 Rotate the scroll wheel Encode to select target file ...

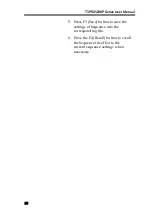
Страница 56: ...ies User Manual 56 5 Press F3 Save button to save the settings of Sequence into the corresponding file 6 Press the F4 Recall button to recall the Sequence file of list to the current sequence settings when necessary ...

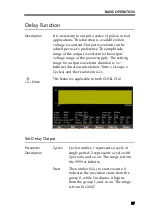
Страница 57: ... range for output waveform duration is 1s Infinite duration calculation Time x Groups x Cycles and the resolution is 1s Note This feature is applicable to both CH1 CH2 Set Delay Output Parameter Description Cycles Cycle number 1 represents a cycle of single period 2 represents a cycle with 2 periods and so on The range is from 0 to 9999 or Infinite Start The number No to start execute 0 indicates ...

Страница 58: ...red font color Use number pad to set the parameters directly and then press the F1 Done button to confirm or use arrow keys along with scroll wheel to complete the setting Press and hold the F5 Infinite button if Infinite execution is in need Start Under the Delay function press the F1 Set button followed by selecting the F2 Start The setting on LCD is activated and appears in red font color Use n...

Страница 59: ...top infinitely by F1 None Operation ON OFF Press the F5 Delay On button Output is open when output lights up whilst output is off when output lights out DLY appears on the status bar yellow for CH1 blue for CH2 and white for both CH1 CH2 on Warning If the channel has been in Output ON before Delay function the status remains unchanged until Delay On so that the corresponding waveform starts to out...

Страница 60: ...ed font color Use number pad to set the parameters directly and then press the F1 Done button to confirm or use arrow keys along with scroll wheel to complete the setting State Under the Delay function press the F2 Edit button and then the F2 State button followed by selecting F1 On F2 Off or F3 Inverted to set output On Off status of each group Time Under the Delay function press the F2 Edit butt...

Страница 61: ... on the LCD On Delay Off Delay When fix FixTime is set in Time Set it s available to set the time value of both F2 On Delay and F3 Off Delay at the same time Base Time Step When increase Increase or decline Decline is set in Time Set it s available to set the time value of F2 Base Time start time and F3 Step group change at the same time Menu Tree Description User is able to well understand the ov...

Страница 62: ...T3PSX3200P Series User Manual 62 Level 1 Advance Level 2 Delay Level 3 Set Edit Cycles No Level 14 Level 15 Level 16 Done Return ...

Страница 63: ...wFile Return Done On Return Off Save Inverted Define Last A Recall Select Groups time Power Return Done Second Define Return Last W Next mW Return Endstate Pattern Return 01 Patt 10 Patt Return Infinite Time Set Return Model Delay Off Current Next mA Return Return Return On Delay Off Delay Return Note In the Memory menu Type CSV DLY New File Select appear only when flash drive is plugged in ...

Страница 64: ...DLY file type New File Available for creating new CSV or DLY file type Save Save the Delay data to the specified file Recall Recall the data saved in the specified file Select Select the file folder in need Operation Internal storage 1 In the Delay menu press F4 Memory button to enter the page as figure show below 2 Press right arrow button to enter the list of 10 groups 3 Rotate the scroll wheel ...

Страница 65: ...lug flash drive in before rotating the scroll wheel Encode to select flash drive 2 Press right arrow button to enter the root directory of flash drive 3 Press F1 Type button to select required file type CSV or DLY 4 Rotate the scroll wheel Encode to select target file 5 Press F3 Save button to save the settings of Delay into the corresponding file 6 Press the F4 Recall button to recall the Delay f...

Страница 66: ... preset conditions Note This feature is Not applicable to CH3 of T3PS33203P Set Monitor Parameter Description Voltage Set condition of monitor of voltage Current Set condition of monitor of current Power Set condition of monitor of power Stop Type Set status after halt 3 types are available output disable content notice and audible alarm Select To confirm if voltage current power is selected as mo...

Страница 67: ... to define logical pattern of other conditions Current 1 Press the Advance key on control panel Select the F4 Monitor function followed by pressing the F2 Current button to enter the current setting 2 Press the F1 Set button The setting on LCD is activated and appears in red font color Use number pad to set the parameters directly or use arrow keys along with scroll wheel to complete the setting 3...

Страница 68: ...Logic button to define logical pattern of other conditions Stop Type Press the Advance key on control panel Select the F4 Monitor function followed by pressing the F4 Outoff button to set output disable select F2 Alarm to set content notice select F3 Beeper to set audible alarm Operation ON OFF Press the F5 MON On button to enter live monitor MON appears on the status bar the color of channel rema...

Страница 69: ...ription Period Set period of each recorded Groups Set recorded group number Channel Set recorded channel Memory Set saving location of record Parameter Setting Period Press the Advance key on control panel Select F5 Recorder function Press F1 Period button to enter setting of recorded period The setting on LCD is activated and appears in red font color Use number pad to set the parameters directly...

Страница 70: ...te the setting Channel Press the Advance key on control panel Select the F5 Recorder function Press the F3 Channel button to enter setting of recorded channel F1 CH1 F2 CH2 F3 CH3 F4 CH4 are available for selection The numbers of channel may vary by models Memory Press the Advance key on control panel Select the F5 Recorder function followed by pressing F4 Memory button to setting of recorded savi...

Страница 71: ...for further saving into flash drive later Flash drive operation description Type CSV REC New File Select buttons appear when flash drive is selected Note Type is used to select CSV and REC file types New File is used to create new file Select is used to open the required file folder Operation ON OFF Press F5 REC On button to enter live record function REC appears on the status bar the color of cha...

Страница 72: ...put signal respectively to have command of the following four functions 1 Control of channel On Off 2 Control of Tracking mode 3 Toggle between PWR Load modes 4 Toggle between CC CV CR modes under Load The conditions listed below for output signal setting 1 Channel output On Off 2 Beyond the setting of Voltage Current Power Rear Pannel Control Port Up to 10 terminals within the control port the up...

Страница 73: ...le function of the port F3 Mode Set which mode to adopt Input Mode or Output Mode F4 Channel Select corresponding channel F1 CH1 F2 CH2 F3 CH3 F4 CH4 F5 More F6 Return F5 More under Input Mode setting Key Function Operation Result F1 Type Select trigger type F1 RiseEdge F2 FallEdge F3 Hi Level F4 Lo Level F5 States Input F2 Response Set result after trigger response F1 Output sets as ON OFF or rev...

Страница 74: ...cription Operation Press the System key on control panel Select the F1 Interface function followed by pressing the F5 Control I O button to enter the setting of external I O Press the F1 Data Line button Select required data line from D0 through D5 F1 D0 F2 D1 F3 D2 F4 D3 F5 D4 Press the F2 Enable button to set this terminal as input or output function This button enables Trigger in or Trigger out...

Страница 75: ...his terminal This button enables Enable or Disenable to be selected in turn Key F5 More After pressing the F3 Mode button Trigger in and Trigger out will bring about different results individually Refer to the table above for details ...

Страница 76: ...T3PSX3200P Series User Manual 76 FILE OPERATION Save Recall 77 Restore Factory Default Settings 80 Default setting of each channel 80 Default setting of system 80 ...

Страница 77: ... seq and delay output dly Note Both file folder and name in flash drive are limited within 10 characters Set file operation set 1 Press the Memory button to enter the interface Rotate the scroll wheel Encode to select file of either internal memory or flash drive 2 Press the right arrow button to enter the file group Rotate the scroll wheel Encode and stop at the file in need ...

Страница 78: ...all Sequence data Note SEQ file can be edited in PC by the specified format CSV or SEQ and imported via flash drive into machine Recorded file operation DLY Refer to page 64 for chapter of save and recall Delay data Note DLY file can be edited in PC by the specified format CSV or DLY and imported via flash drive into machine Recorded file operation REC Refer to page 77 for chapter of Memory operat...

Страница 79: ...ace parameter settings area shows Power On There are 2 settings to choose from Last the last shut down status and Default non modifiable factory default setting To enter the function press the System button to enter the interface followed by pressing the F2 Power on button ...

Страница 80: ...4 Preset button to select Default Default setting of each channel Channel item Parameter Channel item Parameter Voltage 00 000V Current 0 0000A OVP 35V Off OCP 3 5A Off Disp Type Type1 T3PS13206P Type4 Vset Load 1 500V Model PWR Iset Load 0 000A Tracking Indep Rset Load 0050Ω Default setting of system System item Parameter System item Parameter Interface USB MAC Address Factory setting UBS Baud 11...

Страница 81: ...SYSTEM SETTINGS 81 SYSTEM SETTINGS System Information 82 System Settings 83 Firmware Upgrading 85 Description of Using Flash Drive 86 ...

Страница 82: ...Check operation Press the System button on the panel to show the screen as above System Version Model View the system software version Firmware Software version Serial number View the machine serial number Check operation Press the System button followed by pressing the F4 Version button to show the above system version window ...

Страница 83: ...tial state setting In the System menu press the F2 Power On button to select required power on setting Last the last shut down setting and Default factory default setting Menu language setting The System menu press the F3 Setting button followed by selecting the F1 Language to locate the F1 English button or the F2 Chinese button Backlight brightness adjustment In the System menu press the F3 Sett...

Страница 84: ...est software version For more details refer to page 85 Screenshot operation In the System menu press the F3 Setting button followed by selecting F5 Hardcopy to proceed to screenshot operation For more details refer to page 86 Restore to Factory Settings In the System menu press the F5 Preset button to restore to the factory default setting For more details refer to page 80 ...

Страница 85: ...rade Requirement Firmware file Supplied by Teledyne LeCroy Flash drive USB2 0 USB3 0 FAT32 file system 16G MAX Operation After plugging in flash drive the corresponding symbol appears in the status bar Press System button Press F3 Setting button Press F4 Upgrade button Rotate the scroll wheel to select corresponding file Press the F4 Recall button and start to upgrade The procedure is done when th...

Страница 86: ...peration In the target interface press System button F1 Setting F5 Hardcopy button and rotate the scroll wheel Encode to locate the target interface followed by pressing Enter key to save screenshot A confirm voice will sound when successful The file format of screenshot is BMP and is saved in the root directory of flash drive by default Exporting the Sequence data The files of Sequence SEQ Record...

Страница 87: ...TE CONTROL 87 REMOTE CONTROL Connection Usage 88 RS 232 88 USB 89 LAN 91 Command Syntax 96 SCPI Commands Overview SCPI 96 Command List 100 Command Details 107 Errors 188 Error Message 188 Command Errors 189 ...

Страница 88: ...t the target port F1 RS 232 F2 USB F4 LAN The available ports will appear on the LCD State The selected port will appear in the status bar with font color in gray for instance whilst it will change to white color after successful command operation RS 232 Description The T3PSX3200P series models can be remotely controlled by RS 232 connection Interface Rear panel RS 232 port Connection Under power ...

Страница 89: ...op bit 1bit N no flow control bit Function check Perform the following query IDN The unit will return the manufacturer model serial number and software version TELEDYNE T3PS33203P SN xxxxxxxx Vx xx Disable Remote Control Mode Send a remote command Locall from the PC Long press the F6 unlock key on the front panel Note RS 232 is Not hot plug device Please proceed to the connection procedure under t...

Страница 90: ... Interface button to select the target port F2 USB The setting of baud rate will appear automatically please then choose desired setting Display The parameter information of USB will appear on LCD Refer to the description below 115200 transmission baud rate Function Check Perform the following query IDN The unit will return the manufacturer model serial number and software version TELEDYNE T3PS232...

Страница 91: ...tion is successful Set port 1 Press the System button to enter the system interface followed by pressing the F1 Interface button to configure port parameter 2 Press the F4 LAN button to configure internet port parameter 3 Press the F1 Remote button to disable or enable LAN LCD will show the current setting Enable or Disable Edit Host name 1 Press the System button to enter the system interface fol...

Страница 92: ...by pressing the F1 Interface button to configure port parameter 2 Press the F4 LAN button to configure internet port parameter 3 Press the F2 Config button to configure relevant parameter 4 Press the F3 Manual button to manually configure 5 Press the F1 IP Addr button to manually input IP address The set content will be activated to become red color Input required data and confirm by pressing the ...

Страница 93: ...1 0 0 0 to 255 255 255 255 Gateway Gateway range 1 0 0 0 to 223 255 255 255 excluding 127 nnn nnn nnn VISA Resource name TCPIP0 169 254 129 17 1026 SOCKET DHCP 1 Press the System button to enter the system interface followed by pressing the F1 Interface button to configure port parameter 2 Press the F4 LAN button to configure internet port parameter 3 Press the F2 Config button to configure releva...

Страница 94: ...fter entering the IP address you will be shown the Welcome screen which displays the instrument information The page also provides three links Welcome Page Browser Web Control and View Modify Configuration network settings 2 Click on Browser Web Control to execute commands through the browser as shown below ...

Страница 95: ... Save and Restart to change the remote settings for the T3PSX3200P series Note Click Undo Edits to cancel all the edited settings Click Factory Defaults to restore to the factory default settings Exiting from Remote Control Mode Send a remote command from the PC Long press the F6 unlock key on the front panel Unplug the USB cable from the rear panel Note Hot swappable LAN devices can be directly d...

Страница 96: ...words separated by a colon and followed by a parameter There is always a space between the keywords and the parameters Any commands followed by a question mark are queries Example SYSTem BEEPer STATe 0 1 OFF ON SYSTem BEEPer STATe SYSTem is the root level keyword and BEEPer and STATe are the secondary and tertiary level keywords All levels have a separating each keyword Parameters are enclosed in ...

Страница 97: ...e omitted when executing a command For example For the commands OUTPut STATe ON OFF STATe can be omitted Angle Brackets The parameters in angle brackets must be substituted with a valid parameter For example For the command DISPlay CONTrast brightness brightness must be use a numerical value instead such as DISPlay CONTrast 1 Parameter Types The commands have a number of different parameter catego...

Страница 98: ...d can be used For example The RCL 0 1 2 3 9 command can only use 0 1 2 3 9 ASCII Strings ASCII string parameters must use a combination of ASCII characters in a string For example For the command MODE name name must be an ASCII string Command Abbreviations The syntax for SCPI commands contains a combination of upper and lower case letters The upper case letters in a command represent the short for...

Страница 99: ... terminated with a new line character The IEEE 4888 EOI can also be used as a new line character A command can also be terminated using a carriage return new line character The command path will always be reset back to the root level after a command has been terminated Return values are terminated with 0x0A ...

Страница 100: ...T Boolean 112 OUTPut 1 2 3 4 OVP STATe b 112 OUTPut 1 2 3 4 OVP STATe 113 OUTPut 1 2 3 4 OVP value 113 OUTPut 1 2 3 4 OVP 113 OUTPut 1 2 3 4 OCP STATe b 113 OUTPut 1 2 3 4 OCP STATe 114 OUTPut 1 2 3 4 OCP value 114 OUTPut 1 2 3 4 OCP 114 Source and Load Commands SOURce 1 2 3 4 CURRent NRf 118 ISET X NR2 118 SOURce 1 2 3 4 CURRent 119 ISET X 119 SOURce 1 2 3 4 CURRent LIMit STATe 119 SOURce 1 2 3 4...

Страница 101: ...F 126 DELA y 1 2 STATe 127 DELAy 1 2 STATe GENErate 01P 10P 127 DELAy 1 2 STATe GENErate 127 DELAy 1 2 STOP NONE V V V C C C P P P value 127 DELA y 1 2 STOP 128 DELA y 1 2 TIME GENErate FIX INC DEC value0 value1 129 DELAy 1 2 TIME GENErate 130 MONItor 1 2 3 4 CURRent CONDition C C C NONE AND OR NONE 130 MONItor 1 2 3 4 CURRent CONDition 131 MONItor 1 2 3 4 CURRent VALue value MINimum MAXimum 131 M...

Страница 102: ...OUPs value 138 RECOrder 1 2 3 4 GROUPs 138 RECOrder 1 2 3 4 ENABle ON OFF 138 RECOrder 1 2 3 4 ENABle 138 SEQUence 1 2 CYCLEs N I value 138 SEQUence 1 2 CYCLEs 139 SEQUence 1 2 ENDState OFF LAST 139 SEQUence 1 2 ENDState 139 SEQUence 1 2 GROUPs value 140 SEQUence 1 2 GROUPs 140 SEQUence 1 2 PARAmeter No volt curr time 140 SEQUence 1 2 PARAmeter No count 141 SEQUence 1 2 STARt value 142 SEQUence 1 ...

Страница 103: ...SYMMetry 149 SEQUence 1 2 TEMPlet WIDTh value 149 SEQUence 1 2 TEMPlet WIDTh 149 TRIGger IN ENABle D0 D1 D2 D3 D4 ON OFF 149 TRIGger IN ENABle D0 D1 D2 D3 D4 150 TRIGger IN RESPonse D0 D1 D2 D3 D4 ON OFF TOGGLE POWER CV CC CR IND SER PAR 150 TRIGger IN RESPonse D0 D1 D2 D3 D4 151 TRIGger IN SENSitivity D0 D1 D2 D3 D4 LOW MID HIGH 152 TRIGger IN SENSitivity D0 D1 D2 D3 D4 152 TRIGger IN SOURce D0 D...

Страница 104: ... NRf 160 STATus MEASurement ENABle 161 STATus MEASurement CONDition 161 STATus QUEStionable EVENt 161 STATus QUEStionable CONDition 161 STATus QUEStionable ENABle NRf 162 STATus QUEStionable ENABle 162 STATus QUEue NEXT 162 STATus QUEue ENABle list 162 STATus QUEue ENABle 163 STATus QUEue DISable list 163 STATus QUEue DISable 164 STATus QUEue CLEar 164 System Commands SYSTem VERSion 166 SYSTem ERR...

Страница 105: ...EP Boolean 171 SYSTem BEEPer STATe 172 SYSTem LOCal 172 LOCal 172 SYSTem INTerface USB RS232 GPIB LAN 172 SYSTem LANGuage CHINese ENGlish 172 SYSTem LANGuage 173 SYSTem BAUDrate USB 9600 19200 38400 57600 115200 173 SYSTem BAUDrate USB 173 BAUD NR1 173 HELP 174 System Related Commands IDN 175 RST 175 SAV NRf 176 SAV NR1 176 RCL NRf 176 RCL NR1 176 Status Byte Register Commands SRE Allowed values 1...

Страница 106: ...T3PSX3200P Series User Manual 106 Register Commands OPC 187 OPC 187 ...

Страница 107: ...elected Measurement Commands MEASure 1 2 3 4 function 107 VOUT X 107 IOUT X 108 MEASure 1 2 3 4 function Description Performs a READ query on the specified measurement function Parameter function CURRent DC Measures the current VOLTage DC Measures the voltage POWEr DC Measures the power Example MEASure2 CURRent Reads back the CH2 current value VOUT X Description Returns the actual output voltage P...

Страница 108: ...nual 108 Example VOUT1 Returns the CH1 output voltage IOUT X Description Returns the actual output current Parameter X 1 CH1 2 CH2 3 CH3 for T3PS43203P only 4 CH4 for T3PS43203P only Example IOUT1 Returns the CH1 output voltage ...

Страница 109: ...scription Turn the LCD display on or off Parameter 0 OFF Turns the display off 1 ON Turns the display on Example DISPlay ENABle ON Turns the LCD display on DISPlay ENABle Description Queries the state of the display Example DISPlay ENABle Returns the state of the display DISPlay BRIGhtness NRf Description Sets backlight display brightness Parameter NRf Low Middle High CH4 for T3PS43203P only ...

Страница 110: ...s of the display Example DISPlay BRIGhtness Returns the brightness of the display DISPlay TYPE 1 2 3 4 5 6 7 Description Sets the display screens For details see page 29 Example DISPlay TYPE 4 Sets the display screens of TYPE4 DISPlay TYPE Description Queries the TYPE of display screens Example DISPlay TYPE Returns the TYPE of display screens ...

Страница 111: ...UTPut 1 2 3 4 OVP 113 OUTPut 1 2 3 4 OCP STATe b 113 OUTPut 1 2 3 4 OCP STATe 114 OUTPut 1 2 3 4 OCP value 114 OUTPut 1 2 3 4 OCP 114 OUTPut 1 2 3 4 STATe b Description Turns the output on or off Parameter b 0 OFF Turn off the output 1 ON Turn on the output Example OUTPut STATe ON Turns on the output of CH1 on OUTPut 1 2 3 4 STATe Description Queries the output state Example OUTPut STATe Returns t...

Страница 112: ...urns the channels output off Example ALLOUTOFF Turns the channels output off OUT Boolean Description Turns the output on or off Parameter Boolean 0 off 1 on Example OUT1 Turns on the output OUTPut 1 2 3 4 OVP STATe b Description Turns OVP protection on off Parameter b 0 OFF Turns OVP off 1 ON Turns OVP on Example OUTPut2 OVP STATe ON Turn on OVP on CH2 ...

Страница 113: ...lue CH1 0 50 35 00V CH2 0 50 35 00V CH3 0 50 5 50V T3PS43203P CH4 0 50 16 50V T3PS43203P Example OUTPut2 OVP 10 05 Sets the OVP voltage to 10 05V for CH2 OUTPut 1 2 3 4 OVP Description Queries the OVP current level Example OUTPut2 OCP Queries the OVP current level on CH2 OUTPut 1 2 3 4 OCP STATe b Description Turns OCP protection on off Parameter b 0 OFF Turns OCP off 1 ON Turns OCP on Example OUT...

Страница 114: ...f the OCP function on CH2 OUTPut 1 2 3 4 OCP value Description Sets the OCP level Parameter value CH1 0 05 3 50A CH2 0 05 3 50A CH3 0 05 1 20A T3PS43203P CH4 0 05 1 20A T3PS43203P Example OUTPut2 OVP 1 5 Sets the OVP voltage to 1 5A for CH2 OUTPut 1 2 3 4 OCP Description Queries the OCP current level Example OUTPut2 OCP Queries the OCP current level on CH2 ...

Страница 115: ...22 LOAD 1 2 CC ON OFF 122 LOAD 1 2 CR ON OFF 122 MODE 1 2 123 LOAD 1 2 RESistor NRf 123 LOAD 1 2 RESistor 123 DELAy 1 2 CYCLEs N I value 123 DELAy 1 2 CYCLEs 124 DELAy 1 2 ENDState ON OFF LAST 124 DELAy 1 2 ENDState 124 DELAy 1 2 GROUPs NRf 124 DELAy 1 2 GROUPs 125 DELAy 1 2 PARAmeter No ON OFF time 125 DELAy 1 2 PARAmeter No count 125 DELAy 1 2 STARt value 126 DELAy 1 2 STARt 126 DELA y 1 2 STATe...

Страница 116: ...ALARM BEEPER ON OFF 133 MONItor 1 2 3 4 STOPway 134 MONItor 1 2 3 4 VOLTage CONDition V V V NONE AND OR NONE 134 MONItor 1 2 3 4 VOLTage CONDition 134 MONItor 1 2 3 4 VOLTage VALue value MINimum MAXimum 135 MONItor 1 2 3 4 VOLTage VALue 135 RECOrder 1 2 3 4 PATH 135 RECOrder 1 2 3 4 MEMory 0 1 2 3 4 5 6 7 8 9 135 RECOrder 1 2 3 4 USB dest 136 RECOrder 1 2 3 4 PERIod value 136 RECOrder 1 2 3 4 PERI...

Страница 117: ...t MAXValue 145 SEQUence 1 2 TEMPlet MINValue value MINimum MAXimum 146 SEQUence 1 2 TEMPlet MINValue 146 SEQUence 1 2 TEMPlet OBJect V C 146 SEQUence 1 2 TEMPlet OBJect 147 SEQUence 1 2 TEMPlet POINTs value 147 SEQUence 1 2 TEMPlet POINTs 147 SEQUence 1 2 TEMPlet RISERate value 147 SEQUence 1 2 TEMPlet RISERate 148 SEQUence 1 2 TEMPlet SELect SINE PULSE RAMP UP DN UPDN RISE FALL 148 SEQUence 1 2 T...

Страница 118: ...V V C C C P P P AUTO value 154 TRIGger OUT CONDition D0 D1 D2 D3 D4 155 TRIGger OUT ENABle D0 D1 D2 D3 D4 ON OFF 155 TRIGger OUT ENABle D0 D1 D2 D3 D4 156 TRIGger OUT POLArity D0 D1 D2 D3 D4 POSItive NEGAtive 156 TRIGger OUT POLArity D0 D1 D2 D3 D4 156 TRIGger OUT SOURce D0 D1 D2 D3 D4 CH1 CH2 CH3 CH4 157 TRIGger OUT SOURce D0 D1 D2 D3 D4 157 SOURce 1 2 3 4 CURRent NRf Description Sets the current...

Страница 119: ...the current limit level on CH2 ISET X Description Returns the output current setting Parameter X 1 CH1 2 CH2 3 CH3 for T3PS43203P only 4 CH4 for T3PS43203P only Example ISET1 Returns the CH1 output current setting SOURce 1 2 3 4 CURRent LIMit STATe Description Queries the current limit state Returns CV if the current limit has not been reached returns CC if the current limit has been reached Examp...

Страница 120: ... Sets the voltage level Parameter X 1 CH1 2 CH2 3 CH3 for T3PS43203P only 4 CH4 for T3PS43203P only NR2 Decimal number range 0 32 000V Example VSET1 20 345 Sets the CH1 voltage to 20 345V SOURce 1 2 3 4 VOLTage Description Queries the output voltage setting Example SOURce2 VOLTage Queries the output voltage setting on CH2 VSET X Description Returns the output voltage setting Parameter X 1 CH1 2 CH...

Страница 121: ...r CH2 SOURce 1 2 RESistor Description Queries the setting resistor value Example SOURce2 RESistor Queries the setting resistor value and returns the readback value for CH2 OUTPut SERies ON OFF Description Sets CH1 CH2 as tracking series mode Example OUTPut SERies ON Sets CH1 CH2 as Tracking series mode OUTPut PARallel ON OFF Description Sets CH1 CH2 as tracking parallel mode Example OUTPut PARalle...

Страница 122: ... 2 Parallel Example TRACK0 Selects the independent mode LOAD 1 2 CV ON OFF Description Sets CH1 CH2 as Load CV mode Example LOAD2 CV ON Sets CH2 as Load CV mode LOAD 1 2 CC ON OFF Description Sets CH1 CH2 as Load CC mode Example LOAD2 CC ON Sets CH2 as Load CC mode LOAD 1 2 CR ON OFF Description Sets CH1 CH2 as Load CR mode Example LOAD2 CR ON Sets CH2 as Load CR mode ...

Страница 123: ... Example LOAD2 RESistor 100 Sets the Load CR level to 100 Ω for CH2 LOAD 1 2 RESistor Description Queries the Load CR level Parameter value 1 1000 Example LOAD2 RESistor Return the Load CR level for CH2 DELAy 1 2 CYCLEs N I value Description Sets the cycle number of Delay Parameter value 50 1000 I represents an infinite loop N represents a finite loop is set by parameter value Example DELAy2 CYCLE...

Страница 124: ...d OFF Output disabled LAST Stay at the last group of output state Example DELAy2 ENDState OFF Sets the termination state of Delay as output disabled for CH2 DELAy 1 2 ENDState Description Queries the termination state of Delay Parameter ON Output enabled OFF Output disabled LAST Stay at the last group of output state Example DELAy2 ENDState Return the termination state of Delay for CH2 DELAy 1 2 G...

Страница 125: ...he delay parameter of Delay Parameter No Integer 0 2047 Sets the serial number of delay parameter ON OFF The output state of the group time Integer 1s 300s The delay duration of the group Example DELAy2 PARAmeter 1 ON 10 Sets the delay parameter of Delay as the 1st group output ON delay 10s for CH2 DELAy 1 2 PARAmeter No count Description Queries the delay parameter of the specified groups of Dela...

Страница 126: ...up is 2 output state is OFF delay time is 3S the 2nd group is 3 output state is ON delay time is 1S DELAy 1 2 STARt value Description Sets the sequence number for initial execution Parameter NRf 0 2047 Example DELAy2 STARt Sets the CH2 sequence output to start from the group 10 DELAy 1 2 STARt Description Queries the sequence number for initial execution of the channel delay output Example DELAy 2...

Страница 127: ... generated state Parameter 01P 10P 10P the automatically generated state will repeat by the sequence of Off and the On The automatically generated state will repeat by the sequence of On and the Off Example DELAy2 STATe GENE 01P The automatically generated state will repeat by the sequence of Off and the On for CH2 DELAy 1 2 STATe GENErate Description Queries the currently used pattern of the auto...

Страница 128: ... power power value It is used to set voltage current or power value of stop condition which range from 0 to the maximum voltage current power value of the active channel Example DELAy2 STOP V 8 Sets the stop condition of delay as 8V for CH2 Note Sets stop condition type as NONE DELA y 1 2 STOP Description Queries the stop condition of the current delay Example DELAy2 STOP Queries the current stop ...

Страница 129: ...us increase or DEC monotonous decrease is set Starting from the base time it gradually increases or decreases by steps and further generates duration Base time value0 and step value value1 are available for setting the mechanical relation of both of which is base time output group number step value 300s The available range of setting value for value0 is from 1s to 300s output group number step val...

Страница 130: ...ally generated time value0 value1 MONItor 1 2 3 4 CURRent CONDition C C C NONE AND OR NONE Description Sets the current monitor condition for monitor current channel Parameter C C NONE Sets the current monitor condition as C current C current C current or NONE current not monitored AND OR NONE Practical monitor condition is the logical composition of voltage current and power AND and OR or NONE no...

Страница 131: ...alue MINimum M AXimum Description Queries the current monitor value for monitor active channel Parameter value The range available is from 0 to the maximum current value of active channel Example MONItor2 CURRent 2 Sets CH2current monitor value for monitor as 2A MONItor 1 2 3 4 CURRent VALue Description Queries the current monitor value for current monitor active channel Example MONItor2 CURRent Q...

Страница 132: ...ower monitor condition of monitor as power MONItor 1 2 3 4 POWER CONDition Description Queries the power monitor condition of current monitor Example MONItor2 POWER COND Queries the CH2power monitor condition of current monitor MONItor 1 2 3 4 POWER VALue value MINimum MA Ximum Description Sets the power monitor value for monitor active channel Parameter value Ranges from 0 to the maximum power va...

Страница 133: ... Enable monitor for CH2 MONItor 1 2 3 4 STATe Description Queries whether the current monitor is On or Off active channel Example MONItor2 Queries whether the current monitor is On or Off of CH2 Returns to ON or OFF MONItor 1 2 3 4 STOPway OUTOFF ALARM BEEPER ON OFF Description Sets the stop method of monitor active channel Parameter OUTOFF ALARM BEEPER Disable output by set stop method OUTOFF war...

Страница 134: ...arameter V V NONE Sets voltage monitor condition as V voltage V voltage V voltage or NONE none monitored voltage AND OR NONE Practical monitor condition is the logical composition of voltage current and power AND and OR or NONE none logical pattern Example MONItor2 VOLTage CONDition V AND Sets the CH2 voltage monitor condition of monitor active channel as voltage and MONItor 1 2 3 4 VOLTage CONDit...

Страница 135: ...eries the voltage monitor value of monitor active channel Example MONItor2 VOLTage Queries the CH2voltage monitor value for the current monitor RECOrder 1 2 3 4 PATH Description Queries the save location of recorded file Example RECOrder2 PATH Queries the save location of recorded file for CH2 RECOrder 1 2 3 4 MEMory 0 1 2 3 4 5 6 7 8 9 Description Save the recorded file with specified name to the...

Страница 136: ...mitted Example RECOrder2 USB R001 CSV Save the CH2 recorded file with specified name R001 CSV to the enternal storage To set record period and saving location is Not permitted when recorder is enabled Therefore preset saving location is required prior to enabling recorder Instrument will automatically save recorded file with specified name to the specified saving location when recorder is disabled...

Страница 137: ...ill sample and save output of each channel based on the interval of currently set recorded period Make sure output of each channel is enabled during recording process For those disabled output channels the corresponding record data turn to 0 overall When recorder is disabled recording process terminates and instrument will automatically save recorded file to the currently set saving location Examp...

Страница 138: ... Example RECOrder2 Returns the group number of CH2 recorder RECOrder 1 2 3 4 ENABle ON OFF Description Sets the channel recorder ON or OFF Example RECOrder2 ENABle ON Enables CH2 recorder RECOrder 1 2 3 4 ENABle Description Queries the state of channel recorder Example RECOrder2 ENABle Returns the state of CH2 recorder ON or OFF SEQUence 1 2 CYCLEs N I value Description Sets the cycle number of se...

Страница 139: ...Sets terminate state of sequence Parameter OFF Output disabled OFF instrument automatically disable output when output is complete LAST The last group LAST instrument stays at the output state of the last group when output is complete Example SEQUence2 ENDState LAST Sets the terminate state of sequence as the last group SEQUence 1 2 ENDState Description Queries the terminate state of the sequence ...

Страница 140: ...s of all group numbers Example SEQUence2 GROUPs 25 Sets the CH2 output group number of sequence as 25 SEQUence 1 2 GROUPs Description Queries the output group number of the sequence Example SEQUence2 GROUPs Queries the CH2 output group number of the sequence Returns to an integer between 1 to 2048 SEQUence 1 2 PARAmeter No volt curr time Description Sets the parameter of the specified group Parame...

Страница 141: ...00000037 the later 9 digits 000000037 following the initial 9 indicate length of data flow 37 bytes The format of sequence parameter of each group is serial number voltage current timer time and parameter of each group is divided by semicolon For example 1 8 000 1 0000 10 2 6 000 1 0000 10 represents sequence parameters for 2 groups the serial number of sequence parameter for 1st group is 1with vo...

Страница 142: ...uence output Example SEQUence2 STARt Returns the initial sequence number of CH2 sequence output SEQUence 1 2 STATe ON OFF Description Enable or disable sequence function Enabling the sequence will change state of channel output make sure the changed output state will Not impact the device connected with power before enabling Sequence output is activated only when both sequence and channel output a...

Страница 143: ...ent builds based on the actively selected templet and set the sequence parameter SEQUence 1 2 TEMPlet FALLRate value Description Sets the falling degree of ExpFall Parameter value Integer from 0 to 10 Example SEQUence2 TEMPlet FALLR 5 Sets the CH2 falling degree of ExpFall as 5 SEQUence 1 2 TEMPlet FALLRate Description Queries the falling degree of the active ExpFall Example SEQUence2 TEMPlet FALL...

Страница 144: ... 1 2 TEMPlet INTErval Description Queries the active time interval Example SEQUence2 TEMPlet INTErval Queries the CH2 active time interval Returns to an integer between 1 to 300 SEQUence 1 2 TEMPlet INVErt ON OFF Description Enable or disable invert function of the active selected templet Parameter When enabling the invert function invert the target waveform in instrument first and build timer par...

Страница 145: ...selected templet Parameter When voltage is the object to edit it is the maximum voltage to be set When current is the object to edit it is the maximum current to be set When templet type is Pulse the command is to set high level value Example SEQUence2 TEMPlet MAXValue 5 Sets the CH2 maximum voltage of the active selected templet as 5V SEQUence 1 2 TEMPlet MAXValue Description Queries the maximum ...

Страница 146: ...alue Example SEQUence2 TEMPlet MINValue 0 5 Sets the CH2 minimum voltage of the active selected templet as 0 5V SEQUence 1 2 TEMPlet MINValue Description Queries the minimum voltage or current value of the active selected templet Example SEQUence2 TEMPlet MINValue Returns to the CH2 minimum voltage or current value of the active selected templet SEQUence 1 2 TEMPlet OBJect V C Description Selects ...

Страница 147: ...ed by the actively selected templet which Pulse type does Not support Parameter value The overall points range from 10 to 2048 Example SEQUence2 TEMPlet POINTs 10 Sets the CH2 overall points as 10 SEQUence 1 2 TEMPlet POINTs Description Queries the actively set overall points Example SEQUence2 TEMPlet POINTs Returns the CH2 actively set overall points SEQUence 1 2 TEMPlet RISERate value Descriptio...

Страница 148: ...RISE FALL Description Selects templet type Example SEQUence2 TEMPlet SELect SINE Sets the selected templet type as SINE for CH2 SEQUence 1 2 TEMPlet SELect Description Queries the actively selected templet type Example SEQUence2 TEMPlet SELect Returns the actively selected templet type for CH2 SEQUence 1 2 TEMPlet SYMMetry value Description Sets the symmetry of RAMP Parameter value Ranges from 0 t...

Страница 149: ... is from 1s to period 1s is relevant to the actively set period Example SEQUence2 TEMPlet WIDTh 5 Sets the pulse width of Pulse as 5s for CH2 SEQUence 1 2 TEMPlet WIDTh Description Queries the pulse width of the actively set Pulse Example SEQUence2 TEMPlet WIDTh Returns the pulse width of the actively set Pulse for CH2 TRIGger IN ENABle D0 D1 D2 D3 D4 ON OFF Description Enables or disables the tri...

Страница 150: ...ets the trigger condition enable the channel output of the actively selected controlled channel Disable output OFF when the input signal of the specified data line meets the trigger condition disable the channel output of the actively selected controlled channel Output Invert mode TOGGLE when input signal of the specified cable line meets the set triggering condition invert the currently selected ...

Страница 151: ...dual power mode Output Series mode SER when input signal of the specified cable line meets the set triggering condition set CH1 CH2 in the series power mode Output Parallel mode PER when input signal of the specified cable line meets the set triggering condition set CH1 CH2 in the parallel power mode Example TRIGger IN RESPonse D0 ON Sets the output response from the trigger input of the D0 data l...

Страница 152: ... Example TRIGger IN SENSitivity D0 LOW Sets the trigger sensitivity from the trigger input of D0 data line as LOW TRIGger IN SENSitivity D0 D1 D2 D3 D4 Description Queries the trigger sensitivity from the trigger input of the specified data line Example TRIGger IN SENSitivity D0 Returns the trigger sensitivity from the trigger input of D0 data line TRIGger IN SOURce D0 D1 D2 D3 D4 CH1 CH2 CH3 CH4 ...

Страница 153: ... Sets the trigger type from the trigger input of the specified data line Parameter RISE FALL HIGH LOW STATE Trigger from the following options of signal input rising edge RISE falling edge FALL high level HIGH low level LOW or STATE For the signal input high level 2 5V 3 3V low level 0V 0 8V noise tolerance 0 4V Example TRIGger IN TYPE D0 RISE Sets the trigger type from the trigger input of D0 dat...

Страница 154: ... V equal to voltage V all of which indicate that when the output voltage of the specified controlled channel meets the set trigger condition it will trigger then Current trigger greater than current C less than current C equal to current C all of which indicate that when the output current of the specified controlled channel meets the set trigger condition it will trigger then Power trigger greate...

Страница 155: ...ut of the specified data line Example TRIGger OUT CONDition D0 Returns the trigger condition from the trigger output of D0 data line TRIGger OUT ENABle D0 D1 D2 D3 D4 ON OFF Description Enables or disables the trigger output function of the specified data line Parameter After enabling trigger output function the specified data line will when the output signal of the specified controlled channel me...

Страница 156: ...sitive polarity POSItive when trigger condition is met it will output the actively specified output signal NEGAtiv Negative polarity NEGAtive when trigger condition is met it will invert and then output the actively specified output signal Example TRIGger OUT POLArity D0 POSItive Sets the polarity of the output signal from the trigger input of D0 data line as POSItive TRIGger OUT POLArity D0 D1 D2...

Страница 157: ...3 CH4 is available for selection as controlled channel of trigger output Example TRIGger OUT SOURce D0 CH1 Sets the controlled channel from the trigger output of D0 data line as CH1 TRIGger OUT SOURce D0 D1 D2 D3 D4 Description Queries the controlled channel channel from the trigger output of the specified data line Example TRIGger OUT SOURce D0 Returns the controlled channel from the trigger outp...

Страница 158: ...61 STATus QUEStionable CONDition 161 STATus QUEStionable ENABle NRf 162 STATus QUEStionable ENABle 162 STATus QUEue NEXT 162 STATus QUEue ENABle list 162 STATus QUEue ENABle 163 STATus QUEue DISable list 163 STATus QUEue DISable 164 STATus QUEue CLEar 164 STATUS Description Returns the Status 8 bits in the following format Return Parameter 8 bits in the following format Bit Item Description 0 CH1 ...

Страница 159: ...us OPERation EVENt Description Read the operation event register Example STATus OPERation Reads the operation event register STATus OPERation CONDition Description Read the operation condition status register Example STATus OPERation CONDition Read the contents of the operation condition status register STATus OPERation ENABle NRf Description Programs the operation enable status register Parameter...

Страница 160: ...ster Example STATus MEASurement Reads the contents of the measurement event status register STATus MEASurement ENABle NRf Description Program the measurement enable status register Parameter NRf 8 ROF reading overflow enable bit 16 PTT pulse trigger timeout enable bit 32 RAV Reading available enable bit 512 Buffer full enable bit The register is 16 bits If value is between 512 and 1 023 it is cert...

Страница 161: ...t condition status register Example STATus MEASurement CONDition Read the contents of the measurement condition status register STATus QUEStionable EVENt Description Read the questionable event status register Example STATus QUEStionable Read the questionable event status register STATus QUEStionable CONDition Description Read the questionable condition status register Example STATus QUEStionable ...

Страница 162: ...ABle 256 Sets the CAL bit STATus QUEStionable ENABle Description Read the questionable enable status register Example STATus QUEStionable ENABle Read the contents of the questionable enable status register STATus QUEue NEXT Description Read the next message in the error queue Example STATus QUEue Read the next error message STATus QUEue ENABle list Description Specifies which error and status mess...

Страница 163: ...e STATus QUEue ENABle Returns the contents of the enabled error and status messages STATus QUEue DISable list Description Specifies which messages will not be placed in the error queue Parameter list 440 900 Full range error messages 110 Single error message 110 222 A specific range of error messages 110 222 220 A specific range of error messages and a single error message separated by a comma Exa...

Страница 164: ...Sable Description Reads the disabled messages Example STATus QUEue DISable Returns the disabled messages STATus QUEue CLEar Description Empty all the messages from the error queue Example STATus QUEue CLEar Empty all the messages from the error queue ...

Страница 165: ...YSTem COMMunicate LAN SMASk 169 SYSTem COMMunicate LAN GATEway IPaddress 169 SYSTem COMMunicate LAN GATEway 170 SYSTem COMMunicate LAN MANualip STATe b 170 SYSTem COMMunicate LAN MANualip STATe 170 SYSTem COMMunicate LAN APPLy 170 SYSTem REMote 171 REMote 171 SYSTem BEEPer STATe b 171 BEEP Boolean 171 SYSTem BEEPer STATe 172 SYSTem LOCal 172 LOCal 172 SYSTem INTerface USB RS232 GPIB LAN 172 SYSTem...

Страница 166: ...hecks the error status and returns the last error message Example SYSTem ERRor Read and clear the last error and from the error queue Message contents Descriptions a program mnemonic too long The command length must be 15 characters or less b Invalid character Invalid characters such as symbols are entered Example VOUT c Missing parameter The parameter is missing from the command Example VEST shou...

Страница 167: ... Example SYSTem POSetup RST Clears the error queue SYSTem POSetup name Description Set the power on configuration Parameter name RST Machine default settings Last Machine last settings Example SYSTem POSetup RST Set the power on configuration to RST SYSTem POSetup Description Query the power on configuration Example SYSTem POSetup Query the power on configuration SYSTem COMMunicate LAN DHCP STATe ...

Страница 168: ...IPADdress IPaddress Description Sets the IP address Parameter IP address ASCII string within the range of 1 0 0 0 to 223 255 255 255 excluding 127 nnn nnn nnn Note This command is only applicable for the manual IP mode The SYSTem COMMunicate LAN APPLy command needs to be executed before the IP address settings can take effect Example SYSTem COMMunicate LAN IPADdress Sets the IP address to 172 131 ...

Страница 169: ...mask to 255 255 255 0 SYSTem COMMunicate LAN SMASk Description Query the subnet mask Example SYSTem COMMunicate LAN SMASk Query the subnet mask SYSTem COMMunicate LAN GATEway IPaddress Description Sets the gateway IP address Parameter IP address ASCII string within the range of 1 0 0 0 to 223 255 255 255 excluding 127 nnn nnn nnn Note The SYSTem COMMunicate LAN APPLy command needs to be executed b...

Страница 170: ... COMMunicate LAN APPLy command needs to be executed before the subnet mask setting can take effect Example SYSTem COMMunicate LAN MANualip ON Enables a manual IP address to be set SYSTem COMMunicate LAN MANualip STATe Description Queries whether manual IP addressing has been enabled or disabled Example SYSTem COMMunicate LAN MANualip Queries the status of the manual IP addressing SYSTem COMMunicat...

Страница 171: ...e unit to remote control Example REMote Sets to remote control mode SYSTem BEEPer STATe b Description Turn the buzzer on or off Parameter b 0 OFF Turn the buzzer off 1 ON Turn the buzzer on Example SYSTem BEEPer STATe OFF Turns the buzzer off BEEP Boolean Description Turn the buzzer on or off Parameter Boolean 0 OFF 1 ON Example BEEP1 Turns on the beep ...

Страница 172: ...ample SYSTem LOCal Disables remote control mode LOCal Description Exits remote mode and sets the instrument to local mode Example LOCal SYSTem INTerface USB RS232 GPIB LAN Description Sets the interface type Example SYSTem INTerface USB Sets the interface type to USB SYSTem LANGuage CHINese ENGlish Description Sets the syetem lanuage Example SYSTem LANGuage ENGlish Sets the syetem lanuage to Engli...

Страница 173: ... to 9600 SYSTem BAUDrate USB Description Query the USB baud rate Example SYSTem BAUDrate USB SYSTem BAUDrate RS232 9600 19200 38400 57600 115200 Description Sets the RS232 baud rate Example SYSTem BAUDrate RS232 9600 Sets the RS232 baud rate to 9600 SYSTem BAUDrate RS232 Description Query the RS232 baud rate Example SYSTem BAUDrate RS232 BAUD NR1 Description Sets the baud rate to 9600 57600 115200...

Страница 174: ... actual output current VOUT x Returns actual output voltage TRACK NR1 Sets the output of the power supply working on independent or tracking mode BAUD NR1 Set the value of baud rate RCL NR1 Recall the setting data from the memory which previous saved SAV NR1 Saves the setting data to memory BEEP Boolean Sets the BEEP state on or off OUT Boolean Sets the output state on or off LOCAL Return to local...

Страница 175: ...ns four fields each separated by a comma The first field is the manufacturer followed by the model name serial number and the version number Example IDN Returns the T3PSX3200P series identification TELEDYNE T3PS33203P XXXXXXXXX V1 00 TELEDYNE Manufacturer T3PS33203P Model name XXXXXXXXX Serial number V1 00 version number RST Description Resets the unit to RST default conditions Example RST Resets ...

Страница 176: ...rent setup to the selected save location Parameter NR1 0 9 Corresponding to STATE00 STATE09 Example SAV 1 Stores the setting in memory 1 STATE01 RCL NRf Description Recall the selected save setting from memory Parameter NRf 0 9 Corresponding to STATE00 STATE09 Example RCL 2 Recalls the setting stored in memory 2 STATE02 RCL NR1 Description Save the current setup to the selected save location Param...

Страница 177: ...REMOTE CONTROL 177 Example SAV 1 Recalls the setting stored in memory 2 STATE02 ...

Страница 178: ...ers The Status system records various instrument conditions into three main register groups The status byte register the standard event register group and the questionable data register group The status byte register records a high level summary of the other register groups The following diagram is the SCPI Status System diagram ...

Страница 179: ...REMOTE CONTROL 179 Note URQ indicates that the Lock key on the panel has been used Entering lock from unlock or Entering unlock from lock ...

Страница 180: ...corresponding event register can be latched set The enable register can be read and written to Any queries for the enable register will not clear the value in the register The CLS command will not clear the enable register but will clear the events in the event register To allow the individual bits in the event registers to be set the corresponding bits in the enable registers must be set where ea...

Страница 181: ... For enabled events 6 Master Summary bit 64 Indicates that a summary bit is set in the status byte register for enabled summary bits 7 Unused 128 Not used returns 0 The status byte condition register is cleared when one of the following occurs CLS command is used to clear the status byte register You read the event register from another register group only clear the corresponding bit in the condit...

Страница 182: ... However if too many commands queries are executed prior to the execution of the OPC command the output buffer could become saturated and the unit will stop taking readings Standard Event Register The Standard Event Register reports the following types or events Power on has been detected command syntax errors command execution errors self test and execution errors query errors or if the OPC comma...

Страница 183: ...efore a new command was given or the input output buffers are full 3 Device Error 8 A self test calibration or other device specific error 4 Execution Error 16 An execution error 5 Command Error 32 A command syntax error 6 Not used 64 Not used return 0 7 Power on 128 This bit is set if the power supply has been reset from the last time you read the event register The following will clear the stand...

Страница 184: ...le SRE 7 Returns the SRER setting 0000 0111 SRE Description Queries the status byte enable register This command returns a binary weighted decimal number that indicates which bits are set in the status byte register The range is from 0 255 Example SRE Returns 7 which are the contents of the service request enable register STB Description Query the status byte register This is the same as performin...

Страница 185: ...REMOTE CONTROL 185 Example STB Returns 81 if the status byte register is set to 0101 0001 ...

Страница 186: ... Sets the ESER as 0100 0001 ESE Description Queries the standard event enable register It returns a binary weighted decimal value representing all the enabled bits in the standard event register Example ESE Returns 65 as the ESER is set as 0100 0001 ESR Description Queries the standard event register It returns a binary weighted decimal value in the range of 0 255 Example ESR It returns 198 as the...

Страница 187: ...d event registers Operation event registers Measurement event registers Questionable event registers OPC Description After all the pending operations are complete sets the operation complete bit in the standard event status register Example OPC OPC Description Will return 1 to the output queue when all pending operations have been completed Example OPC After the last command is executed will retur...

Страница 188: ...low Unless the error queue is cleared no more errors can be written to the error queue If there are no errors in the error queue the instrument will return No error To clear the error queue you can use the SYSTem CLEar command or cycle the power When you read a message from the error queue that message will be cleared from the error queue Using the RST command to reset the instrument does not clea...

Страница 189: ...memory lost 260 Configuration memory lost 241 Expression error 230 Hardware missing 225 Data corrupt or stale 224 Out of memory 223 Illegal parameter value 222 Too much data 221 Parameter data out of range 220 Settings conflict 200 Parameter error 178 Execution error 171 Expression data not allowed 170 Invalid expression 161 Expression error 160 Invalid block data 158 Block data error 154 String dat...

Страница 190: ...umber 120 Numeric data error 114 Header suffix out of range 113 Undefined header 112 Program mnemonic too long 111 Header separator error 110 Command header error 109 Missing parameter 108 Parameter not allowed 105 GET not allowed 104 Data type error 103 Invalid separator 102 Syntax error 101 Invalid character 100 Command error 000 No error 101 Operation complete 301 Reading overflow 302 Pulse trigge...

Страница 191: ...ate of calibration not set 440 Gain aperture correction error 500 Calibration data invalid 510 Reading buffer data lost 511 GPIB address lost 512 Power on state lost 514 DC Calibration data lost 515 Calibration dates lost 522 GPIB communication data lost 610 Questionable calibration 900 Internal system error ...

Страница 192: ...es User Manual 192 APPENDIX Replacing the Fuse Steps 1 Remove the power cord and then take out the box using a small screw driver 2 The fuse is stored in the housing Rating T3 15A 250V 220V 230V T6 30A 250V 100V 120V ...

Страница 193: ... for T3PS43203P CH4 0 15 000V 0 1 0000A for T3PS43203P Voltage Line regulation 0 01 3mV Load regulation 0 01 3mV rating current 3A 0 02 5mV rating current 3A Ripple noise 5Hz 1MHz 0 35mVrms 0 5mVrms T3PS13206 1mVrms T3PS43203P CH3 CH4 Transient recovery time 50µs T3PS13206 100µs 50 load change minimum load 0 5A Temperature coefficient 300ppm C Current Line Regulation 0 2 3mA Load Regulation 0 2 3m...

Страница 194: ...ramming 5 digits readback 6 digits Setting accuracy Voltage 0 03 of reading 10mV Current 0 3 of reading 10mA Readback accuracy Voltage 0 03 of reading 10mV Current 0 3 of reading 10mA Bindpost Output voltage Output current 1 8V 2 5V 3 3V 5 0V 5 5A CH3 T3PS33203P Line regulation 3mV Load regulation 5mV Ripple noise 2mVrms 5Hz 1MHz Transient recovery time 100µs 50 load change minimum load 0 5A USB P...

Страница 195: ...ution 1Ω Other Mode OVP Power mode OFF ON 0 5V 35 0V CH1 CH2 OFF ON 0 5V 5 5V T3PS43203P CH3 OFF ON 0 5V 16 5V T3PS43203P CH4 Fixed 5 5V T3PS33203P CH3 Load mode OFF ON 1 5V 35 0V CH1 CH2 Setting accuray 100mV Resolution 100mV OCP Power Load mode OFF ON 0 05A 7 00A T3PS13206 OFF ON 0 05A 3 50A CH1 CH2 OFF ON 0 05A 1 20A T3PS43203P CH3 CH4 3 1A USB port T3PS33203P CH3 Setting accuracy 20mA Resoluti...

Страница 196: ...T3PSX3200P Series User Manual 196 Between chassis and DC power cord 30MΩ or above DC 500V ...

Страница 197: ... 0 0 0 1 2 3 4 5 6 7 8 8 9 3 3 3 45 6 990 0 0 9 0 0 0 9 0 0 0 0 9 7 7 88 8 1 931711 RevB ...

Отзывы: