The Display
In Detail
3Ć22
ĂĂStep 2:ă
Press the menu button next to the bottom menu item
RO
OFF
. The menu disappears and the screen displays only the
signal.
ĂĂStep 3:ă
If you wish to turn the readouts back on again, repeat the
above procedure. The next time you access the display menu, the
RO OFF
item appears boxed, indicating that it is selected and that
readouts have therefore been turned off. Press the button again to
deselect the menu item. The menu disappears and readouts
again appear.
Inverting the Display
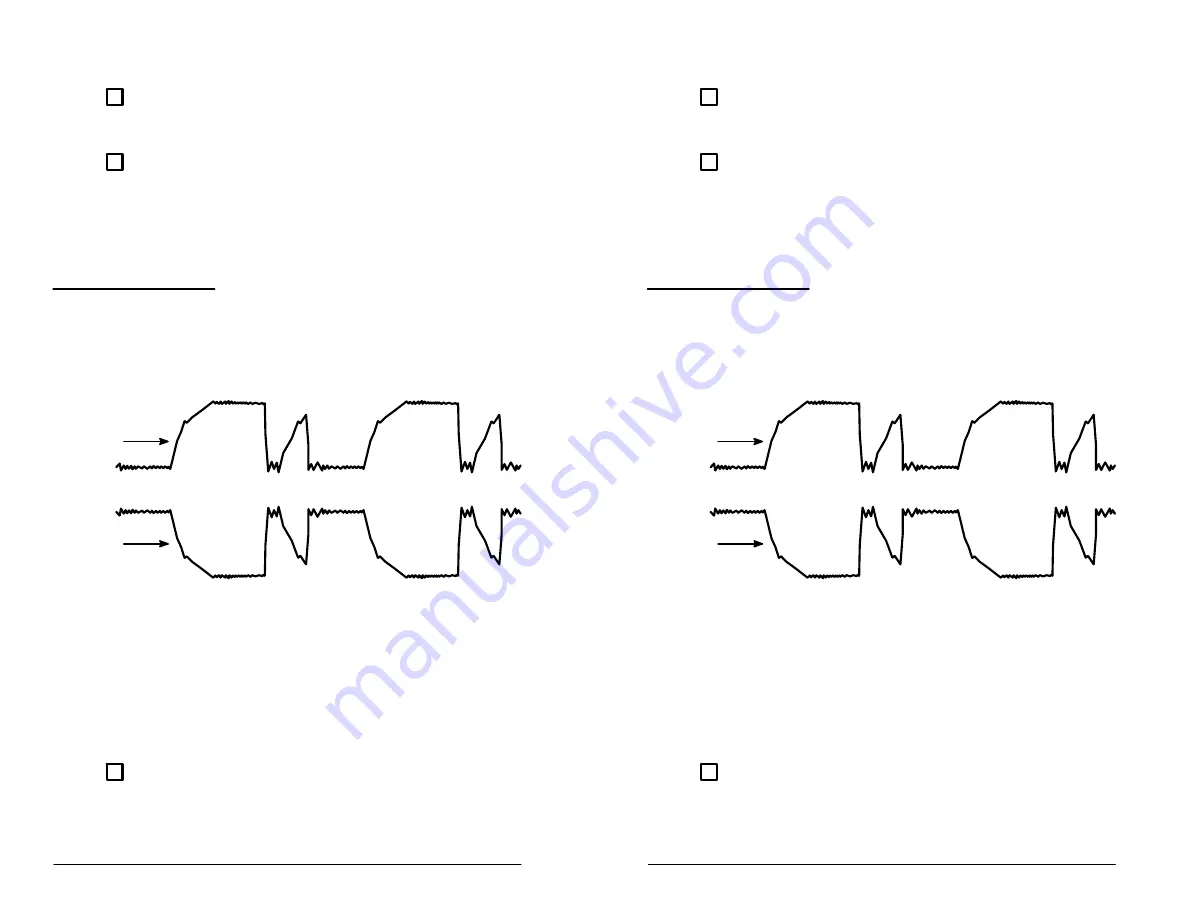
You can invert the waveforms displayed for either channel. Figure 3Ć9
shows an example of a normal and an inverted waveform.
Normal
Waveform
Inverted
Waveform
Figure 3Ć9:ăNormal and Inverted Waveforms
Some signal processing circuits, such as circuits that process composĆ
ite video signals, automatically invert waveforms. While working on
these circuits you may want to invert these signals to view them
normally.
To invert a signal, follow these steps.
ĂĂStep 1:ă
Press the
DISPL
button on the top panel to invoke the
display menu. See Figure 3Ć8.
Содержание 222PS
Страница 6: ......
Страница 14: ...Contents viii Glossary Index Glossary GĆ1 Index IĆ1 Contents viii Glossary Index Glossary GĆ1 Index IĆ1 ...
Страница 18: ...Contents xii Contents xii ...
Страница 21: ...Overview Overview ...
Страница 22: ......
Страница 27: ...At a Glance At a Glance ...
Страница 28: ......
Страница 45: ...In Detail In Detail ...
Страница 46: ......
Страница 50: ...Acquisition Modes In Detail 3Ć4 Acquisition Modes In Detail 3Ć4 ...
Страница 54: ...Auto Setup In Detail 3Ć8 Auto Setup In Detail 3Ć8 ...
Страница 60: ...Calibration In Detail 3Ć14 Calibration In Detail 3Ć14 ...
Страница 66: ...Channels In Detail 3Ć20 Channels In Detail 3Ć20 ...
Страница 70: ...The Display In Detail 3Ć24 The Display In Detail 3Ć24 ...
Страница 76: ...Horizontal Operation In Detail 3Ć30 Horizontal Operation In Detail 3Ć30 ...
Страница 96: ...Probes In Detail 3Ć50 Probes In Detail 3Ć50 ...
Страница 106: ...Saving and Recalling Data In Detail 3Ć60 Saving and Recalling Data In Detail 3Ć60 ...
Страница 108: ...Store Mode In Detail 3Ć62 Store Mode In Detail 3Ć62 ...
Страница 124: ...Vertical Operation In Detail 3Ć78 Vertical Operation In Detail 3Ć78 ...
Страница 127: ...Appendices Appendices ...
Страница 128: ......
Страница 164: ...Appendix B Remote Communication Appendices AĆ36 Appendix B Remote Communication Appendices AĆ36 ...
Страница 170: ...Appendix C Quick Checks Appendices AĆ42 Appendix C Quick Checks Appendices AĆ42 ...
Страница 210: ...Appendix F Accessories Appendices AĆ82 Appendix F Accessories Appendices AĆ82 ...
Страница 211: ...Glossary Index Glossary Index ...
Страница 212: ......
Страница 230: ...Index Index IĆ10 Index Index IĆ10 ...
Страница 231: ......
Страница 232: ......


