Section XI, Continued
Section XI, page 2
Step III - Buss out Recording
Setting up busses to be available
The TM-D1000 uses the same signal paths for both auxiliary sends and busses. Since the default
setting of the board is with 4 auxiliaries, and we want to record using busses, we need to make some
busses available. For detailed explanation of your options, read Section V - Buss+Aux=4. But for now,
to save you the page flipping and prevent information overload in this session, we’ve given you
instructions on basic switching between aux and busses.
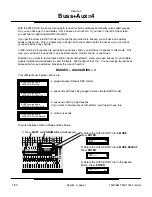
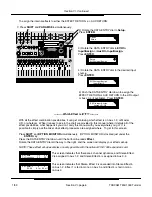
- Press SHIFT and PARAM SEL together. The top line of the screen should read “Option”. If it does not,
press ESCAPE until it does.
- Rotate the DATA ENTRY dial to the left until the bottom line of the screen reads “MODE”. Press ENTER.
- Rotate the DATA ENTRY dial to the left until the bottom line of the screen reads “MODE select”. Press
ENTER.
- Rotate the DATA ENTRY dial to the left until the bottom line of the screen reads “REC”. Press ENTER.
You have just entered... Record mode.
(Cue “Twilight Zone” music.)
Record Mode and Mix Mode are a
simple way of keeping track of whether your four BUSS/AUX paths are all busses (Record Mode) or all
Auxiliaries (Mix Mode.) There are other options available. Again, they are explained in Section V -
Buss+Aux=4.
Setting up input signal
Just to make things easy, we can use the same input we used in Step II - Direct Out Recording. Or, if
you want to plug another source in, then go for it! Just remember to set the signal up just as we did in
“Step II - Direct Out Recording” under “Setting up and input signal”.
Routing signal to the recorder
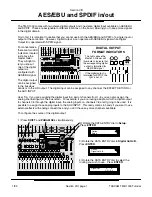
- Press CH SEL above your input channel, and disengage it’s L-R routing by pressing the lit L-R button.
Again, the L-R button will turn off when you do this, and you will no longer be able to hear the signal
directly. Of course, if the light is already out, then you can leave it alone.
- Press the 3-4 button, just to the left of the L-R button. The 3-4 button should now light up. This
indicates that we have routed signal to busses 3 and 4.
- Raise the 3-4 buss level to “0”. (They’re the right two black faders in the bottom right of the mixer.)
- Arm track 3 and 4 of your multitrack.
- Start playing signal into the mixer. You will notice the signal feeds both tracks. If you rotate the pan
control to the left, the signal will only show up to track 3. Rotating the pan to the right moves the signal
to track 4. Basically, groups 3 and 4 are a stereo pair, and the pan control moves the signal between
them. This is especially useful for live submixing or bouncing tracks. (i.e. recording 4 drum mics, a bass
and rhythm guitar down to a stereo pair of tracks.)
- Rotate the pan to the far right. We’ll record this signal on track 4 only. You can disengage track 3 if
you like... we don’t need that. We just used it to demonstrate panning in busses.
- Set the Trim of channel 4 so the meter is approaching the maximum level at it’s loudest point, but not
exceeding the max level.
Setting monitor level and recording
- Raise the fader on channel 12 to hear the tape return of track 4. You should be able to hear your
signal again now.
- Press Record and Play on your multitrack, and record your track. Press Stop when you’re done.
- Disarm track 4 on the multitrack recorder. Signal from your input channel of the TM-D1000 will no
longer be heard.
- Rewind the tape to the beginning, and listen to your new masterpiece.
You just bussed a signal! Feeling like a pro yet? Well, let’s take this a step further: ADDING EQ!!!
TASCAM TM-D1000 Tutorial
1/99

