8
TASCAM DR-44WL
2 – Names and functions of parts
g
INPUT LEVEL button
Press this button to show the
INPUT
LEVEL
setting
screen on the display as a pull-down menu.
When the
INPUT
LEVEL
setting screen is shown, press
this button to close the pull-down menu.
h
INPUT LEVEL volume
When the
INPUT
LEVEL
setting screen is shown, use
this to adjust the input level.
j
USB port
Use the supplied USB cable to connect the DR-44WL with a
computer. (See “11 – Connecting with a computer” on page
50.)
Power can be supplied through the USB cable included
within this unit package or the dedicated AC adapter
(GPE053B) supplied with this unit.
CAUTION
Connect the DR-44WL directly be connected directly with
the computer, not through a USB hub.
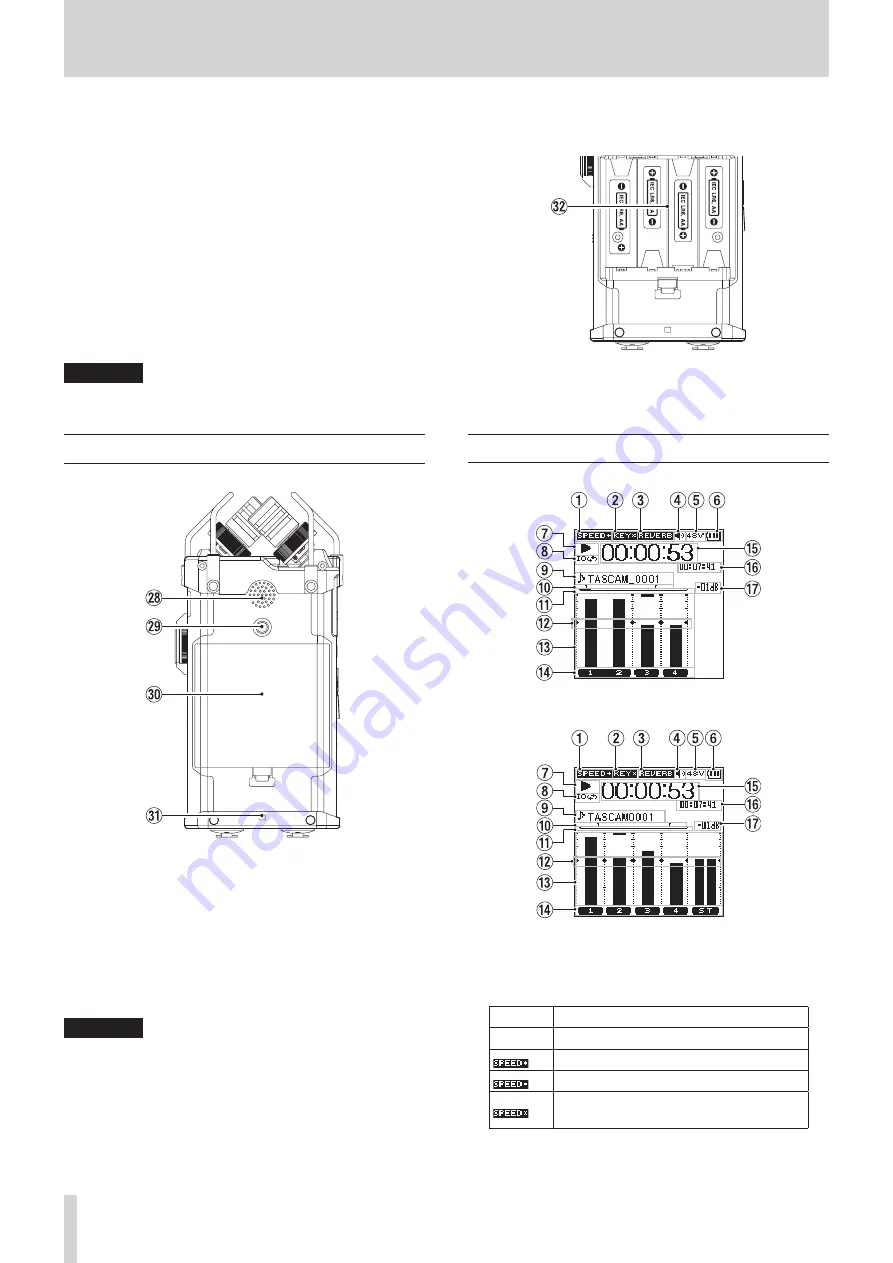
Bottom panel
k
Built-in mono speaker
Use this built-in speaker to listen to recordings.
No sound will play when:
o
In recording standby
o
Headphone is connected
o
In recording mode
o
Speaker output setting is turned off
l
Tripod attachment screw-hole (1/4 inch)
A tripod can be attached to the DR-44WL.
CAUTION
•
Ensure the tripod or microphone stand screws are securely
fastened to prevent the unit from falling off.
•
When attaching this unit to a tripod or microphone stand,
ensure to place it on a level surface.
•
Some tripods have different screw specifications that make
direct connection impossible. Use a commercially-available
adapter with such tripods.
;
Battery compartment cover
z
Strap holder
A strap can be attached to this holder.
x
Battery compartment
Insert four AA batteries into the compartment to power the
unit. (See “Using AA size batteries” on page 12.)
Home Screen
Home Screen in the 4 CH mode
Home Screen in the MTR mode
1
Playback speed status display
One of the following icons appears according to the
playback speed setting.
Icon
Playback speed
Blank
Playback speed not changed
×1.1 – ×2.0
×0.5 – ×0.9
When the playback speed cannot be
changed
2
Display of the key control function on/off status
This icon shows whether the key control function is on or off.


