FAAST 7100X
INSTALLATION AND MAINTENANCE INSTRUCTIONS
© Pertronic Industries Ltd
7
FAAST XS (7100X) Installation Guide Iss 1.0, 201606
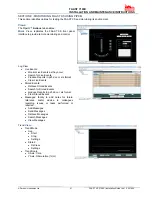
Main Menu Screen:
Use the scroll ( ) keys to Increment or Decrement the
number the cursor is on. To register the number, use the
Select ( ) key and the cursor will advance to the next digit.
After the last digit has been entered the Functions menu
appears if the password is entered correctly - the default LCD
Password is 1111. If the password does not match, the display
shows Password Invalid for 3 seconds and then returns to the
home screen.
1. Active Faults:
Only the highest priority fault is shown on the home screen,
but it is possible for a device to have more than one fault.
These faults can be seen with the Active Faults screen. The
screen displays all active faults from highest to lowest priority.
The priority fault level is as follows:
Disable, Isolate, Configuration, Sensor, Aspirator, Low
Voltage, High Flow, Low Flow, Filter, External Monitor, Time.
2. AirFlow:
The Airflow screen shows the level of airflow change from the
baseline as a bargraph and a percentage
Figure 12: AirFlow Screen
3. Functions:
The Functions menu screen is used to change the device’s
state or activate Test mode. Because this menu allows the
user to change the device out of its normal operating state
there is an optional lockout feature for this menu. The
lockout requires a 4-digit passcode to enter the functions
menu – this passcode is set using the PipeIQ software.
When the Functions menu has been accessed from the
Main Menu screen with the lock feature enabled, the Enter
Password screen appears
Figure 13: Functions Menu Screen
From the Functions menu the following options are
available:
3.1 Isolate:
The Isolate function sets the device into Isolate mode.
When selected the device requests confirmation. Use the
scroll (
) keys to select Cancel or OK and then select (
)
key to confirm the selection
3.2 Disable:
The Disable function sets the device into Disable mode.
When selected the device requests confirmation. Use the
scroll (
) keys to select Cancel or OK and then select (
)
key to confirm the selection
3.3 Reset Baseline:
The Reset Baseline function sets the device into Reset
Baseline mode. When selected the device requests
confirmation. Use the scroll (
) keys to select Cancel or
OK and then select (
) key to confirm the selection
3.4 Reset IP:
The Reset IP function sets the device into Reset IP mode.
When selected the device requests confirmation. Use the
scroll (
) keys to select Cancel or OK and then select (
)
key to confirm the selection
3.5 Test Mode:
The Test Mode function sets the device into Test mode.
When selected the device requests confirmation. Use the
scroll (
) keys to select Cancel or OK and then select (
)
key to confirm the selection
3.6 Sounder Test:
The Sounder Test Mode function sets the device into
Sounder Test mode. When selected the device requests
confirmation. Use the scroll (
) keys to select Cancel or
OK and then select (
) key to confirm the selection
After confirmation the tones activate on the Sounder.
Because the sounder is configurable, the screen displays
which tone is currently playing (Fault or Alarm)
3.7 Reset:
The Reset function Resets the device. When selected the
device requests confirmation. Use the scroll (
) keys to
select Cancel or OK and then select (
) key to confirm the
selection
3.8 Set Time:
The Set Time function allows the user to set the Time and
Date of the device. This feature can be locked out and
require the user to enter a 4 digit access code to enter the
Set Time menu. When the screen is first accessed the hour
time is highlighted. Use the scroll (
) keys to change the
value, When the correct Hour is selected use the (
) key
to set the Hour. The cursor then advances to the Minutes.
As each field is set, the cursor progresses to the end. When
all fields have been completed, the device requests
confirmation
4. Configuration:
The Configuration menu provides access to view how
the device is
specifically configured from PipeIQ.
Because this menu contains potentially
sensitive
information, such as email addresses, there is an
optional lockout
feature on this menu. The lockout
requires a user to enter a 4 digit access
code to enter
the Functions menu. This four digit access code is
configurable
through PipeIQ. When a user selects the
Functions menu from the main
menu screen with the
lock feature enabled, the enter password screen will
be
displayed. All configuration data is read only. From
the main configuration
menu the following selections
are available:
Use the scroll (
) keys to select an option and then select
(
) key to confirm the selection


