Chapter 2: Installation
2-5
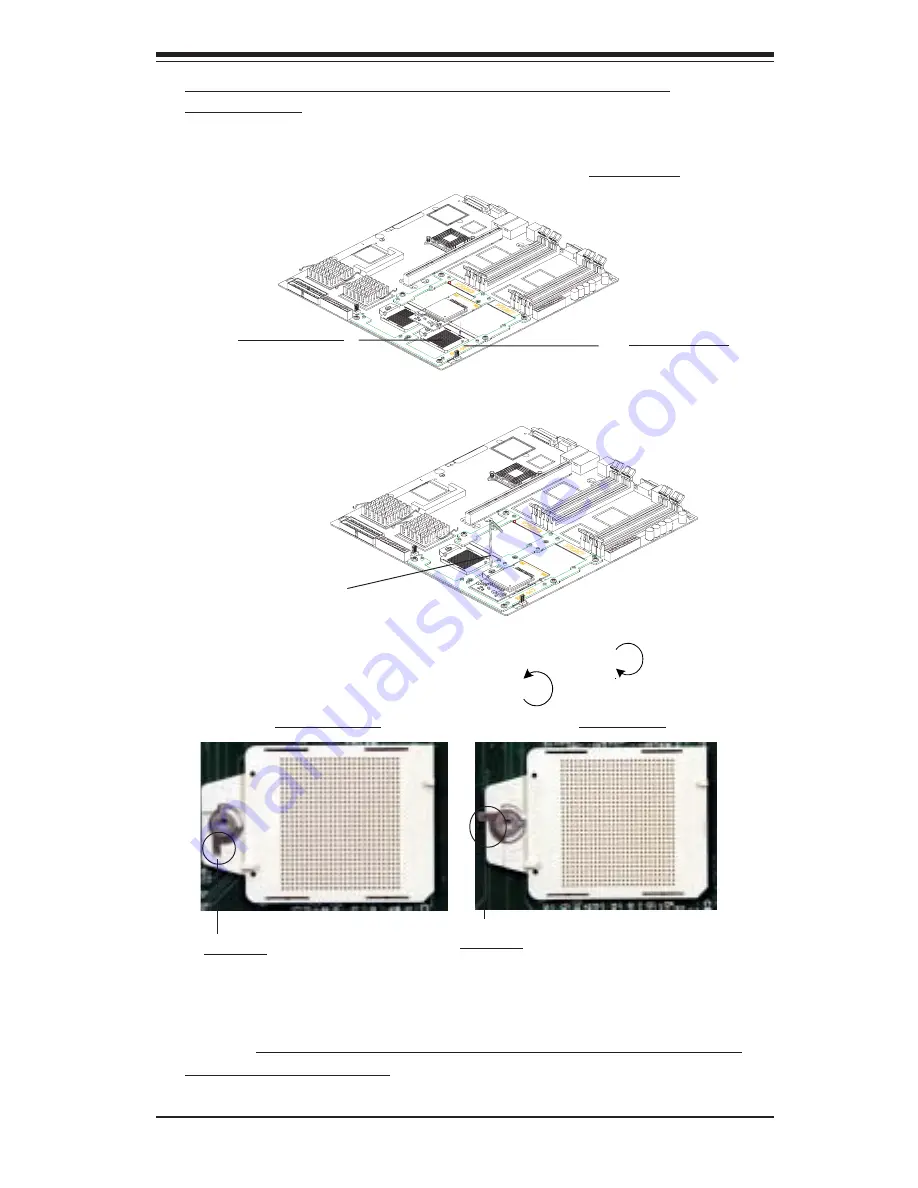
1. Insert the Itanium 2 CPU into the CPU1 Socket. Make sure that CPU Pin
1 is aligned with the cut angle of the CPU socket. (*See Note) as shown
in the picture below:
D. Installing and securing the Itanium 2 CPU onto the
motherboard
Itanium 2 CPU
CPU1 Socket
2. Use an M2.5 Hex Key to properly install and securely lock the Itanium 2
CPU onto the socket as shown below:
Use an M2.5 Hex Key
to secure the CPU.
(
*Notes
: Please refer to Chapter 1 Page 1-4 for the locations of CPU1
Socket and CPU2 Socket.)
3. Make sure that the CPU is in its proper locking position. (*To lock it:
Use an M2.5 Hex key to turn the lock in the clockwise direction. To
unlock it: turn the lock in the counter-clock direction.)
4. Repeat the Steps 1-3 to install CPU#2, if needed.
CPU-unlocked
CPU-locked
Pointer
Pointer


