Chapter 2: Installation
2-11
ATX20 POWER
CPU1
CPU2
J15
DIMM #3A
JP8
DIMM #3B
DIMM #2B
DIMM #2A
BANK 3
BANK 2
Mouse
J28
Keyboard
J29
USB0/1
COM1
JLAN2
VGA
JLAN1
M C H
Rage XL
ICH3
CHS
FAN3
P64H2
BATTERY
IDE #1
IDE #2
FLOPPY
WOL
JP24
JD4
PCIX #1
SXB
PCIX #2
JP4
JP7
SUPER X5DPR-TG2+
OHLED
JD1
WOR
DIMM #1B
DIMM #1A
BANK 1
JP36
JP9
JP38
J10, J11
J8
J17
J18
Pin1
VGA Enable
Pin1
L
AN Enable
GLAN
Controller
82546EB
PCIX/PCI Bus
Controller
PCI Graphics
Controller
SMB
Pin1
JP35
Keylock
Pin1
BIOS
South
Bridge
JP11
Pin1
IPMI
Super I/O
LAN 1
LAN 2
®
FSB Speeds
Pin1
SATA ACT LED
JP37WD JP12
IR/CIR
JP27
USB2
JPS1
JPS2
JL1
PWR LED Speaker
Chas.
Intrusion
JBT1
Clear
CMOS
FPUSB0/1
Pin1
SATA2
Ctrl
SATA1
Ctrl
SATA0
SATA1
SATA2
SATA3
COM2
J3 J2
J26
J
0
H
1
JP2
3rd PS
Alarm
3rd PS
Reset
CPU1Chassis
FAN
PWR Fault
JP16
12V PWR
Pin1
Pin1
CPU2Chassis
FAN
JF2
SPEAKER
JP12
Reset Button
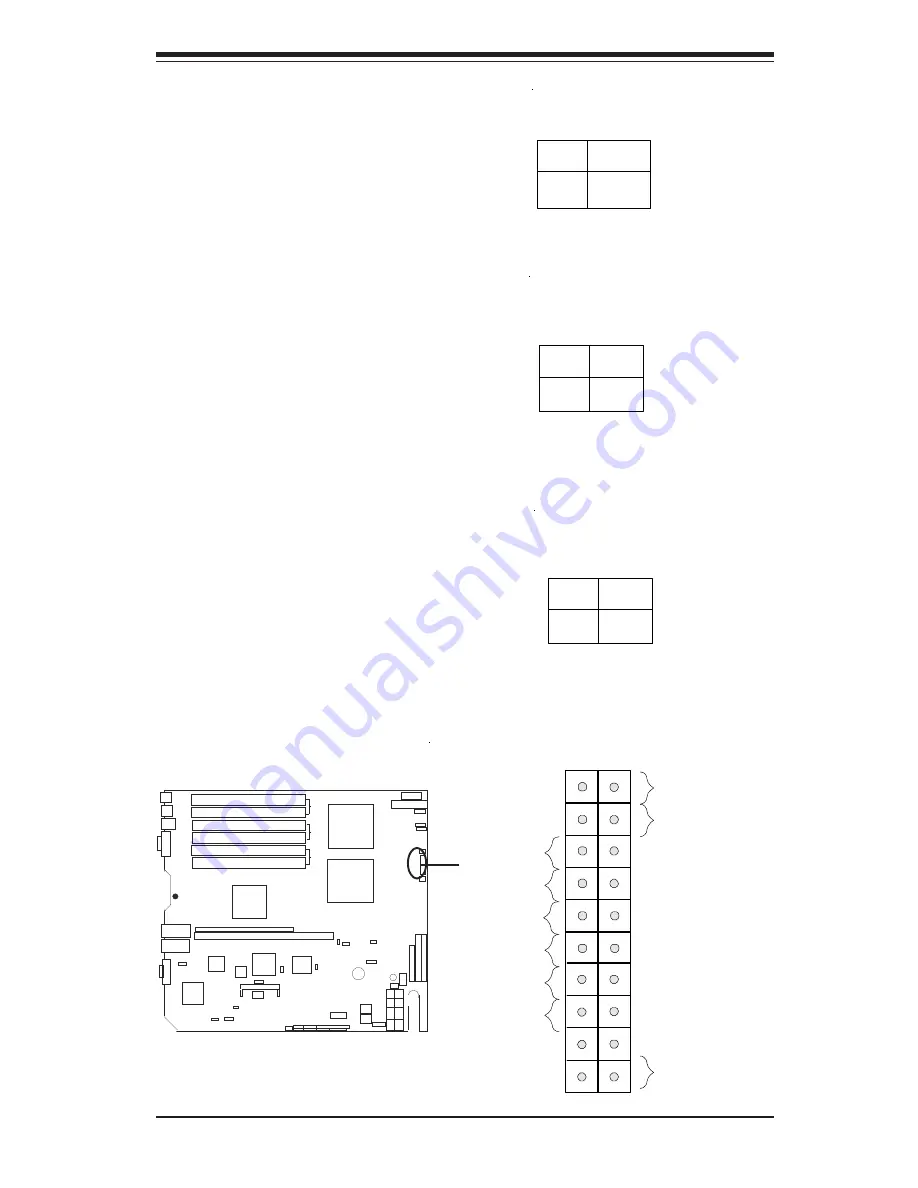
The Reset Button connection is lo-
cated on pins 3 and 4 of JF2. At-
t a c h i t t o t h e h a r d w a r e r e s e t
s w i t c h o n t h e c o m p u t e r c a s e .
Refer to the table on the right for
pin definitions.
Pin
Number
3
4
Definition
Reset
Ground
Reset Pin
Definitions
(JF 2)
Power Fail LED
The Power Fail LED connection is
located on pins 5 and 6 of JF2.
Refer to the table on the right for
pin definitions.
Po wer Fail L ED
Pin Definitio ns
(JF2)
Pin
Number
5
6
Definition
Vcc
GN D
JF2 (Front Con-
trol Panel)
Power Button
The Power Button connection is
located on pins 1 and 2 of JF2.
Momentarily contacting both pins
will power on/off the system. This
button can also be configured to
function as a suspend button (see
the Power Button Mode setting in
B I O S ) . T o t u r n o f f t h e p o w e r
when set to suspend mode, de-
press the button for at least 4
seconds. Refer to the table on the
right for pin definitions.
P in
Number
1
2
Definition
PW _O N
G round
P ow er Butto n
Connector
P in Definitions
(JF2)
Power Button
Overheat LED
19
NIC1 LED
Reset Button
20
Power Fail LED
NIC2 LED
HDD LED
Power LED
Vcc
Vcc
Vcc
Vcc
Vcc
Ground
1
2
Vcc
X
NMI
Ground
Ground
X
Содержание X5DPR-TG2 Plus
Страница 1: ... SUPER X5DPR TG2 USER S MANUAL Revision 1 0 SUPER ...
Страница 9: ...Chapter 1 Introduction 1 3 Introduction Figure 1 1 SUPER X5DPR TG2 Image ...
Страница 44: ...2 24 SUPER X5DPR TG2 User s Manual Notes ...
Страница 50: ...3 6 SUPER X5DPR TG2 User s Manual Notes ...
Страница 80: ...A 6 SUPER X5DPR TG2 User s Manual Notes ...
Страница 86: ...B 6 SUPER X5DPR TG2 User s Manual Notes ...
Страница 103: ...Appendix C Software Installation C 17 ...
Страница 110: ...C 24 SUPER X5DPR TG2 User s Manual Notes ...


