background image

                                                            OPERATION & MAINTENANCE MANUAL              SWE18UF


64 


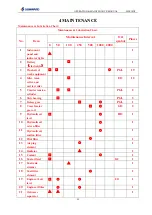
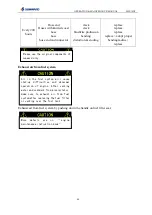
Every 200 

hours 

Hose end 

Hoses with knitted cover 

hose 
hose 

hose end and connector 

crack 
crack 

brushfire protrusion 

bending 

distortion & eroding 


replace 
replace 
replace 

replace

adopt proper 

bending radius


replace 


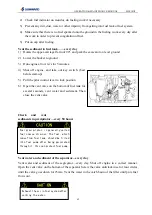
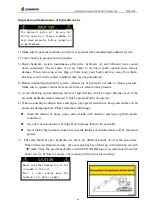
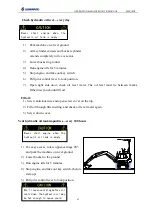
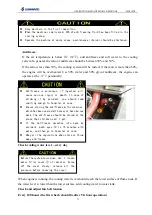
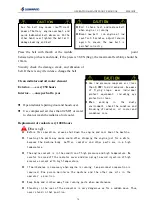
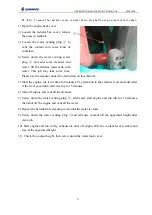
Exhaust air from fuel system 


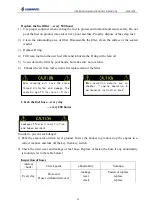
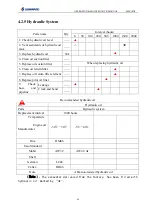
Exhaust air from fuel system by pushing down the handle on fuel filter seat. 


Please use the original components of 
sunward only. 

Air  in  the  fuel  system  will  cause 
stat-up  difficulties  and  abnormal 
operation  of  engine.  After  venting 
water and sediment from precipitator, 
make  sure  to  exhaust  air  from  fuel 
system after replacing the fuel filter 
or venting over the fuel tank. 
 

More  details  are  on  “ engine 
maintenance instruction book”. 


Содержание SWE18UF

Страница 1: ...I SWE18UF Crawler type Hydraulic Excavator Operation Maintenance Manual Sunward Intelligent Equipment Co Ltd July 2020...

Страница 2: ...original spare parts procured from Sunward are to be used To use parts of poor quality will be detrimental to machine s overall performance All operation described in this instruction manual should b...

Страница 3: ...NE SAFELY 5 1 17 SAFE MAINTENANCE 5 1 18 SUPPORTING MACHINE SAFELY 6 1 19 REMOVING RUBBISH FROM MACHINE 6 1 20 PREVENTING BATTERY EXPLOSION 7 1 21 STORING PARTS SAFELY 7 1 22 PREVENTION OF SPLASHING O...

Страница 4: ...ng Engine 29 3 3 7 Starting Engine 29 3 3 8 Start Engine in Cold Weather 30 3 3 9 Adjusting Engine Rev 30 3 3 10 Stopping Engine 30 3 3 11 Using Auxiliary Battery 31 3 4 TRAVEL CONTROL 32 3 4 1 Contro...

Страница 5: ...4 1 6 Periodic Replacement of Hydraulic Hose 54 4 2 MAINTENANCE GUIDE 56 4 2 1 Adding Lubricant Grease 56 4 2 2 Engine Oil 57 4 2 3 Gear Oil 59 4 2 4 Fuel Oil System 61 4 2 5 Hydraulic System 65 4 2 6...

Страница 6: ...NG ATTACHMENT 103 9 3 HYDRAULIC HAMMER BREAKER 104 9 3 1 Main Use of Hydraulic Hammer breaker 104 9 3 2 Control of Hydraulic Hammer breaker 104 7 3 3 Operation Key Points of Hydraulic Hammer breaker 1...

Страница 7: ...avoided could result in death or serious injury 2 WARNING indicates a potentially hazardous situation which if not avoided could result in death or serious injury 3 CAUTION indicates potentially hazar...

Страница 8: ...espirator or filtration mask Earplug or ear cap 1 6 CHECKING BEFORE START UP Before starting machine every day or every shift check the machine according to the contents in Checking before start up in...

Страница 9: ...d harmonize the hand signal before machine start up Before operating the machine traveling the operation of traveling pedal control lever should be corresponding with the traveling direction Step on t...

Страница 10: ...pipes water supply pipes and operate the machine carefully to prevent accidents All the non working people should be away from the working range of machine Make sure the ground of working site is har...

Страница 11: ...e Stop engine take out key from key switch Switch off pilot control If the machine has to stay on a slope use chocks to block crawler lower bucket and plug bucket teeth into ground Fix the machine wel...

Страница 12: ...o chapter maintenance in this manual Make sure all parts are in good condition and fitted correctly Replace worn or damaged parts Clean any accumulative lubricant or scraps When adjusting electric sys...

Страница 13: ...By all effective means store parts and machine safely to avoid falling down Don t permit unauthorized people especially children being closed to the parts storage area 1 22 PREVENTION OF SPLASHING OB...

Страница 14: ...gas will cause disease so much as or death If it is necessary to operate machine in the building open door and window to ensure well ventilation or use long exhaust pipe to discharge smoke 1 27 BEWARI...

Страница 15: ...ent 1 31 REMOVING PAINT BEFORE WELDING OR HEATING Prevent bringing potential poisonous gas and dust When paint is heated up by welding or by other methods it will cause poisonous gas Remove paint as f...

Страница 16: ...not Use a piece of cardboard to check leakage never check leakage with nude hand to prevent pressured oil from shooting up causing injury Tighten repair or replace any clamps pipe hose oil cooler and...

Страница 17: ...w Noise at operator s position LpA 93 7 dB Machine noise LWA 92 7dB Seat shock absorption Excavator status Engine rev Mode Vibration accelerated speed m s Under the operator seat On the cab floor Engi...

Страница 18: ...15 352 35 361 05 469 80 482 85 0 5m 291 45 183 75 334 95 247 50 426 30 315 00 613 35 461 25 0m 308 85 195 00 374 10 225 00 469 80 292 50 617 70 378 75 0 5m 313 20 206 25 378 45 221 25 491 55 292 5 326...

Страница 19: ...OPERATION MAINTENANCE MANUAL SWE18UF 13 Radius Lift point Lift height Swing center...

Страница 20: ...ve requirements 1 Diesel oil tank is full diesel oil instrument displays full 2 Hydraulic oil is enough 3 Water tank antifreeze fluid is enough 4 Sealing plate is assembled 5 Driver s weight is not in...

Страница 21: ...UF 15 2 1 POSITION OF MACHINE COMPONENTS 1 Cab 2 Seat 3 Rear hood 4 Fuel tank 5 Hydraulic tank 6 Travel motor 7 Track roller 8 Carrier roller 9 Rubber track 10 Idler 11 Dozer blade 12 Dozer cylinder 1...

Страница 22: ...r 2 2 CAB 1 Engine starting switch 2 Monitor 3 Engine speed control lever 4 Dozer blade control lever 5 Right operating handle 6 Battery switch 7 Guardrail 8 Boom swing control pedal 9 Left travel con...

Страница 23: ...t control button 15 Screen switching button 16 Working hour meter 17 Fuel capacity indicator 18 Engine working speed Checking Operation Control 1 Fuel level warning indicator light When fuel level is...

Страница 24: ...light comes on when the engine working condition is abnormal the engine oil pressure is low or coiling water temperature is high and the buzzer warning after 30seconds engine stops working 10 Coolant...

Страница 25: ...osition after releasing the key Before start up for another time shut down the power supply first 2 6 RADIO Radio equipped on this machine it s the product of famous brand with strong aseismatic and d...

Страница 26: ...struction 1 Forward Afterward adjustment Put up the adjustment knob by your hand then pull or push knob forward or backward to the proper position you want and then release the knob the slider will lo...

Страница 27: ...dozer undercarriage extension lever left right travel control lever boom swing control pedal assistant control pedal 2 8 PILOT SAFETY LEVER When pulling the safety lever up to the lock position the wh...

Страница 28: ...o adjust accelerator imperceptibly 2 10 PILOT OPERATION Operation marks You should clearly understand the corresponding part of each control lever The instruction of this manual is established under t...

Страница 29: ...fer switch of dozer blade and undercarriage extension retraction on the left control box A lift the dozer B lower the dozer D Travel control lever Make sure that the dozer is at the foreside of the op...

Страница 30: ...ant pipe B Hydraulic oil flows to the assistant pipe 2 11 AIR DUCT HOOD AND COVERING PARTS Air duct hood The engine should be equipped with air ducting hood to prevent foreign materials from being ree...

Страница 31: ...OPERATION MAINTENANCE MANUAL SWE18UF 25 2 12 DECALS Center of gravity label Traction hook label 750610020148 Pedal dropping label...

Страница 32: ...2 3 After first 50 hours of operation Carry out 50 hour operation maintenance refer to maintenance guide fifty hours The manual only applies to normal working conditions when the machine works in othe...

Страница 33: ...nnector or not and check whether the light can be turned on or off normally 2 Boom arm bucket dozer blade sheet metal track shoe Check whether there are curving damaged and lost parts or not 3 Fastene...

Страница 34: ...ator lights safety warning devices battery electrolyte acidity and fuses 3 3 4 Air Filter When indicator light comes on it means that you should maintain or replace filter element 3 3 5 Oil Level in H...

Страница 35: ...the monitor system is on normal working condition 3 3 7 Starting Engine 1 Keep pilot valve control lever locked 2 Turn the key switch to ON position 3 Honk the horn to warn surrounding people 4 Start...

Страница 36: ...uns at full load lower handle to bottommost engine runs at minimum load adjust accelerator between upmost and bottommost to control engine rev and also you can screw handle to adjust accelerator imper...

Страница 37: ...t engine with assistant battery 3 3 11 Using Auxiliary Battery 1 Connect auxiliary battery Stop engine which is equipped with auxiliary battery Connect one end of red wire with battery anode and conne...

Страница 38: ...2 Straight backing Step on two pedals backward at the same time pedal 3 and 4 in FIG 3 8 3 Turning in one point Left Turning FIG 3 9 Step on right pedal 2 forward and left pedal 3 backwards FIG 3 8 R...

Страница 39: ...l Push two handles forward at the same time 2 Straight backing Pull two handles backward at the same time 3 Turning in one point Left Turning Push right handle forward and pull left handle backward Ri...

Страница 40: ...of the water make sure that the water s depth is not higher than the half of the track roller Never dip the rear end of the machine into water If the lubricant parts need to work in water for a long...

Страница 41: ...IG 3 16 900 1100 20 30cm FIG 3 17 20 30cm 900 1100 FIG 3 18 5 If the excavator can t travel for getting into miriness you can extend arm and place bucket to ground to lift one side of crawler then tur...

Страница 42: ...OPERATION MAINTENANCE MANUAL SWE18UF 36...

Страница 43: ...ol with right pilot handle Right figure is the front view of right pilot handle when operator sits on the seat The four movements of handle can make the excavator move as follows a Raise boom b Lower...

Страница 44: ...d The dozer is used for simple bulldozing work so never dig the dozer blade too deep or the dozer blade or even the infrastructure may be damaged g Extend arm h Retract arm 3 5 2 Composite Movement of...

Страница 45: ...iny day the excavator must be kept at a proper distance away from working face to prevent collapse 9 After stopping machine shut off all switches of control panel shut off electric power and lock cab...

Страница 46: ...parts in the cab the top window and cab door should be closed after parking the excavator Inspection after stopping the engine Check the oil tank and water tank work device upper structure and underca...

Страница 47: ...wler by the Boom and Arm Avoid tilting Avoid transverse traveling on a slope When the machine travels on a slope the traveling direction should be accordant with the gradient When upgrade and downgrad...

Страница 48: ...eration 1 Place the bucket teeth on ground while the angle between bucket bottom and ground is 45 2 Apply arm to be the main digging force pull bucket to the machine direction 3 When mud adheres to th...

Страница 49: ...apse 1 Place traveling motor to the rear end of machine to work while the machine and the digging surface are in certain angle or perpendicular 2 Don t place machine at the edge of trench or digging a...

Страница 50: ...is fully loaded In order to increase throughput full load should be the first important goal and then the working rate The rapid circulation output of every full load of digging will be bigger than pa...

Страница 51: ...to guarantee safety 3 5 16 Prevention Measurement for Dozer Blade 1 Don t use dozer blade to dig otherwise it will damage dozer blade or crawler system 2 Dozer blade can t support large or unstable b...

Страница 52: ...dozer blade cylinder or other components will be damaged 3 6 LOAD LIFTING Lifting hook mark 750610020152 1 Sling chain should tightly bind the load the workman should glove when bind sling chain 2 Co...

Страница 53: ...partment for maintenance purpose 3 Avoid dirt entering into system when changing bucket into breaker 4 After connection check the oil leakage and bolts slack condition Before fitting hydraulic breaker...

Страница 54: ...ately The pressure change of breaker accumulator or damaged accumulator will cause unusual hose jump and damage hydraulic breaker or machine 6 When retracting front attachment don t allow the chisel o...

Страница 55: ...ntage 3 8 BOOM SWING The boom swing pedal locates at the position of operator s right foot it is used to swing boom but the upper carriage cab engine etc won t slew when operating this pedal A Boom sw...

Страница 56: ...quipment PGL 19 4 Idler track roller and carrier roller EO 12 5 Crawler tension cylinder PGL 2 6 Slew bearing PGL 3 7 Rotary gear PGL 1 8 Travel motor gear oil GO 2 9 Hydraulic oil level HO 1 10 Hydra...

Страница 57: ...and hydraulic oil is hot in order to prevent scald 5 Release the pressure slowly when opening the cap 6 More details please find in the maintenance manual Important prompts The first 50 hours is the...

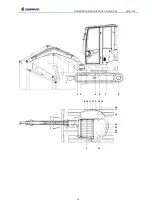
Страница 58: ...OPERATION MAINTENANCE MANUAL SWE18UF 52 3 4 5 6 7 8 1 2 9 10 11 14 16 19 20 18 17 15 13 12 21 22...

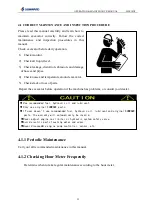
Страница 59: ...parts Repair the excavator before operation if the machine has problems or consult your dealer 4 1 1 Periodic Maintenance Carry out all recommended maintenance in this manual 4 1 2 Checking Hour Mete...

Страница 60: ...t leave cab 5 Pull the pilot control lever to LOCK position 6 Before maintenance please hang the label DO NOT OPERATE on left control handle 4 1 5 Engine Maintenance Please carry out periodic maintena...

Страница 61: ...aced parts Replacement Interval Engine Fuel hose from fuel tank to precipitator from precipitator to oil feeding pump 1 5 years Main frame Pump inhaling hose from oil tank to main pump 2 years Pump ou...

Страница 62: ...er cylinder 2 Junction pin shaft of dozer blade and chassis 2 Swing bearing track 1 Inner swing gear ring 1 Control lever 4 During maintenance Position bucket arm boom slewing gear slewing bearing etc...

Страница 63: ...after the first 50 hours operation of machine Please maintain as per the requirement in diesel engine manual book Recommended engine oil Oil brand Manufacturer 30 to 20 10 to 35 25 to 40 Esso Essolub...

Страница 64: ...operation After first replacement please carry out replacement as per YANMAR operation and maintenance manual Replace engine oil filter every 250 hours Steps of replacing engine oil and filter 1 Warm...

Страница 65: ...il filter cover and fill recommended oil in engine 15 minutes later check whether the oil level lies within the marking range or not 16 Fit filler cap 17 Start engine Run at low revs for 5 minutes 18...

Страница 66: ...ch 5 Pull the pilot control lever to lock position 6 Open oil level check plug check oil level 7 If necessary fill the filler through oil filler hole to the level as the right figure shows refer to ge...

Страница 67: ...ediment in water segregator 1 4 Replace fuel filter 1 5 Check fuel hose Leakage crack etc Crack distortion etc Recommended fuel Please use high quality diesel fuel GB2520 in normal condition 10 for th...

Страница 68: ...p 5 Pull the pilot control lever to lock position 6 Open the vent valve on the bottom of fuel tank for several seconds vent water and sediment Then close the vent valve Check and vent sediments in pre...

Страница 69: ...ement of the filter Check the fuel hose every day every 200 hours In order to prevent such danger 1 Park the excavator on firm level ground Lower the bucket to ground stop the engine in a correct mann...

Страница 70: ...haust air from fuel system Exhaust air from fuel system by pushing down the handle on fuel filter seat Please use the original components of sunward only Air in the fuel system will cause stat up diff...

Страница 71: ...raulic oil tank 3 Replace hydraulic oil 30L 4 Clean oil suction filter 5 Replace oil suction filter When replacing hydraulic oil 6 Clean oil return filter 7 Replace oil return filter element 8 Replace...

Страница 72: ...is released it still be pressurized by the gravity 6 When connecting hydraulic hoses and pipes pay special attention to keep seals surface clean and avoid damaging them Please remember followings Wash...

Страница 73: ...l oil 1 Screw anticlockwise and open screw cover on the top 2 Fill oil through filter netting and check oil lever meter again 3 Screw down cover Vent hydraulic oil tank impurities every 200 hours 1 Fo...

Страница 74: ...completely to fix excavator 3 Lower the bucket to ground 4 Run engine at low revs for 5 minutes 5 Stop engine and take out key 6 Pull pilot control lever to lock position 1 Release oil vent plug at th...

Страница 75: ...1 Release exhaust plug of hydraulic pump 2 Once hydraulic oil overflows from the exhaust plug plug screw the plug down immediately 3 Start engine and run it idle for 10 mins 4 Idle the engine make al...

Страница 76: ...ing radius replace 4 2 6 Air Filter Parts name qty interval hour 8 50 100 250 500 1000 2000 1 Air filter element Clean 1 Or when the indicator light Replace 1 After 5 times clean or 1 year operation T...

Страница 77: ...Take out the filter element 10 Cover the back of the shell of the air filter with cloth or adhesive tape to avoid the entering of dust 11 Clean the interior of the shell 12 Use dry compress air whose...

Страница 78: ...heck seal every day Replace When pipeline has crack and air leakage 4 2 7 Cooling System Parts name Qty Interval hours 8 50 100 250 500 1000 2000 1 Check cooling water level 1 2 Check and adjust fan b...

Страница 79: ...antifreezing fluid has been filled in the cooling system Operate the machine at dusty areas maintenance interval should be shortened FIG 100 FIG 98 Never start engine when the hydraulic oil tank is em...

Страница 80: ...with high temperature If maintenance is necessary when engine is running two personnel cooperation is required One person maintains the machine and the other one sits in the operator s position Keep...

Страница 81: ...manual 5 Start the engine ide it for about 30 minutes Pay attention to the cleanser level and add water if the level goes down after start up for 5 minutes 6 Shut off engine and vent all the cleanser...

Страница 82: ...ening torque When necessary Check bucket teeth every day 1 Check the abrasion and looseness of bucket teeth 2 Replace the seriously abraded teeth 3 The replacement procedures Take out lock pin with a...

Страница 83: ...parate arm and bucket 4 Clean orientation pin pin and holes daub sufficient lubricant to them 5 Calibrate the arm and new bucket ensure the bucket will not to roll 6 Fit pin A and B and fit correspond...

Страница 84: ...of disassembly operation Check track sag every 50 hours or when necessary Park the excavator with engine off takes out the key set pilot safety control lever to lock position If not the sudden movemen...

Страница 85: ...ng There is pressure grease in the track tightening mechanism the grease pressure relief valve may fly out and cause damage if you do not operate as the follow procedures Slowly screw off the grease p...

Страница 86: ...iron core has desquamated 6 Replace track when rubber track has a more than 60mm long gap A Disassemble 1 Completely loosen the tightened track 2 Slowly operate the control lever use the operation de...

Страница 87: ...que ISO10 9 intensity standard certificated 1 If no special request considering the screw down moment of the bolt and nut refers to the following table 2 Don t use the moment in the following table wh...

Страница 88: ...WE18UF 82 27 30 M20 2 5 410 9 20 5 Thin screw thread 12 13 M8 1 0 24 5 1 2 14 17 M10 1 25 50 2 5 17 19 M12 1 5 87 3 4 3 19 22 M14 1 5 135 3 6 8 22 24 M16 1 5 220 6 11 27 30 M20 1 5 452 1 22 6 4 2 9 Ma...

Страница 89: ...the radiator and oil cooler cooling fin to remove dust and dirt 3 More frequently clean the fuel sucking filter and its core 4 Termly carry out clean maintenance especially the surface of the engine...

Страница 90: ...x any malfunction Add lubricant oil and grease Check the lubricant to find if it is dirty or insufficient Add lubricant to the parts which need this And apply a layer of oil Battery Take off the batte...

Страница 91: ...h cab 990 mm More details about dimension please refer to chapter 7 There is a possibility that the machine will roll tip over or fall while loading or unloading it Therefore you need to take the foll...

Страница 92: ...e center of the crawlers Use the engine accelerator control lever to reduce the revs of engine drive the machine slowly to the slope and lower the hoe attachment as much as possible making sure it wil...

Страница 93: ...sprocket side Extend arm cylinder and bucket cylinder to their end of stroke operate boom cylinder and lower the work equipment to the ground 2 Stop the engine remove the key and lock cab doors and wi...

Страница 94: ...ull 5 Choose a proper storage place It s best to store the machine in a room if it can only be stored outdoors you should choose a flat ground and cover the machine with cloth During storage 1 Run the...

Страница 95: ...er to the YANMAR 3TNV80F SSSU engine malfunction estimation and maintenance manual 6 TROUBLE SHOOTING If malfunction occurs stop machine immediately analyze the reason and adjust or repair the machine...

Страница 96: ...t with your dealer 5 Consult with your dealer A cylinder doesn t work or work slowly 1 Corresponding pilot valve malfunction 2 Corresponding reversing valve malfunction 3 Corresponding overload valve...

Страница 97: ...rature rises too fast or becomes too high 1 There is dirt on the surface of oil cooler 2 Wear of hydraulic parts and reduction of the cubage efficiency 3 Overflow valve and over load valve opens too f...

Страница 98: ...lot valve carry out the hydraulic proportion control of the boom arm bucket and platform swing through 2 control lever Model HC RCY 60130874LR HC RCY 60110330DD Pilot system pressure 3 5Mpa Hydraulic...

Страница 99: ...pressure multiple brake normally closed Electric device Battery 1X12V 45Ah Starter 12V 1 1KW Generator 12V 40A Fuel device Fuel tank capacity 24 6L Travel mechanism Speed ratio 31 Maximum output torq...

Страница 100: ...n of diesel motor Hydraulic system and pilot system Hydraulic pump main valve drive motor and swing motor are products of China Japan Korea and Italy respectively with perfect quality and stable work...

Страница 101: ...evice can conveniently tension and loosen track The helix spring provides huge tension power for oriented wheel and ensures the track orientation avoid track digression High alloy steel track has good...

Страница 102: ...m All the indicator s sketch maps comply with SAE certification There is radio installed in cab Also there is heater in cab optional The heater we adopt is world famous Bergstrom product with perfect...

Страница 103: ...3582X990X2415 Dimension parameter A Tumbler distance mm 1210 B Length of track mm 1538 C Platform ground clearance mm 436 D Tail swing radius mm 680 E Chassis width mm 990 1320 F Track width mm 230 G...

Страница 104: ...height mm 4355 B Max dumping height mm 3010 C Max digging depth mm 2840 D Max vertical digging depth mm 2580 E Max digging radius mm 4775 F Max reach at ground level mm 4670 G Max lifting height of do...

Страница 105: ...OPERATION MAINTENANCE MANUAL SWE18UF 99 8 APPENDIX 8 1 ELECTRICAL SCHEMATIC...

Страница 106: ...er level sensor 12 Battery switch 21 Fusible line 4 Battery 13 Engine oil pressure sensor 22 Inserted fuse 5 Generator 14 Pilot safety switch 23 Ground contact cable 6 Starter 15 Horn button 24 Relay...

Страница 107: ...101 8 3 HYDRAULIC SCHEMATIC...

Страница 108: ...nter swivel joint 5 Pilot dual speed solenoid valve 17 Travel drive part 6 Main valve travel operation 18 Dozer cylinder 7 Right handle Pilot valve boom bucket 19 Swing motor 8 Left handle Pilot valve...

Страница 109: ...e Unauthorized person is not allowed in the working area as for there s the risk of falling of loaded objects A crane should be used when lifting or moving a heavy object exceeding 25kg Replace option...

Страница 110: ...the area 9 3 HYDRAULIC HAMMER BREAKER 1 Different models of Excavator is installed with different types of hydraulic hammer breaker before mounting hydraulic hammer breaker please consult Sunward to...

Страница 111: ...CE MANUAL SWE18UF 105 Step on the right side of control pedal the hammer breaker begins to work In order to prevent accidental operation please cover the protective plate up when there is no need to o...

Страница 112: ...entering when changing the installation of bucket to hammer breaker 5 After connection check seal for oil leakage and bolts of tube clamp for slack Before installing the hammer breaker to the arm the...

Страница 113: ...y That s caused by the damaged accumulator of which the pressure change of the hammer breaker More seriously the hammer breaker and the excavator may be damaged too 7 When retracting foreside work equ...

Страница 114: ...anwhile the boom and mechanical boom will be damaged d Do not use the drill rod as a crowbar Bolts and drill rod also will be damaged when using the drill rod as a crowbar e Do not continue to hit ove...

Страница 115: ...r and the load bearing mechanism thus damage the hammer parts and the machine j Do not hit the limit position of load bearing cylinder When hitting on the limit position of load bearing cylinder machi...

Страница 116: ...as following chart 2 The filter element should be replaced when the hammer breaker is operated continuously for more than 100 hours Using hours of the hammer breaker 9 4 KEY POINTS FOR HYDRAULIC CLAMP...

Страница 117: ...ent for hydraulic filters and hydraulic oil should be more frequently than the usual excavation to avoid the damage of hydraulic pump and other hydraulic components The replacement interval please ref...

Страница 118: ...Trade mark Add Sunward Industrial Park No 1335 Liangtang Road E Xingsha Changsha Hunan China Sales hotline 400 887 6230 Service hotline 400 887 8230 Maintenance point Our office in various provinces...

Страница 119: ...geesling rd denton tx 76208 6 SUNWARD INTELLIGENT CAMBODIA CO LTD cambodia sunward cc No 18 St 110B Ideal Garden Home City Sangkat Teuk Thla Khan Sen Sok Phnom Penh Cambodia 7 SUNWARD RUS LLC rus sunw...

Страница 120: ...OPERATION MAINTENANCE MANUAL SWE18UF 114...

Отзывы: