Piarm, Release 1.0
3.2.3 Shovel Bucket
Step 1
Assemble the
to the end of
PiArm
.
Step 2
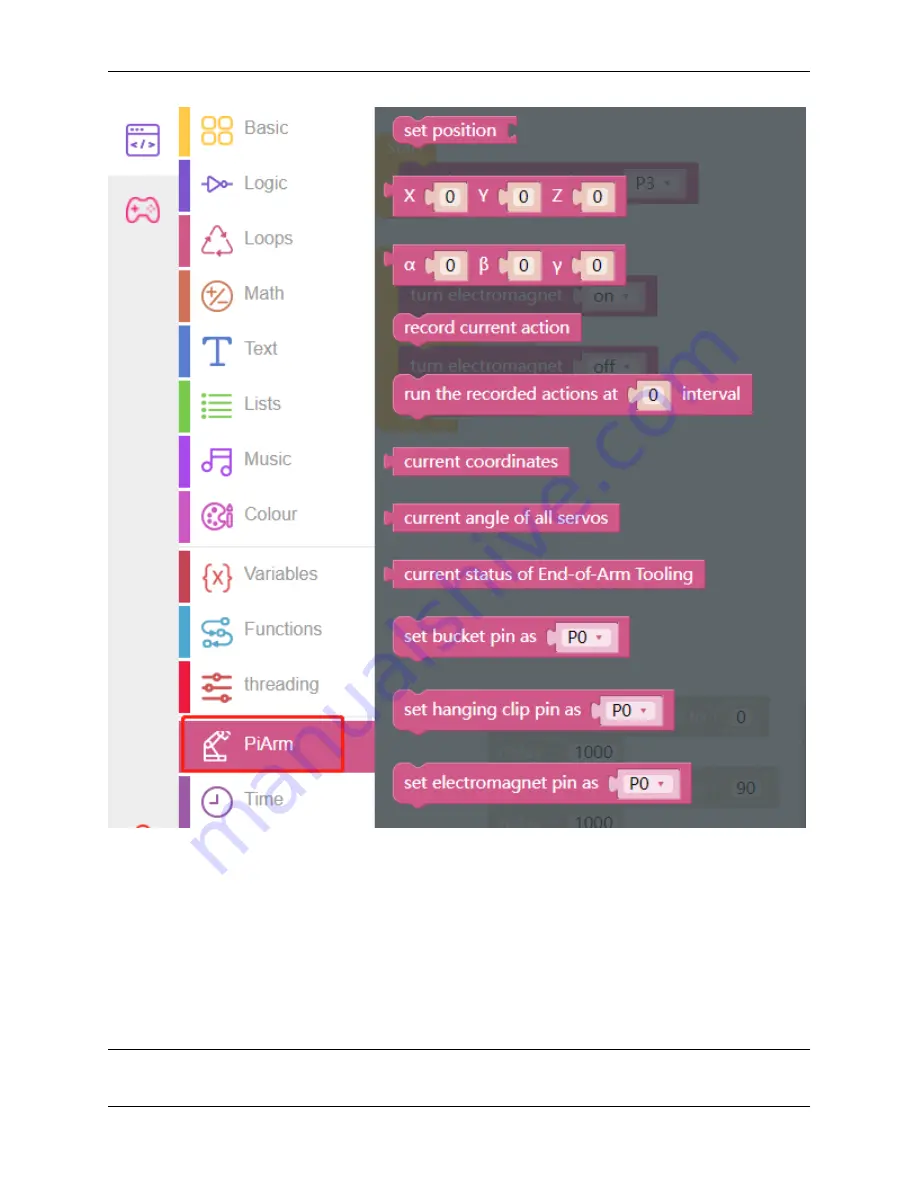
Now start writing the code to make Shovel Bucket work.
Put [set bucket pin as ()] in the [Start] block to initialize the bucket pin as P3.
Note:
Because in the assembly diagram above, it is connected to the Transfer Module, which is already connected to
3.2. Assemble and Test 3 EoATs
27
Содержание PiArm
Страница 1: ...Piarm Release 1 0 www sunfounder com Mar 31 2022 ...
Страница 2: ......
Страница 4: ...ii ...
Страница 6: ...Piarm Release 1 0 2 CONTENTS ...
Страница 8: ...Piarm Release 1 0 4 Chapter 1 Component List and Assembly Instructions ...
Страница 13: ...Piarm Release 1 0 Assemble the Shovel Bucket to the end of the PiArm with M2x4 screws 2 2 Shovel Bucket 9 ...
Страница 14: ...Piarm Release 1 0 The Shovel Bucket has a rotation range of 90 60 10 Chapter 2 Hardware Introduction ...
Страница 15: ...Piarm Release 1 0 Use range Can t dig water can be used to dig sand and gravel 2 2 Shovel Bucket 11 ...
Страница 17: ...Piarm Release 1 0 Attach the Hanging Clip to the end of the PiArm with the M2x4 screw 2 3 Hanging Clip 13 ...
Страница 18: ...Piarm Release 1 0 The angle range of the Hanging Clip is 0 90 14 Chapter 2 Hardware Introduction ...
Страница 48: ...Piarm Release 1 0 44 Chapter 3 Play with Ezblock ...
Страница 82: ...Piarm Release 1 0 Step 6 Put the control function into the Forever block 78 Chapter 3 Play with Ezblock ...
Страница 91: ...Piarm Release 1 0 3 9 GAME Iron Collection 87 ...
Страница 92: ...Piarm Release 1 0 88 Chapter 3 Play with Ezblock ...
Страница 99: ...Piarm Release 1 0 Step 7 Click the WRITE button 4 1 Quick Guide on Python 95 ...
Страница 146: ...Piarm Release 1 0 Ctrl C At this point you can stop the code with Ctrl C 142 Chapter 4 Play with Python ...
Страница 148: ...Piarm Release 1 0 Yes then Ok Finish 144 Chapter 5 Appendix ...
Страница 152: ...Piarm Release 1 0 Step 4 Double click the connection just created 148 Chapter 5 Appendix ...
Страница 153: ...Piarm Release 1 0 Step 5 Enter Username pi and Password raspberry by default 5 2 Remote Desktop 149 ...
Страница 154: ...Piarm Release 1 0 Step 6 Now you can see the desktop of the Raspberry Pi 150 Chapter 5 Appendix ...
Страница 160: ...Piarm Release 1 0 156 Chapter 5 Appendix ...
Страница 162: ...Piarm Release 1 0 158 Chapter 6 Thank You ...


