background image

©


Drechselbedarf Schulte


Translation of the Original Instruction Manual Version 1.0


- 33 


of the work piece, although bowl gouges are mainly used for this nowadays. Also see the video 
"Einführung in die Grundlagen des Drechseln" (Introduction to the Basics of Woodturning). 


Rectangular chisel and oval chisel 

Rectangular  chisels  are  traditional  tools  that  have  always  been 
used  for  particularly  fine  surfaces  when  turning  side  grain.  Oval 
chisels  have  only  existed  since  the  end  of  the  70s.  They  were 
developed  for  working  on  long  coves.  Chisels  are  held  on  the 
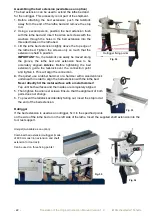
work  piece  with  a  side  work  angle  of  45°  (see  Fig.  40a).  The 
centre  third  of  the  cutting  edge  does  the  work.  Here,  too,  the 
bevel must be applied. 


Parting tool 

During cutting off, the tool is applied to the work piece on the 
upper third, cutting in an arc to the centre. 


Fig. 40a 

With  side  grain,  when  turning  a fillet,  the  same  process  is  used, but  only  to  the required  diameter.  For 
further  information,  please  attend  a  woodturning  course,  get  our  video  "Grundlagen  des  Drechselns" 
(Basics  of  Woodturning),  read  specialist  books  or  have  your  specialist  dealer  explain  to  you  in  more 
detail. 


Recommended speed 

The  speed,  in  rpm,  mainly  depends  on  the  size  of  the  work  piece.  But  also,  other  characteristics  like 
imbalance, weight, hardness, different densities etc. determine the safe speed. If the speed is too low, a 
smooth surface is usually not possible. If the speed is too high, the lathe will start to vibrate and there is 
a risk that the work piece will be ejected and cause severe injuries or damage. 


Outrigger 


Warning! 


  When using the outrigger, we recommend that the lathe is appropriately 

secured to the floor. 

  Only advanced wood turners with the relevant qualification or training are 

advised to work with the outrigger! 


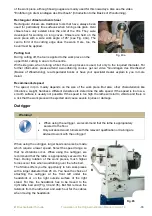
When using the outrigger, larger bowls can also be made 
which  require  a  lower  speed.  Select  the  speed  range  so 
that  no  vibrations  occur.  When  using  the  outrigger,  we 
recommend that the lathe is appropriately secured to the 
floor.  During  rotation  of  the  work  pieces,  much  higher 
forces occur than when woodturning over the lathe bed. 
The Stratos offers you the opportunity to turn work pieces 
with a larger diameter than 45 cm. You have the choice of 
attaching  the  outrigger  at  the  front  left  under  the 
headstock  or  on  the  right  outside  surface  of  the  right 
stand.  For  this,  the  headstock  has  to  be  moved  to  the 
right lathe bed end (Fig. 34 and 35). But first remove the 
tailstock from the lathe bed and watch out for the cables 
when moving the headstock. 

Fig. 65 

Содержание FU-230

Страница 1: ...FU 230 WOOD TURNING LATHE...

Страница 2: ...us an email We look forward to hearing from you Your experiences enable us to keep improving the quality of this wood turning lathe Kind regards Drechselbedarf Schulte HOPE woodturning D 49744 Geeste...

Страница 3: ...g the wood turning lathe 12 Easy quick release system available as an option 21 Assembling the bed extension available as an option 22 7 Connecting the wood turning lathe to the mains supply 23 8 Comm...

Страница 4: ...ling template auxiliary support for cutting out printing 46 Explanation of symbols Use eye protection Use breathing protection Use hearing protection Environmentally hazardous substances Use protectiv...

Страница 5: ...re the initial use of the machine If you are not familiar with the functions of a wood turning lathe find competent help We urgently recommend an introduction to handling a wood turning lathe by an ex...

Страница 6: ...safetystandards Pay attention to the appropriate electrical installation to which you connect the wood turning lathe and only ever use the supplied safety plugs Do not use extension leads Runs from a...

Страница 7: ...eed is set before turning on the spindle Use the lowest speed for new work pieces or work pieces that are not round Turn using the recommended speed Table in Fig 49 and Fig 50 Never slow down the work...

Страница 8: ...0 rpm 50 Hz 1 500W Variable speed control of the motor by the potentiometer on the movable control unit Mains supply 230 Volt 1 N PE 50 Hz Speed stages rpm on the spindle Stage I 180 3 700 rpm and Sta...

Страница 9: ...n Stratos is equipped with a zero voltage switch which deactivates the lathe in the event of a power outage or when the pulley cover is lifted and it prevents restarting when the power has been restor...

Страница 10: ...ENCY STOPPED as well as stopped in the conventional way Fig 2 By pressing the red button 0 all machine functions are deactivated To restart press the green ON button I The toggle switch is used to act...

Страница 11: ...possible position the machine close to a window Electrical equipment To operate the wood turning lathe a suitable conventional 230 V isolated socket fused with a 16 amp supply is required Electric ca...

Страница 12: ...or lockingmechanism 1 8 Electric motor 1 9 Spindle locking pin 1 10 Spindle with M33 thread 1 11 Digital speed display 1 12 24 position locking pin 2 Lathe bed 2 1 Main switch 2 2 Movable control unit...

Страница 13: ...ed Check all bolted joints for tightness after eight operating hours During assembly put the headstock down in such a way that the cable connections are not damaged and the cables are not disconnected...

Страница 14: ...to thestands H Morse taper double sided MT2 for aligning the centres I Allen keys 3 and 4 mm J Face plate wrench to loosen the face plate from thespindle K Face plate 150 mm with M33 x 3 5 mm thread...

Страница 15: ...tach the feet to the threaded holes on the bottom Secure them with suitable hex nuts To ensure that the wood turning lathe is positioned securely and horizontally you can alter the level adjusting fee...

Страница 16: ...ght of the lathe bed Remove the plastic cover headstock tailstock and tool rest support To do this loosen the stops on both ends of the lathe bed Fig 16 and watch out for the connected cables Using tw...

Страница 17: ...the stand Now fix the lathe bed to the stand with the remaining two bolts First hand tighten the bolts so you can adjust the lathe bed and the feet after removing the bar clamp After tightening the tw...

Страница 18: ...that the lathe bed is level If required adjust the lathe using the feet Fig 21 Fig 22 Using two people carefully lift the headstock into the lathe bed guide Fig 23 First place the tool rest support on...

Страница 19: ...N into the specified socket on the motor flange to tighten the drive belt Fig 26 Attach the holder for the movable control unit to the front right of the lathe bed The tool holder is attached to the...

Страница 20: ...gning the headstock Loosen the headstock and rotate it so it is aligned with the lathe bed and the tailstock Mount the double ended Morse taper H in the tailstock and using the tailstock insert it int...

Страница 21: ...d turning lathe has been assembled Easy quick release system available as anoption This high quality equipment enables rapid replacement of the lathe bed extension and the outrigger Fig 31 and 35 This...

Страница 22: ...bed Tighten the screws only so much that the extension is held in position IMPORTANT So the tailstock can easily be moved along the groove the lathe bed and extension have to be accurately aligned Ad...

Страница 23: ...On the movable control unit turn the toggle switch to forward and turn the potentiometer all the way to the left to zero Insert the safety plug into the designated isolated socket Now switch the main...

Страница 24: ...ock guarantees an exact alignment between live centre and spur centre This guarantees low vibration woodturning and is the best prerequisite for exact drilling with a tailstock To move the tailstock o...

Страница 25: ...that the motor is not turned on during locking of the spindle 24 position indexing By turning the knob 1 by 90 the 24 position indexing clicks into position This enables an even graduation in 15 incre...

Страница 26: ...on 0 is a combination button for EMERGENCY STOP and OFF 0 during woodturning The green ON button I is used to turn on the lathe during woodturning The toggle switch is for forward and reverse operatio...

Страница 27: ...left and determine the speed rpm A Recommended speed range for general woodturning Fig 49 B Recommended speed range for general woodturning on the outrigger Fig 50 Recommended speed range Work piece d...

Страница 28: ...eed ranges Disconnect the mains plug and only then open the cover on the headstock Then loosen the quick release lever on the motor flange Using the chromium plated clamping lever S Fig 53 pull the mo...

Страница 29: ...ure the position with the quick release lever Now remove the faulty belt cut with a knife or scissors if required The new belt is put over the handwheel guided past the spindle shaft and belt cover an...

Страница 30: ...rmediate support steady rest for long and slender or long work pieces when vibrations begin Be careful when using the tools Place the tool on the tool rest first then guide it closer to the work piece...

Страница 31: ...sing the clamping lever position the tailstock tightly on Fig 37 the rear of the lathe bed By turning the handwheel push the live centre into the centre of the other scantling end Finally lock the qui...

Страница 32: ...iceably above the work piece centre Cylindrical shapes can be smoothed with a chisel Here too the chisel engages noticeably above the centre of the work piece see Fig 40a So called fillets are cut wit...

Страница 33: ...n rpm mainly depends on the size of the work piece But also other characteristics like imbalance weight hardness different densities etc determine the safe speed If the speed is too low a smooth surfa...

Страница 34: ...n Afterwards lock the headstock using the Fig 67 clamping lever K and the headstock pivot locking pin D Now insert the tool rest support U into the bed extension In order to compensate for the greater...

Страница 35: ...lubrication All bearings are double enclosed and do not need maintaining Repairs Danger When carrying out work on electrical parts of the machine the mains circuit breaker must be switched off and the...

Страница 36: ...stomer himself herself must bear the costs of storage and return The distributor cannot be held liable for a claim made based on regular wear and tear improper use mains overload mains related overvol...

Страница 37: ...tting edge of toolblunt Cutting pressure toohigh Work piece clamped off centre Speed too high Pulleys are loose Machine positioned on uneven floor Tool rest tailstock or headstock not locked securely...

Страница 38: ...Drechselbedarf Schulte 38 Translation of the Original Instruction Manual Version 1 0 14 Appendices Appendix 1 Declaration of Conformity...

Страница 39: ...mm x M33 1 03 KS18 A03 Allen set screw 1 4x3 8 6 04 KS18 A04 Spindle M33x3 5 mm 1 05 KS18 A05 Round head screw 1 4 x5 16 4 06 KS18 A06 Key 6x6x50 1 07 KS18 A07 Key 4x4x10 1 08 KS18 A08 Bearing 6007 2...

Страница 40: ...x 3 8 19 33 KS18 A33 Hinge 1 34 KS18 A34 Upper cover 1 35 KS18 A35 Lower cover 1 36 KS18 A36 Circuit breaker 2 14 V 1 37 KS18 A37 Stop plate 1 38 KS18 A38 Acrylic panel 1 39 KS18 A39 Machine screw 6...

Страница 41: ...4 KS18 A66 4 Button red 1 66 5 KS18 A66 5 Speed controller 1 66 6 KS18 A66 6 Speed controller knob 1 66 7 KS18 A66 7 Housing 1 66 8 KS18 A66 8 Magnet 3 66 9 KS18 A66 9 Strain relief PG9 1 66 10 KS18...

Страница 42: ...ndwheel handle 1 02 KS18 B02 Handwheel 6 x19 1 03 KS18 B03 Set screw 1 4x1 4 2 04 KS18 B04 Tailstock 1 05 KS18 B05 Quick release lever 5 16 2 06 KS18 B06 Clamping lever 1 07 KS18 B07 Stop rod 2 08 KS1...

Страница 43: ...cover plate 1 26 KS18 B26 Round head screw 10 24unc x 5 16 17 27 KS18 B27 Strain relief PGll 1 28 KS18 B28 Strain relief PG9 4 29 KS18 B29 Stop plate 1 30 KS18 B30 Round head screw 1 4 20UNC x 3 8 1 3...

Страница 44: ...70 Parts list C Stand Position number Part no Description Specification Quantity 01 KS18 C01 Stand for left and right hand use 2 02 KS18 C02 Washer 3 8 8 03 KS18 C03 Spring washer 3 8 8 04 KS18 C04 H...

Страница 45: ...witch for forward and reverse operation Green button ON SB1 U1 Frequency converter Delta VFD S 015S21U Speed display sensor Safety plug SA1 ON OFF Appendix 3 Circuit diagram Fig 71 Circuit diagram key...

Страница 46: ...of the Original Instruction Manual Version 1 0 Appendix 4 Drilling template auxiliary support for cutting out printing 1 150 mm total board length EB I Hole 9 mm I I t Place at board edge 50 mm 20 mm...

Отзывы: