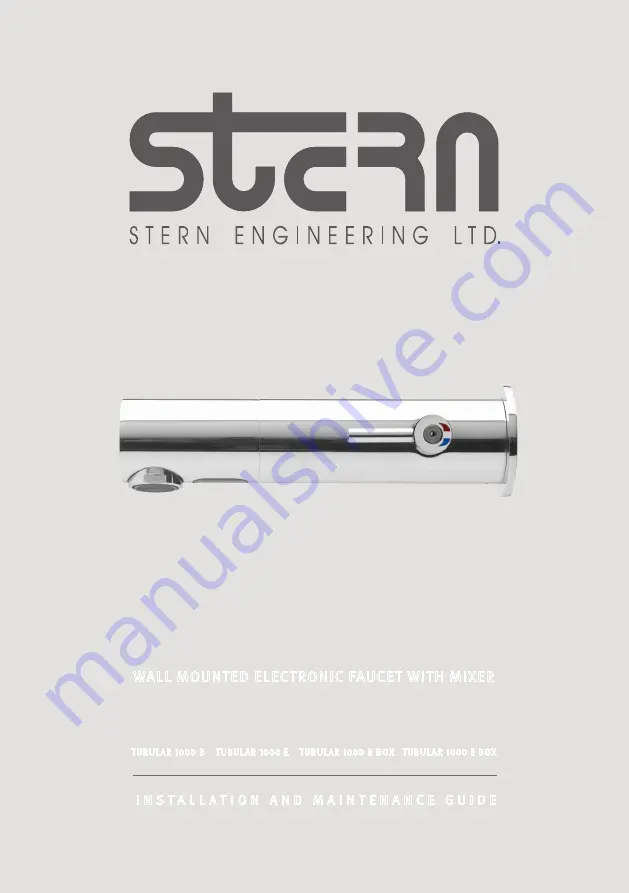
Wall mounted electronic faucet With mixer
TUBULAR 1000 SERIES
tubular 1000 b tubular 1000 e tubular 1000 b box tubular 1000 e box
i n s t a l l a t i o n a n d m a i n t e n a n c e g u i d e
Страница 1: ...Wall mounted electronic faucet with mixer TUBULAR 1000 SERIES Tubular 1000 B Tubular 1000 E Tubular 1000 B Box Tubular 1000 E Box I n s t a l l a t i o n a n d m a i n t e n a n c e g u i d e...
Страница 2: ...right subject to all applicable laws at any time at its sole discretion and without notice to discontinue or change the features designs materials and other specifications of its products and to eith...
Страница 3: ...len key 1x Allen key Power splitter Power splitter Temporary protective cover Spout and attachments incl electronic unit Tubular base Wall rosette M4x6 screw Rigid pipes not supplied Box mounting pack...
Страница 4: ...cordance with applicable codes and regulations STEP 1 INSTALLING THE FAUCET 1 Shut off the water supply 2 Drill a hole 28 to 29 mm where you want to install the spout of the faucet and a small hole ju...
Страница 5: ...cable coming from the electronic unit that leads to the solenoid valves to the power splitter Important This product includes a self adjusting sensor The ideal sensor range for the specific location w...
Страница 6: ...over Step 3 Connecting the power source 1a For Tubular 1000 B Connect the cable coming from the electronic unit in the Tubular base leading to the power source to the battery box from the electronic u...
Страница 7: ...in wall level b Cut the box mud guard cover wherever required by the installation 9 Assemble the wall rosette over the Tubular base and secure it using the 2 screws provided 10 Connect the cables fro...
Страница 8: ...ge for the specific location will be set automatically OBJECT Before proceeding check that no objects are in front of the sensor besides the washbasin Now remove the protective sticker that covers the...
Страница 9: ...second as an indication that the ideal sensor range was set and the product is ready for use Security time The Security time prevents continuous running of water due to reflections or vandalism By def...
Страница 10: ...lows Press the IN button Wait until a quick flashing of the red light in the sensor eye is perceived Then press to increase the delay in time and to reduce it Delay OUT time This button allows modifyi...
Страница 11: ...ng water supplies f Make sure that there is no water leakage 2 For Tubular 1000 B Box and Tubular 1000 E Box a Release the screws at the panel and remove it Turn off the regulating valve b Disassemble...
Страница 12: ...return to normal operation remove any blockage In this case the water flow will stop anyway after 90 seconds because of the security time SOLUTION CAUSE INDICATOR PROBLEM Replace battery Low battery 1...
Страница 13: ...08 17 015350800 D 777 Passaic Avenue Clifton NJ 07012 USA Tel 1 973 773 8011 Fax 1 973 779 8768 Toll Free 1 800 4364410 info sternfaucets com tech sternfaucets com...