49
˙
The illustration below shows the result of increasing (right) or decreasing (left) the
setting.
If setting values are not changed within 12 seconds, or the ENTER key is not
pressed, no change is made.
1.When you reach your workout goal (time, distance, calories), or during pause
mode, press < STOP/PAUSE/HOLD TO RESET > key to stop the workout and enter
COOL DOWN. The data screen will display “COOL DOWN”. The COOL DOWN will
end when 2 minute timer is up.
2.Once “COOL DOWN” is completed, the data screen will display “ACCU DATA”,
including user’s workout time, distance, calorie, average heart rate and energy
generated. Press < STOP/PAUSE/HOLD TO RESET > key at this time to return to
BANNER/SELECT PROGRAM screen.
The USB port in this product can be used for providing 5V 500mA of power for
devices such as USB memory sticks, iPod devices, cameras, mobile phones, and
other items. (Third generation or newer iPod devices support power charging via USB
ports.)
Note: iPod is a trademark of Apple Inc., registered in the US and other countries.
"Made for iPod" means that an electronic accessory has been designed to connect
specifically to iPod and has been certified by the developer to meet Apple
performance standards. Apple is not responsible for the operation of this device or its
compliance with safety and regulatory standards.
While user’s workout summary (workout time, distance, calorie, and average heart
rate) is been displaying, press the < STOP/PAUSE/HOLD TO RESET > key, the data
screen will display total energy generated: WATTS GENERATED=XXXX.XX WH.
After 50 seconds of displaying time or press < STOP/PAUSE/HOLD TO RESET > key
again, it will return to BANNER/SELECT PROGRAM screen.
USB Port
Cool Down
OPERATION
Other Notes
OPERATION
Cumulative energy generating display (WH)
OPERATION
Содержание G572U
Страница 1: ...2011 12 G572U BIKE ...
Страница 5: ...2 2 IMPORTANT SAFETY PRECAUTIONS Such parts ...
Страница 7: ...4 a ...
Страница 16: ...13 STEP 6 Move the Product Lift the rear support and push rolling the bike into place for use c a b ...
Страница 18: ...STEP 8 Install the Boost Converter Box 15 ...
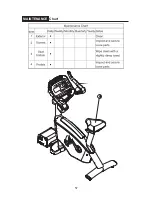
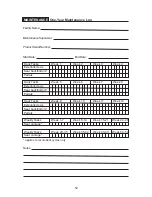
Страница 60: ...57 MAINTENANCE Chart ...
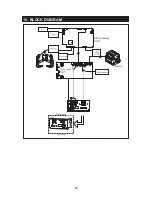
Страница 63: ...60 10 BLOCK DIAGRAM CN1 CN8 CN4 CN 7 CN5 CN3 CN6 CN9 CN2 ...
Страница 68: ...12 GREEN SYSTEM CABLE CONNECTION ILLUSTRATION 65 Your Authorized SPORTS ART Distributor ...


