VAIO Computer Quick Start
102
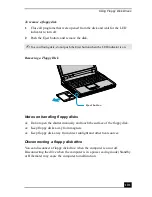
To disconnect a floppy disk drive
1
Close any active programs to prevent data loss.
2
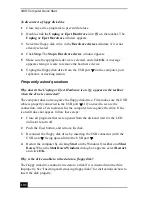
Double-click the Unplug or Eject Hardware icon
on the taskbar. The
Unplug or Eject Hardware window appears.
3
Select the floppy disk drive in the Hardware devices window, if it is not
already selected.
4
Click Stop. The Stop a Hardware device window appears.
5
Make sure the appropriate device is selected, and click OK. A message
appears stating it is safe to remove the hardware device.
6
Unplug the floppy disk drive from the USB port
on the computer, port
replicator, or docking station.
Frequently asked questions
Why doesn’t the Unplug or Eject Hardware icon
appear on the taskbar
when the drive is connected?
The computer does not recognize the floppy disk drive. First, make sure the USB
cable is properly connected to the USB port
. If you need to secure the
connection, wait a few moments for the computer to recognize the drive. If the
icon still does not appear, follow these steps:
1
Close all programs that were opened from the disk and wait for the LED
indicator to turn off.
2
Push the Eject button, and remove the disk.
3
Reconnect the floppy disk drive by inserting the USB connector (with the
USB icon
facing upward) into the USB port
.
4
Restart the computer by clicking Start on the Windows® taskbar and Shut
Down. When the Shut Down Windows dialog box appears, select Restart,
and click OK.
Why is the drive unable to write data to a floppy disk?
The floppy disk drive cannot write data to a disk if it is inserted into the drive
improperly. See “Inserting and removing floppy disks” for instructions on how to
insert the disk properly.
Содержание VAIO PCG-R505GCK
Страница 8: ...VAIO Computer User Guide 8 ...
Страница 28: ...VAIO Computer Quick Start 28 ...
Страница 29: ...29 Internet and Network Connections Internet Connections Network Connections Connecting Another VAIO Computer ...
Страница 47: ...53 CDs DVDs and Optical Drives Inserting and Ejecting CDs or DVDs Copying and Playing CDs Playing DVDs ...
Страница 57: ...63 Printer Connections Printing With Your Computer ...
Страница 62: ...VAIO Computer Quick Start 68 6 Click OK ...
Страница 86: ...VAIO Computer Quick Start 92 ...
Страница 87: ...93 Connecting Mice and Keyboards Using External Mice and Keyboards ...
Страница 92: ...VAIO Computer Quick Start 98 ...
Страница 93: ...99 Floppy Disk Drives and PC Cards Using Floppy Disk Drives Using PC Cards ...
Страница 104: ...VAIO Computer Quick Start 110 ...
Страница 105: ...111 Docking Stations Connecting the Docking Station ...
Страница 114: ...VAIO Computer Quick Start 120 ...
Страница 135: ...141 Preinstalled Programs Software Programs On Your Computer DVgate Application Notes Program Support Information ...
Страница 146: ...VAIO Computer Quick Start 152 ...
Страница 147: ...153 Memory Upgrades Upgrading Your Computer s Memory ...
Страница 154: ...VAIO Computer Quick Start 160 ...
Страница 155: ...161 Using the Recovery CDs Application and System Recovery CDs Using Your Recovery CDs ...


