VAIO Computer Quick Start
156
5
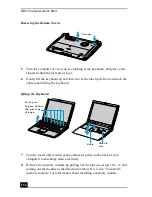
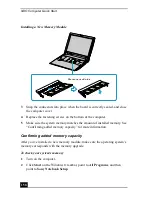
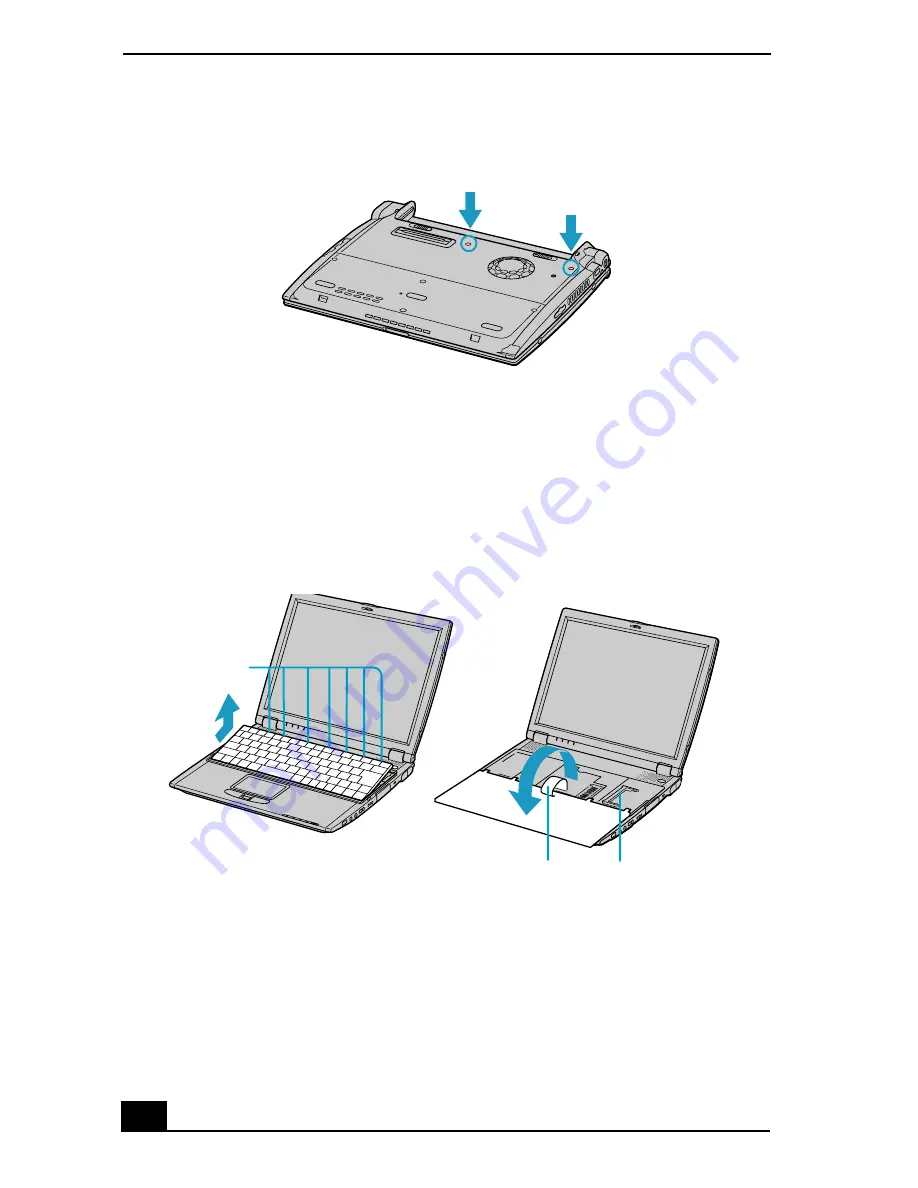
Turn the computer over so you are looking at the keyboard, and place your
fingers behind the last row of keys.
6
Gently lift the keyboard up and turn it over the touch pad. Do not detach the
cable when lifting the keyboard.
7
Touch a metal object (such as the connector panel on the back of your
computer) to discharge static electricity.
8
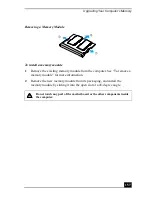
Remove the memory module by pulling out the tabs (see arrows No. 1), and
pulling out the module in the direction of arrow No. 2. See “To install a
memory module” for information about installing a memory module.
Removing the Bottom Screws
Lifting the Keyboard
Screws
Cable
Place your
fingers behind
the last row
of keys
Module
slot
Содержание VAIO PCG-R505GCK
Страница 8: ...VAIO Computer User Guide 8 ...
Страница 28: ...VAIO Computer Quick Start 28 ...
Страница 29: ...29 Internet and Network Connections Internet Connections Network Connections Connecting Another VAIO Computer ...
Страница 47: ...53 CDs DVDs and Optical Drives Inserting and Ejecting CDs or DVDs Copying and Playing CDs Playing DVDs ...
Страница 57: ...63 Printer Connections Printing With Your Computer ...
Страница 62: ...VAIO Computer Quick Start 68 6 Click OK ...
Страница 86: ...VAIO Computer Quick Start 92 ...
Страница 87: ...93 Connecting Mice and Keyboards Using External Mice and Keyboards ...
Страница 92: ...VAIO Computer Quick Start 98 ...
Страница 93: ...99 Floppy Disk Drives and PC Cards Using Floppy Disk Drives Using PC Cards ...
Страница 104: ...VAIO Computer Quick Start 110 ...
Страница 105: ...111 Docking Stations Connecting the Docking Station ...
Страница 114: ...VAIO Computer Quick Start 120 ...
Страница 135: ...141 Preinstalled Programs Software Programs On Your Computer DVgate Application Notes Program Support Information ...
Страница 146: ...VAIO Computer Quick Start 152 ...
Страница 147: ...153 Memory Upgrades Upgrading Your Computer s Memory ...
Страница 154: ...VAIO Computer Quick Start 160 ...
Страница 155: ...161 Using the Recovery CDs Application and System Recovery CDs Using Your Recovery CDs ...

