73
Configuring Recording Schedules
C
h
ap
te
r 4
A
pplic
at
io
n
S
e
tti
n
gs
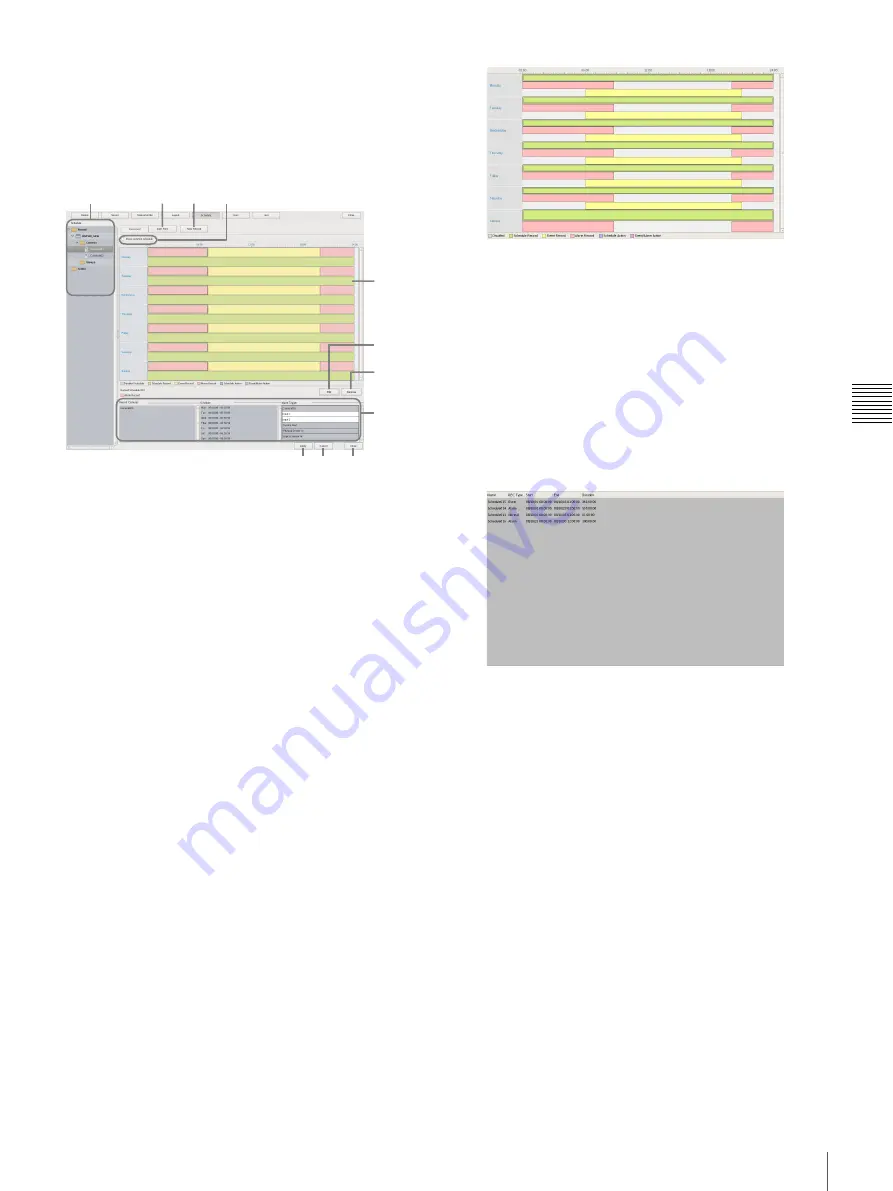
Setting Items of Schedule Screen
This screen is displayed by clicking [Schedule] in the
Configuration window.
Screen example: When recurrent schedule (recurrent
view)
A
[Schedule] Tree
This displays a list of the cameras.
Selecting cameras from the tree displays the configured
schedule in the area on the right.
B
Recurrent/Date and Time View Selection
Button
Recurrent
Switches to recurrent view.
Date Time
Switches to date and time view.
C
New Record
This displays the New Record dialog box
for
creating a new schedule manually.
D
Common Schedule Display
Select the check box to display the schedules common to
each of the cameras.
E
Schedule View
This displays the details of the schedule.
When recurrent view:
In this view, schedule items are color-coded by action
for each day of the week.
• Guide lines are shown in 15-minute intervals, and by
dragging the edges of each scheduled time slot, you
can change the start and end times of the action.
When you want to configure the time in detail, click
[Edit] and make adjustments in the Schedule
Configuration dialog box that appears.
• Selecting each time slot displays information such as
the camera target for recording and the duration in
area
H
.
When date and time view:
In this view, a list of the schedules that have been
configured are displayed.
• Selecting each schedule displays information such
as the camera target for recording and the duration in
area
H
.
F
Edit
This displays the Schedule Configuration dialog box for
changing schedule settings.
G
Remove
This deletes the selected schedule.
H
Show Configuration Information
This displays the configuration information of the selected
schedule.
I
Apply
This saves the settings.
J
Cancel
This cancels the changes to the settings.
K
Close
This closes the screen.
C
D
B
A
E
H
K
G
F
I J
Содержание NSR-500
Страница 117: ...117 System Administration Chapter 5 Operation and Control 4 Click Close The Export screen closes ...
Страница 133: ......


