1-8
CCU-TX7 (E)/V1
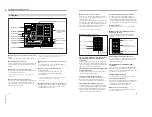
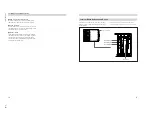
Rear Panel
1
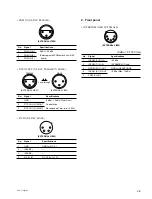
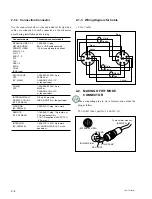
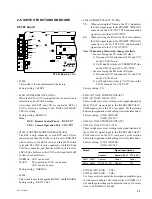
PGM IN (program audio input) connector (XLR
3-pin)
The program audio signal is input via this connector.
2
CAMERA connector (triaxial)
Connect a triaxial cable here to connect this unit to the
CA-TX7/TX7P Camera Adaptor attached to a video
camera.
3
RTS (intercom) connector (XLR 3-pin)
Use this connector to connect an RTS intercom system
or a Clear-Com intercom system.
Contact a Sony service representative before using this
connector.
4
COAX (coaxial) connector (BNC type)
Use this connector for input and output of signals from
the video camera connected via a coaxial cable. No
power is supplied to the video camera or camera
adaptor via the coaxial cable.
CAMERA
COAX
VBS1
R/R-Y/C
GENLOCK
PROMPT VIDEO
DC IN
AC IN
RETURN
VIDEO
1
RETURN
VIDEO
2
VBS2
PIX
1
2
G/Y/Y
1
2
B/B-Y
1
2
WF
SYNC
SPARE
REMOTE
WF MODE
BREAKER
INTERCOM/TALLY
CH1
CH1
CH2
RS232C
CH2
PGM IN
RTS
INPUT
OUTPUT
MIC OUT
75
Ω
ON
OFF
75
Ω
ON
OFF
75
Ω
ON
OFF
75
Ω
ON
OFF
9
OUTPUT connectors
0
INPUT connectors
and 75
Ω
termination
switches
!¡
DC IN connector
!™
MIC OUT connectors
!£
AC IN connector
!¢
Breaker switch
1
PGM IN connector
2
CAMERA connector
3
RTS connector
4
COAX connector
5
REMOTE connector
6
WF MODE connector
7
INTERCOM/TALLY
connector
8
RS232C connectors
Internal board settings must be changed before using this
connector. For details, contact a Sony service
representative.
5
REMOTE (remote control panel) connector (10-
pin)
Use this connector to connect the RCP-TX7 Remote
Control Panel via a CCA-7 cable.
6
WF MODE (waveform monitor mode)
connector (4-pin)
Connect to the corresponding connector on a
waveform monitor when monitoring signals in
sequential mode.
Internal board settings must be changed before using this
connector. For details, contact a Sony service
representative.
7
INTERCOM/TALLY connector (D-sub 25-pin)
Intercom signals and tally signals are input and output
via this connector. Connect to the intercom system’s
INTERCOM/TALLY connector.
14
Location and Function of Parts
8
RS232C connectors (D-sub 25-pin)
There are two connectors, CH1 and CH2. You can use
these connectors to connect a personal computer to
control the video camera.
You may also use these connectors to connect this unit
to another CCU-TX7/TX7P unit. It is possible to carry
out color balancing or linked iris adjustment between
two or more interconnected CCU-TX7/TX7P units
using the RCP-TX7 Remote Control Panel.
For details, see the RCP-TX7 Operation Manual.
9
OUTPUT connectors (BNC type)
R/R–Y/C, G/Y/Y, and B/B–Y (component video
signal/RGB signal/Y and C signal output)
connectors
Use these connectors to output component signals (R–
Y, B–Y, and Y), R, G, and B signals (for chroma key),
and Y and C signals. Use a switch on an internal board
(ES-20) to select the type of output signal.
VBS1 and VBS2 (composite video signal 1 and
2 output) connectors
Use these connectors to output signals from a video
camera as composite video signals.
SYNC (sync signal output) connector
This connector outputs a SYNC signal (0.3 Vp-p, 75
Ω
). Connect to the synchronization signal input
connector on a waveform monitor or video monitor.
PIX (picture monitor output) connector
Use this connector to output a video signal to a video
monitor. Use the MONITOR SELECT button on the
RCP-TX7 Remote Control Panel to set the type of
signal to be output. Selection of the signal type also
applies to the output from the WF connector.
VBS1
R/R-Y/C
VBS2
PIX
1
2
G/Y/Y
1
2
B/B-Y
1
2
WF
SYNC
SPARE
OUTPUT
PIX connector
WF connector
SPARE connector
SYNC connector
R/R–Y/C, G/Y/Y, and B/B–Y connectors
VBS1 and VBS2 connectors
WF (waveform monitor output) connector
Use this connector to output a video signal to a
waveform monitor. Use the MONITOR SELECT
button on the RCP-TX7 Remote Control Panel to set
the type of signal to be output. Selection of the signal
type also applies to the output from the PIX connector.
SPARE connector
This connector is not used (it is reserved for future
use).
0
INPUT connectors (BNC type) and 75-
Ω
termination switches
This section includes four pairs of loop-through
connectors and corresponding 75-
Ω
termination
switches.
GENLOCK (generator lock) connectors
Use these connectors to input a reference sync signal
(black burst signal or composite video signal) for
external synchronization .
RETURN VIDEO 1 and RETURN VIDEO 2
connectors
These connectors correspond to the RETURN 1 and
RETURN 2 buttons on the CA-TX7/TX7P Camera
Adaptor. Two sets of return video signals can be input
via these two pairs of connectors.
PROMPT VIDEO connectors
Use these connectors to input teleprompter signals.
75-
Ω
termination switches
When only one loop-through connector is used and the
other connector in the pair is not connected to any
external device, set the corresponding 75-
Ω
termination switch to the ON position.
!¡
DC IN connector (XLR 4-pin)
Use this connector to operate this unit using a DC
power source (10.5 to 17 V).
GENLOCK
PROMPT VIDEO
RETURN
VIDEO
1
RETURN
VIDEO
2
INPUT
75
Ω
ON
OFF
75
Ω
ON
OFF
75
Ω
ON
OFF
75
Ω
ON
OFF
GENLOCK connectors
RETURN VIDEO 1 and
RETURN VIDEO 2 connectors
PROMPT VIDEO connectors
75-
Ω
termination switches
15


