


Setting Recording Parameters
36
P/N: 1006148-01
Coll
ecting Data
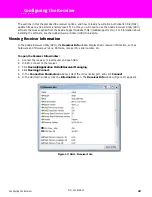
Initializing the File System Using SRU
1. Connect the receiver to a computer and run SRU. See the
Sokkia Receiver Utility
(
SRU
)
Online Help
for
more information about connecting the receiver to a computer.
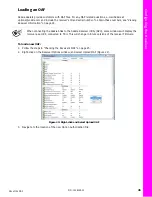
2. Click the File Explorer icon to open the File Explorer
screen.
3. On the Files
tab, press and hold the right mouse button on the file line.
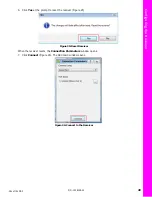
4. Click Initialize File System.
Setting Recording Parameters
The Sokkia Receiver Utility (SRU) software enables you to set logging parameters, such as logging rate and
types of messages, in which to record data. This software is available from http://sokkiasupport.com, and the
SRU Online Help
is available only in the software. See the
SRU Online Help
for more information. The Sokkia
Atlas is compatible with any Sokkia field software for configuration and recording raw data.
Logging Rates
The amount of memory used to log data depends on the logging rate. For more information about setting
logging rate parameters, see the
SRU Online Help
.
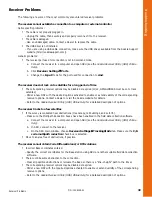
Recording Data
You can log raw GNSS data to the receiver’s SD/SDHC card and use the Sokkia Receiver Utility (SRU) or
MAGNET
®
Office software to download the files to a computer.
To start or stop recording data, use the LED display panel or SRU:
1. Press the Power button to turn on the receiver.
2. Wait for the STAT LED to indicate satellites are being
tracked. The STAT LED blinks green for GPS satellites
and amber for GLONASS satellites.
A short red blink
indicates the receiver has not solved a position. Five
or more satellites provide optimal positioning.
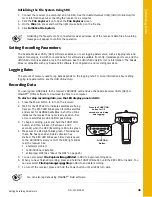
3. To begin recording, press and hold the FUNCTION
button, and then release it (between 1 and 5
seconds) when the REC (Recording) LED turns green.
4. Make sure the REC light blinks green. This indicates
that a file has opened and data collection has
started. The REC LED blinks each time data is saved
to the SD/SDHC memory card. If the REC light blinks
red, the receiver has:
•
a hardware problem
•
no SD/SDHC card installed
•
an improper OAF (See “About the OAF” on page 25)
5. You can also select File Explorer
Logs
Start in SRU to begin recording data.
6. When you have finished recording, press and hold the FUNCTION button until the REC LED turns dark. You
can also select File Explorer
Logs
Stop in SRU to end data recording.
7. To turn off the receiver, press and hold the Power button until all LEDs turn dark.
Initializing the file system of a connected receiver will erase all of the receiver’s data files. A warning
message will appear to confirm the operation.
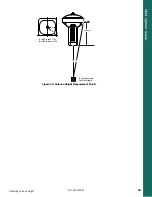
FUNCTION
FUNCTION
FUNCTION
Button
Press the FUNCTION
button for 1–5
seconds to start/stop
data logging.
You can also log data using MAGNET
®
Field software.