


Setting Up the Rover Receiver
33
P/N: 1006148-01
Field Sys
tem Setup
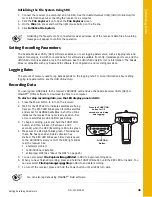
Setting Up the Rover Receiver
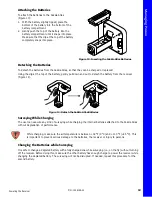
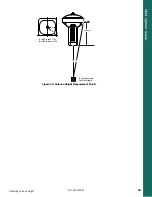
1. If needed, attach the quick disconnect to a
bi-pod/range pole.
2. Attach the receiver to the quick
disconnect. Make sure the receiver locks
into place.
3. If you are not using a fixed height rover
pole, measure the height of the receiver
from the ground. See “Measuring Antenna
Height” on page 33.
4. Attach the antenna to the antenna
connector.
5. Press the power button to turn on the
receiver. The integrated wireless device in
the receiver turns on when the receiver is
powered.
6. View the LED display panel for the
receiver’s current status. See also “Display
Panel Operations” on page 11.
Measuring Antenna Height
The receiver calculates the coordinates of the antenna’s phase center. To determine the coordinates of the
station marker, specify the following:
•
Measured height of the antenna above the station marker
•
Method of measuring the antenna height
•
Model of the antenna/receiver used
Any necessary antenna phase center adjustments, based on the antenna model, is automatically applied. This
adjustment, when combined with accurately measured height and measurement methods, allows for correctly
computed reference marker coordinates.
To accurately measure the antenna height:
1. Measure the antenna height above the control point or marker, either the slant height or the vertical
height.
You may either measure the vertical height to the Antenna Reference Point (ARP) located at the bottom of
the receiver at the base of the mounting threads, or measure the slant height to the Slant Height
Measurement Mark (SHMM) on the side of the receiver. For ARP and SHMM marks on the receiver, see
Figure
32
on
page
34
.
2. Record the antenna height, points name, and start time in the field notes.
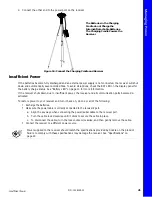
Use a bi-pod during post-
process surveys to ensure the
antenna/receiver does not
move during data logging.
Lock
Sokkia Atlas Recevier
5/8 inch Screw
Quick Disconnect (Optional)