background image


29 


2 YEAR LIMITED WARRANTY 


For two (2) years from purchase date for the original purchaser's use, SNAPPER, through any authorized 
SNAPPER dealer will replace, free of charge (except for taxes where applicable), any part or parts found upon 
examination by the factory at McDonough, Georgia, to be defective in material or workmanship or both. 
 
SNAPPER
 FIELD SERVICEABLE SPINDLES and their components used on SNAPPER PRO

®

 Mid Size walks 

and SNAPPERZRIDER

®

 ride on commercial equipment have a three (3) year limited warranty against defects in 

material or workmanship or both. 
 
All transportation costs incurred by the purchaser in submitting material to an authorized SNAPPER dealer for 
replacement under this warranty must be paid by the purchaser. 
 
This warranty does not apply to engines and their components, and batteries, as these items are warranted 
separately. This warranty does not apply to parts that have been damaged by accident, alteration, abuse, 
improper lubrication, normal wear, or other cause beyond the control of SNAPPER. This warranty does not 
cover any machine or component that has been altered or modified, changing safety, performance, or durability. 
 
Batteries have a one (1) year prorated warranty period with free replacement if required during the first ninety 
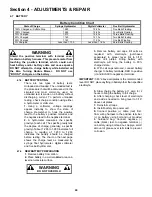
(90) days from the original purchase date. SNAPPER will not be responsible for any installation cost incurred. 
The battery warranty only covers original equipment batteries and does not cover damage to the battery or 
machine caused by neglect or abuse, destruction by fire, explosion, freezing, overcharging, improper 
maintenance, or use of improper electrolyte. 
 
There is no other express warranty. 
 

DISCLAIMER OF WARRANTY 

Implied warranties, including those of merchantability and fitness for a particular purpose, are limited to 
two (2) years from purchase date for the original purchaser's use, and up to the extent permitted by law 
and all implied warranties are excluded. This is the exclusive remedy. Liabilities for consequential 
damages, under any and all warranties are excluded. 
 
Some states do not allow limitations on how long an implied warranty lasts, or do not allow the 
exclusion or limitation of incidental or consequential damages, so the above limitation or exclusion may 
not apply to you. 
 
This warranty gives you specific legal rights, and you may also have other rights which vary from state to state. 
 

WARNING:

 THE USE OF REPLACEMENT PARTS OTHER THAN GENUINE SNAPPER PARTS MAY IMPAIR THE 

SAFETY OF SNAPPER PRODUCTS AND WILL VOID ANY LIABILITY AND WARRANTY BY SNAPPER ASSOCIATED 
WITH THE USE OF SUCH PARTS.
 
 
IMPORTANT: Please fill out the attached SNAPPER Product Registration Card immediately and mail to: 

Snapper’s Product Registration Center, P.O. Box 1379, McDonough, Georgia. 30253 


Содержание EZF2100DKU, EZF2300GKU, EZF520

Страница 1: ...3 Engine Horse Power G Gasoline Fuel Engine F Out Front Mower MOWER UNIT Z Zero Turning Hydro Drive 52 Mower Cutting Width 00 Series Designation M Mower Deck F Out Front Mower 61 Mower Cutting Width T...

Страница 2: ...other attachments these affect the handling and the stability of the machine 1 DO NOT operate machine on slopes exceeding 15 degrees 27 grade 2 Exercise EXTREME CAUTION on slopes above 10 degrees 18 g...

Страница 3: ...ction Inspect machine and repair damage before resuming operation OPERATION Continued From Previous Column 12 Mow only in daylight or with good artificial light 13 Move motion control levers SLOWLY to...

Страница 4: ...NTS AND REPAIR 19 25 Neutral Position Adjustments 19 Mower Deck Adjustment Levelness 19 20 Parking Brake Adjustment 20 Engine Adjustments Repair 20 Mower Blade Replacement 20 21 Blade Sharpening 21 Mo...

Страница 5: ...re information above Figure 1 1 shows the essential parts of the SNAPPER OUT FRONT Z RIDER It is recommended that all operator s of this equipment become thoroughly familiar with the controls componen...

Страница 6: ...Pull switch up ON to engage blade Push switch down OFF to disengage blade IMPORTANT Mower Blade Control Switch must be in OFF disengaged position to start engine SYMBOLS Hearing protection required du...

Страница 7: ...ear the mowing area of all objects that could cause injury if thrown by blades Read and understand all manuals and instructions furnished with the machine DO NOT operate machine on slopes greater than...

Страница 8: ...e is running STOP engine Allow all motion to completely stop before approaching SYMBOLS DO NOT perform any service maintenance adjustments or repairs with the engine running STOP engine STOP blades En...

Страница 9: ...fuel to tank of the Out Front Z Rider outside where fumes can safely dissipate Make sure fuel filler cap is tight Refer to engine owner s manual for fuel specifications 2 1 7 COLD ENGINE ONLY Check e...

Страница 10: ...maximum Moving the joystick farther from the neutral position will cause the speed of motion to increase To turn move the joystick towards the side you want to turn to DO NOT make sudden changes in s...

Страница 11: ...ne speed control to the Rabbit or fast position 2 Pull the blade switch out into the ON position to engage the mower blades 3 Release the parking brake 4 Move joystick carefully in the desired directi...

Страница 12: ...ight of cut release switch See Figure 2 10 Observe the height of cut decal located on the upper right top side of the deck to place deck at the correct height of cut See Figure 2 10 NOTE The engine do...

Страница 13: ...running adjust engine speed control to Rabbit or Fast position 2 Release parking brake 3 Move joystick lever carefully and slowly into desired speed position A small movement of the joystick can cause...

Страница 14: ...1 FIGURE 3 1 3 After all the oil has drained reinstall oil drain plug and tighten securely See Figure 3 1 Wipe up any oil that may have spilled Dispose of drained oil properly 4 Fill engine crankcase...

Страница 15: ...wer Deck Levelness Check mower deck for proper levelness Adjust as required Refer to Section MOWER DECK ADJUSTMENT LEVELNESS 4 Cleaning Mower Deck a Remove key from ignition switch b Remove spark plug...

Страница 16: ...ermine the recommended change interval FIGURE 3 6 3 Power Transfer Shaft Lubricate power transfer shaft with Kendall NLGI No 2 lithium grease or equivalent from a grease gun See Figure 3 7 FIGURE 3 7...

Страница 17: ...briefly with air vent plug loosened to purge all air from system FIGURE 3 8 3 6 DECK REMOVAL Move machine to an area where the mower deck is to be disconnected Turn engine OFF but leave key switch in...

Страница 18: ...from mower deck FIGURE 3 10 FIGURE 3 11 3 7 POWER TRANSFER SHAFT REMOVAL Engage parking brake Turn engine OFF and remove key The power transfer shaft connects the power unit to the mower deck The shaf...

Страница 19: ...nto the cross shaft arms and reconnect Tighten securely 9 Reconnect park brake rod 10 Start engine Release park brake Wheels should not be rotating if adjusted properly Repeat adjustment if necessary...

Страница 20: ...r blades running Stop blades Stop engine Set brake Remove key Remove spark plug wires from spark plugs and gas only secure wires away from spark plugs Engine and components are HOT Avoid serious burns...

Страница 21: ...e is in good condition sharpen at 22 to 28 degrees DO NOT sharpen beyond existing cutting edge See Figure 4 7 4 Check blade balance after sharpening If necessary correct blade balance by grinding the...

Страница 22: ...be necessary to use a pry bar to pull idler pulley back to install belt See Figure 4 8 2 Reinstall belt cover FIGURE 4 8 4 6 3 ENGINE BELT REMOVAL 1 Remove radiator screen 2 Remove nut and bolt that s...

Страница 23: ...hly corrosive liquid Wear eye protection Wash affected areas immediately after having eye or skin contact with electrolyte acid Battery acid is corrosive Rinse empty acid containers with water and mut...

Страница 24: ...measures the specific gravity of each cell The specific gravity tells the degree of charge generally a specific gravity of about 1 265 to 1 280 indicates full charge A reading of 1 230 to 1 260 indica...

Страница 25: ...The bearing is sealed shielded on one side only The bottom bearing must be installed with the sealed shielded side DOWN 7 Insert spindle shaft up through the bottom bearing Slide spacer down over spin...

Страница 26: ...Excessive load on engine 1 Lessen load 2 Engine air pre cleaner or air cleaner dirty 2 Clean or replace filters 3 Engine oil level low 3 Fill with engine oil to proper level 4 Fuel injection nozzle c...

Страница 27: ...el 6 Excessive deck pitch front to rear 6 Adjust front to rear level 7 Cutting blade s dull or damaged 7 Sharpen cutting edges or replace blade s 8 Blade belt slipping 8 Replace blade belt 9 Check ele...

Страница 28: ...r Blades Check For Wear Damage Replacement Pages 14 20 21 X Mower Deck Clean Outside Underside of Debris Accumulation Page 15 X Lubrication Points Grease or Oil Pages 15 16 X X Hydrostatic Trans Oil C...

Страница 29: ...from the original purchase date SNAPPER will not be responsible for any installation cost incurred The battery warranty only covers original equipment batteries and does not cover damage to the batter...

Страница 30: ...30 NOTES...

Страница 31: ...31 NOTES...

Страница 32: ...and Follow all warnings and instructions in this manual the engine manual and on the machine engine and attachments If you have any questions about your Snapper product contact your local authorized...

Отзывы: