14
3.2.2 Manually Selecting an Advanced Feature Course:
1. You must have a Membership and have downloaded an Advanced Feature Course map to be able to
select it on the SGX
W
. See Section 2.4 for more information.
2. On the
Main Menu
, select either “Courses” or “Play Golf”.
3. On the
Course Selection
screen, scroll to the course name you want, then press the Right Key under “OK”.
3.3 Target Views
(Available on Advanced Feature Courses through Membership Only)
The SGX
W
offers several target view options to represent key distance information in a variety of ways. Enable
the target views that best fit your style of play. By default, Target Views are turned ON. However, you may
choose the target views you prefer to see on each hole by changing the Target View setting.
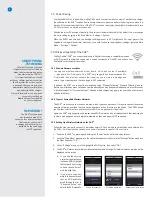
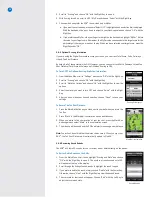
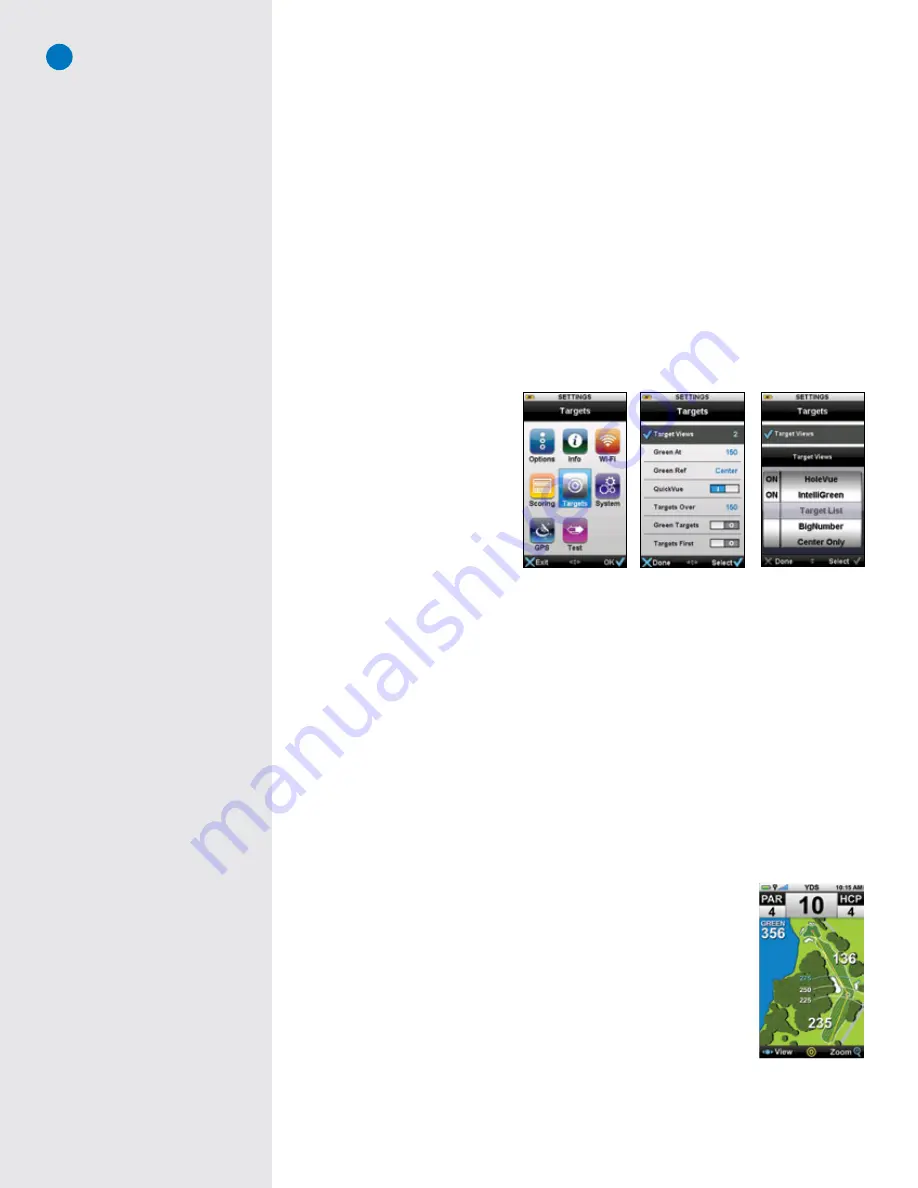
To change the Target View setting:
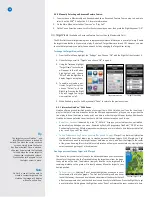
1. From the Main Menu, highlight the “Settings” icon. Choose “OK” with the Right Soft key to select it.
2. Under Settings, scroll to “Targets” and choose “OK” to open it.
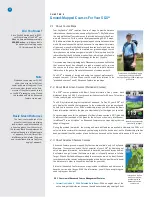
3. Using the Trackpad, highlight
“Target Views” (a checkmark
will appear to the left when
highlighted) and choose
“Select” with the Right Key to
display Target View options.
4. To enable or disable a par-
ticular Target View option,
choose “Select” with the
Right Key. Pressing the Right
Key will toggle the target
view selection on/off.
5. When finished, press the Left Key beneath “Done” to return to the previous screen.
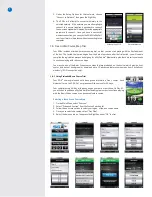
3.3.1 Interactive HoleVue™ With Zoom:
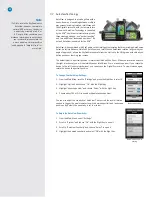
HoleVue offers a ground-rectified graphic of every golf hole. With HoleVue, you’ll see the ideal line of
play for that hole, real-time distances for the tee shot and approach shot, plus you can re-position the
line of play to know the distance to any point on a hole in order to play with fewer strokes. Additionally,
HoleVue includes a patented zoom function to dial into the exact area you need to see.
• Know Your Location:
Indicated by a red “X”, XMark™ displays your actual position on HoleVue,
automatically updating as you move. Powered by SkyGolf’s proprietary TruePoint™ GPS Precision
Positioning Technology, XMark always shows where you are in relation to hole features that affect
play – even if you can’t see them!
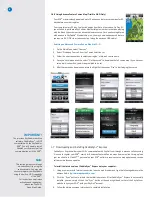
• To See Distances to Any Point on the Hole (Par 4s and 5s only):
XTarget™ is a feature of Interactive
HoleVue With Zoom that allows you to create a personal fairway targets. With XTarget, you’ll get
the distance you need to any target, layup or safe area on a hole, and from that target to the center
of the green. Knowing this critical distance information will help you save strokes by staying in the
smart zones and getting out of trouble areas.
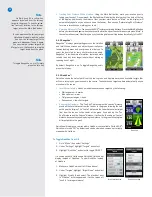
Creating a personal fairway target with XTarget:
The line of play (yellow line) will indicate the distance between your location and
the center of the green. Use the Trackpad to drag the target down from the green
to any where on the hole. The distance from your location to the target and the
remaining distance to the green will instantly appear. Move the target to your
desired position.
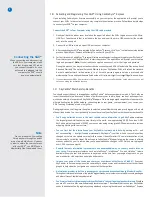
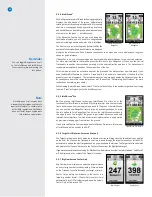
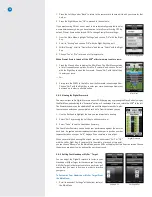
• To Zoom In or Out:
Selecting “Zoom” above the Right Key allows you to zoom
three levels of the HoleVue graphic. The first level of zoom provides a closer
look at the fairway, the second level shows a closer view of the hazards that will
affect your approach shot, and the third level zooms directly to IntelliGreen. Press the Right Key to get
back to HoleVue. Holding down the Right Key under “Zoom” will reverse the zoom one level at a time.
Target preferences
Settings menu
Target View setting
Custom Target Line
Note
On Par 3s, you will not be able to
create a custom target and the
HoleVue the image will display
without a yellow line.
Tip
The target cursor on HoleVue™ and
IntelliGreen® screens is locked by
default. To unlock the cursor on those
screens, simply press the Center
Key (Power button). Once unlocked,
slide your finger across the Trackpad
to freely move the cursor target to
the desired location and release.
Press the Center Key again to lock
the target cursor in place.
Содержание SkyCaddie SGX
Страница 1: ...SkyCaddie SGXW User Guide ...


