22
Calendar
Adding Events
1.
On any view screens of the Calendar application, tap
.
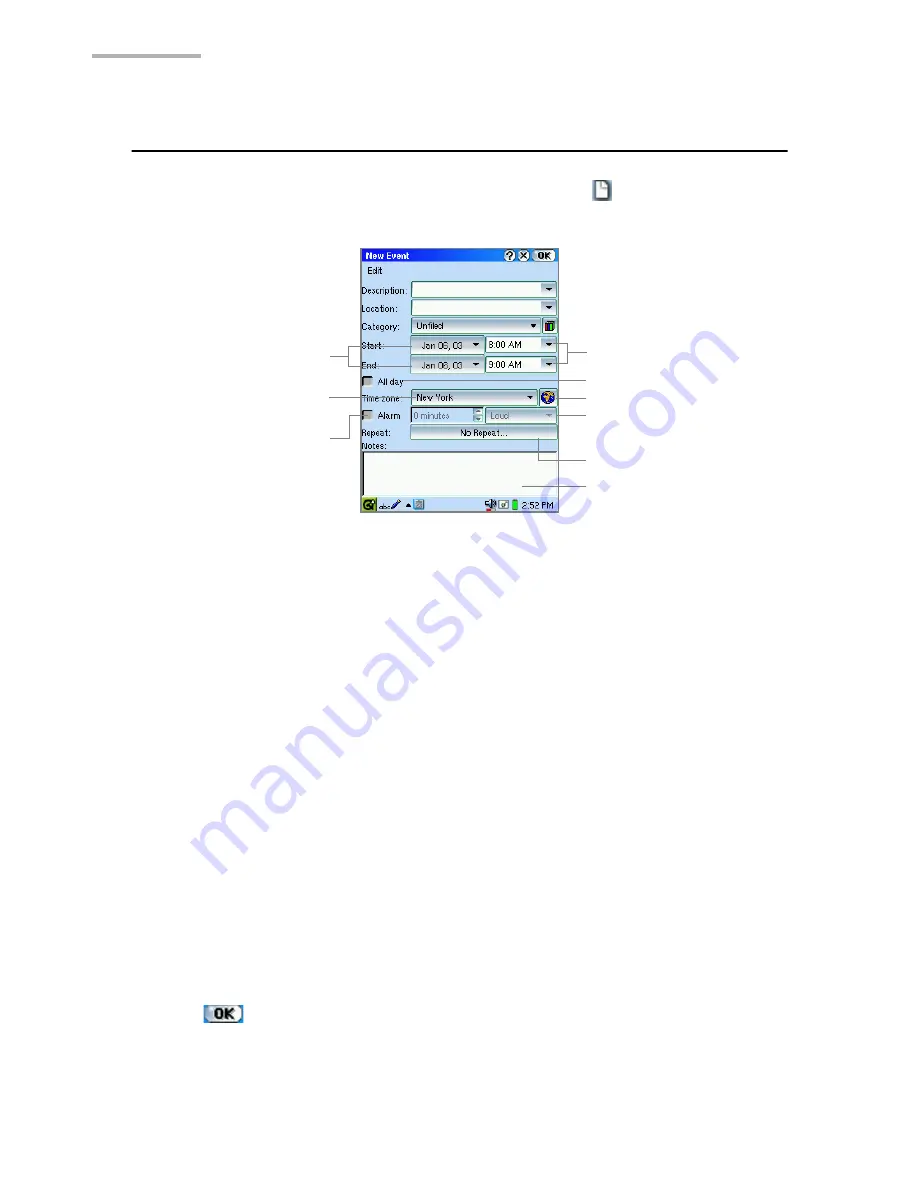
The New Event screen appears.
2.
Select/Enter the event contents.
•
For Description and Location, you can either select from the list or enter your own.
Entered items are added to the list. When items exceed 20 in number, the oldest
one will be deleted.
•
Select the desired category from the drop-down list. (“Unfiled” is the default) You
can add more category names. See the separate Start-up Guide for details.
•
To change the Start/End date, tap the Start/End date button and select the
desired day from the mini-calendar that pops up.
•
The Start/End time will be entered automatically if you tap and drag the time
buttons on the Event screen (the Day view) to specify the time. To change the
time, enter the time directly or tap Start/End time combobox buttons.
•
For the All day schedule, select the All day checkbox. With this box checked, you
cannot specify the Start/End time nor the time zone, etc.
•
You can change the time zone by tapping the City Time button. (See page 121,
“To change cities”.)
•
You can set an event alarm. (See page 23, “To set an alarm”.)
•
You can make a repeating event. (See page 23, “To repeat an event”.)
•
You can enter a note in the Notes field.
3.
Tap
to save the new event entry.
The New Event screen turns to the previous screen.
Alarm sound on/off
drop-down list button
Repeat button
Notes field
All day checkbox
Start/End date buttons
Alarm checkbox
Start/End time combobox
buttons
Time zone drop-down
list button
City Time button
Содержание SL-5600
Страница 1: ......
Страница 203: ...SHARP CORPORATION ...


