


2 – 36
GX10i
CONFIDENTIAL
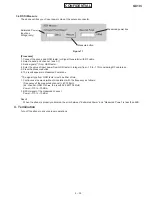
[3] Adjustment procedures after replacement of the parts
Be sure to make adjustments to the parts as shown in the table below.
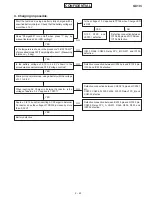
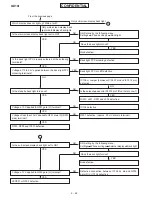
1. Adjustment procedures of camera temperature
1.
Place a thermometer near the unit to be adjusted. Make sure the room temperature is over 0
°
C.
2.
Attach the battery pack.
3.
Access the normal mode by holding down the power key.
4.
Transmit the [AT+XDIAG] command.
5.
Make sure the screen for the function test mode is displayed.
6.
Access the TEMP ADJ mode by pressing the “ ” key, and push the “1” (1. CAM TEMP) key.
7.
Temperature detected by the sensor is displayed after “Temp:”. Compare the displayed value to the room temperature.
Enter the difference as a corrected value with the “ ” key if the displayed value is higher, and use the “ ” key if it is lower.
The corrected value is displayed after “Correct:”.
8.
Press the “#” key. [Param Save OK.] will be displayed to notify the corrected value is registed.
9.
Press the “0” key to access the initial screen of the function test mode.
10. Press the “Power” key to exit this mode.
2. Adjustment procedures of battery temperature
1.
Perform steps 1 – 5 of “Camera temperature adjustment procedure”.
2.
Access the TEMP ADJ mode by pressing the “ ” key, and push the “2” (2.BAT TEMP) key.
3.
Perform steps 7 – 10 of “Camera temperature adjustment procedure”.
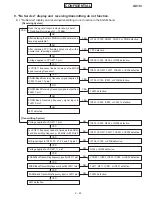
3. Flicker adjustment procedure
1.
Attach the battery pack.
2.
Access the manual testmode
3.
Access the manual testmodeF81 (LCD Setting) by pressing the “8”, “1” and “Right Soft” keys in this order.
4.
Press the “2” (2. VCOM Adjust) key.
5.
Adjust the flickers on the screen to the minimum by pressing the “ ” and the “ ” keys. Make sure visually they are minimized
at a distance of about 20 cm from the inverter fluorescent lamp. (Fine adjustments to the DC voltage between LCD
electrodes)
6.
Press the “Centre” key twice. [Diag Param Saving] will be displayed to notify the corrected value is registered.
7.
Press the “Power” key to exit this mode.
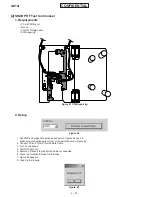
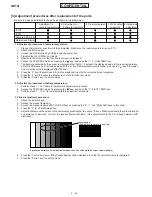
Enlargement
(Add a black line at every one line)
8 gradation patterns with a black line between each line of the patterns (monochrome pattern)
1. Adjustment to
2. Adjustment to
3. Flicker adjustment 4. White defect 5. Optical axis
camera temperature battery temperature
correction
adjustment
IC105
IC307
Camera FPC A’ssy
Main-screen Display
Содержание GX10i
Страница 36: ...2 32 GX10i CONFIDENTIAL Point Figure 66 Contact points Push Figure 67 Turning power on ...
Страница 84: ...GX10i CONFIDENTIAL MEMO 4 5 ...
Страница 120: ...5 36 GX10i CONFIDENTIAL MEMO ...


