


15
13VT-R100/R150
13VT-CR10
Ë
SERVICE ADJUSTMENT
VCO Adjustment
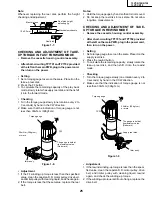
1. Connect a digital voltmeter between pin (44) of IC401
and ground.
2. Select a good local channel.
3. Enter the service mode and select the service
adjustment item "PIF-VCO" and set the data value
to "40".
4. Adjust the VCO coil L202 so that the digital voltmeter
reads 2.5V.
5. Adjustment is complete, remove the voltmeter and
return to "normal" mode.
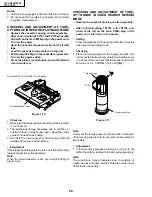
RF AGC Adjustment
1. Select a good local channel.
2. Enter the service mode and select the service
adjustment item "RF-AGC".
3. Set the data value to point where no noise or beat
appears.
4. Select another channel to confirm that no noise or
beat appears.
Note 1: You will have to come out of the service
mode to select another channel.
Note 2: Setting the data to "0" will produce a
black raster.
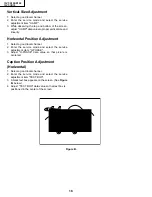
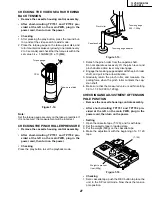
Screen Adjustment
1. Select a good local channel.
2. Enter the service mode and select the service
adjustment item "COLOR" and set the data value to
"0" to set the color level to minimum. You may skip
this step, if you selected a B/W picture or monoscope
pattern.
3. Select service adjustment item "MUTE" and adjust
the data value to "1", this turns off the luminance
signal (Y-mute).
4. Select service adjustment item "BRIGHT" and set
the value to "32".
5. Adjust the master screen control until raster darkens
to the point where raster is barely seen.
6. Adjust service adjustments item "R-CUT OFF" red
"G-CUT OFF" green and "B-CUT OFF" blue to obtain
a good grey scale with normal whites at low
brightness level.
7. Select the service adjustment item "MUTE" and reset
data to "0". Select service adjustment item "COLOR"
and reset data to obtain normal color level.
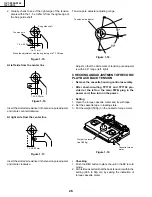
White Balance Adjustment
1. Select a good local channel.
2. Enter the service mode and select the service
adjustment item "COLOR" and set to "0" (minimum
color). "COLOR" does not have to be adjusted if you
selected a B/W picture or monoscope pattern.
3. Alternately adjust the service adjustment data of "G
GAIN" and "B GAIN" until a good grey scale with
normal whites is obtained.
4. Select the service adjustment item "COLOR" and
adjust data to obtain normal color level.
Picture Adjustment
1. Select a good local channel.
2. Make sure the customer picture control is maximum.
3. Enter the service mode and select the service
adjustment item "PICTURE".
4. Adjust the data value to achieve normal contrast
range.
Tint Adjustment
1. Select a good local channel.
2. Set customer tint control to center of it’s range.
3. Enter the service mode and select the service
adjustment item "TINT".
4. Adjust "TINT" data value to obtain normal flesh tones.
Color Adjustment
1. Select a good local channel.
2. Make sure the customer color control is set to center
position .
3. Enter the service mode and select the service
adjustment item "COLOR".
4. Adjust "COLOR" data value to obtain normal color
level.
Brightness Adjustment
1. Select a good local channel.
2. Make sure the customer brightness control is set to
center position.
3. Enter the service mode and select the service
adjustment item "BRIGHT".
4. Adjust "BRIGHT" data value to obtain normal
brightness level.
Содержание 13VT-CR10
Страница 55: ...57 13VT R100 R150 13VT CR10 56 12 11 10 9 8 7 6 5 4 3 2 1 A B C D E F G H BLOCK DIAGRAM OF TV SECTION ...
Страница 62: ...69 13VT R100 R150 13VT CR10 68 12 11 10 9 8 7 6 5 4 3 2 1 A B C D E F G H OVERALL SCHEMATIC DIAGRAM ...
Страница 64: ...71 13VT R100 R150 13VT CR10 6 5 4 3 2 1 A B C D E F G H SCHEMATIC DIAGRAM CRT Unit ...
Страница 72: ...85 13VT R100 R150 13VT CR10 6 5 4 3 2 1 A B C D E F G H PWB C POWER Unit Component Side ...
Страница 73: ...86 13VT R100 R150 13VT CR10 6 5 4 3 2 1 A B C D E F G H PWB A MAIN Unit Component Side ...
Страница 74: ...87 13VT R100 R150 13VT CR10 6 5 4 3 2 1 A B C D E F G H PWB A MAIN Unit Chip Parts Side ...