


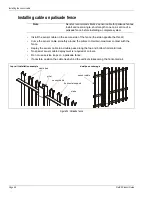


Installing the sensor cable
Page 44
FlexPS Product Guide
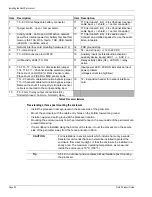
3.
Continue this back and forth flossing motion until the center conductor moves easily with very
little resistance.
4.
When the conditioning procedure is complete, release the tension on the center conductor,
and cut off any center conductor that was damaged during conditioning.
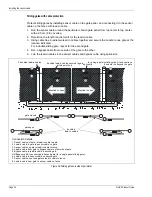
Once the Armour-FLEX cable is conditioned, it can be attached to the fence.
Installation instructions
1.
Carefully deploy the entire roll of Armour-FLEX sensor cable on the ground beside the
installation location. (The cable should be in place following the conditioning procedure.)
2.
Secure the Armour-FLEX to the fence using cable ties, stainless steel straps or wire ties.
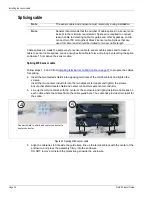
Figure 47: Mark 2 Armour-FLEX cable conditioning (part 2 cable flossing)
Figure 48: Mark 2 Armour-FLEX cable conditioning (part 2 cable flossing)
Note
When conditioning is complete, the center conductor usually extends an
additional 15 to 30 cm out of the cable jacket at both ends, and it slides
easily in both directions.
Note
Refer to
Installing cable on chain-link on page 30
for additional
details.
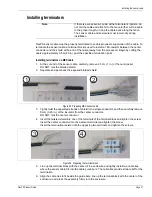
apply 2.3 to 4.5 kg (5 to 10 lb) pulling
tension to the center conductor
hold the cable
first person
second person
second person
first person
hold the cable and use pliers
to the center conductor
to apply pulling tension
hold the cable and tell the first person to stop
pulling when the knot reaches the black jacket
Содержание FlexPS
Страница 6: ...Page 6 FlexPSProduct Guide ...
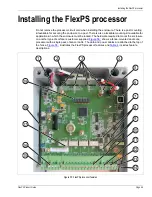
Страница 66: ...Installing the FlexPS processor Page 66 FlexPS Product Guide ...
Страница 88: ...Page 88 FlexPS Product Guide ...
Страница 94: ...Page 94 FlexPS Product Guide ...