46
4.
5.
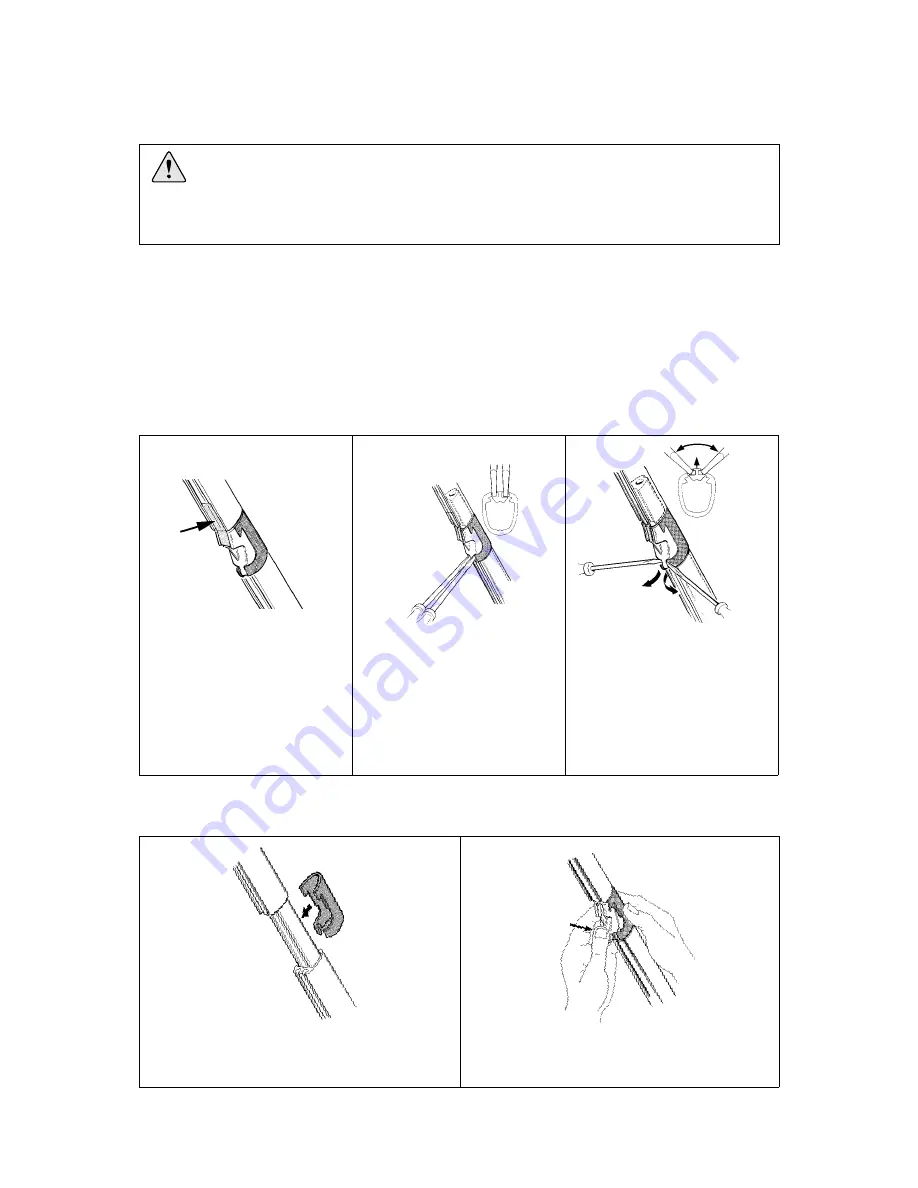
Press on the sail feeder connector from the front
of the luff extrusion.
Clip the sailfeeder into the connector’s top
recess, then press the sail feeder’s lower edge
until it snaps into place.
1.
2.
3.
Secure the stainless steel sail
feeder with adhesive tape
to prevent it from falling
overboard during disassembly.
Insert two small screwdrivers
into the small slots as per the
diagram. Force the screwdrivers
apart so that the sides of the
sailfeeder connector are pressed
out and its concealed clips are
released.
Continue the movement of the
screw-drivers and the sail feeder
is ”lifted out” of its seat.
17 Dismantling
NOTE! Do not dismantle the halyard swivel or lower bearing assembly.
You will find it difficult to re-assemble them correctly
(the ball-bearings are loose and difficult to refit!) .
Contact your Furlex dealer if service is required.
The halyard swivel can be removed from the system by removing the top guard and sliding it over the
end of the forestay wire. The stay has to be detached from the mast.
Removing the sail feeder:
Fig. 17.2.b
Fig. 17.2.c
Fig. 17.2.a
Fig. 17.2.d
Fig. 17.2.e
Re-installing the sail feeder:
17.2 Sail feeder
17.1 Halyard swivel


