65
to clicking on the “Add Device” option.
• • • DOMAIN
The
DOMAIN
edit box allows you to manually input the Domain name you’ve
created from the free DDNS website, such as www.dyndns.com or www.
no-ip.com. Once registered create a name such as name.dyndns.org to input
into the “Domain” box. The Port, User Name, Password, and zone all need to
comply as instructed above.
NOTE:
When using domain for DDNS service, it is not required to open ports
from you router, however, UPnP is required to be enabled in your local router.
• • • CLOUD
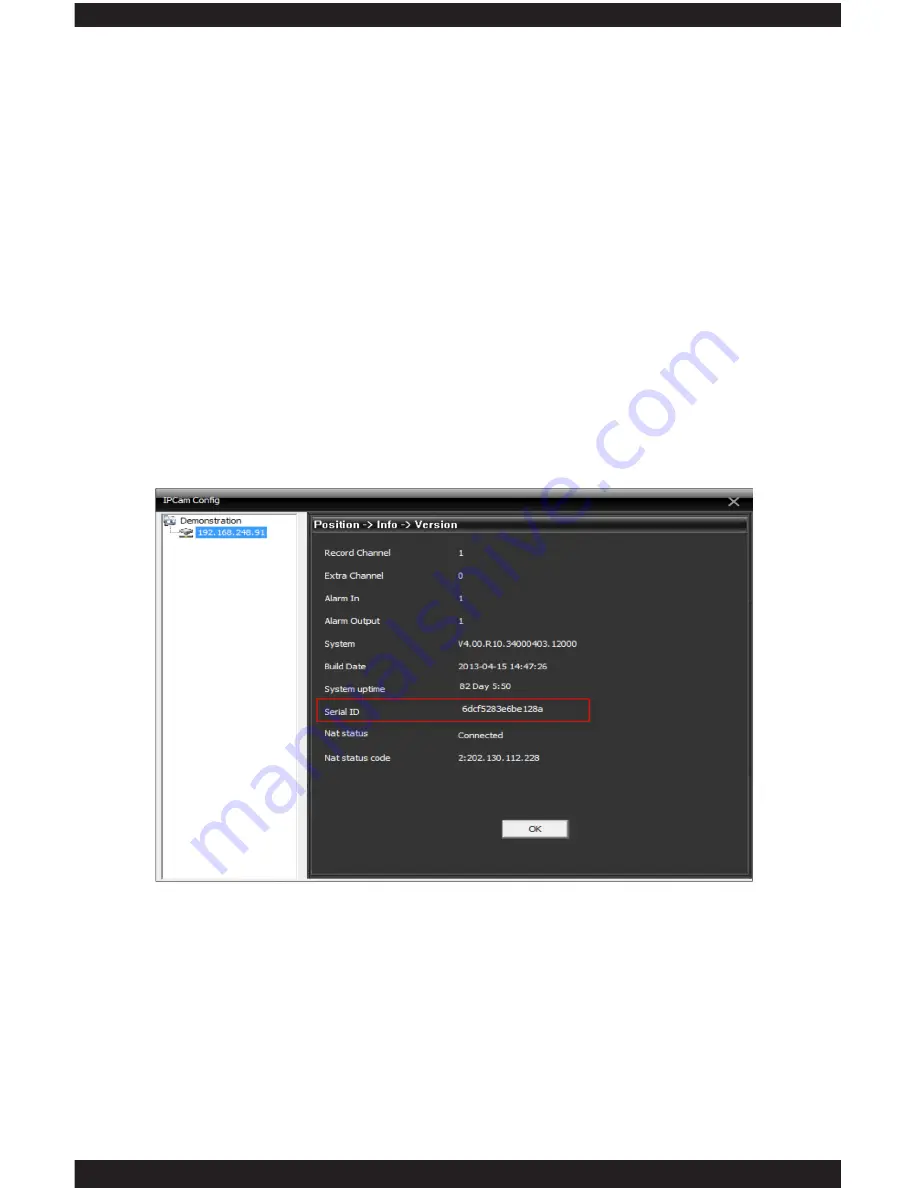
The CLOUD input box allows you to enter in the cloud serial ID number which
can be found under IPCam Config/Info/Version as shown below. Input the
Serial ID into the “Serial ID” field, setup the User Name, Password, and Zone
to comply as instructed above.
NOTE:
When using serial ID for Cloud, it is not required to open ports from
you router, however, UPnP is required to be enabled in your local router.
• • • EDIT DEVICE
The
EDIT DEVICE
option is used to save any changes that were made to the
selected camera from the “Device List Window”. This is where you would want
to change the default IP address of the IP camera to match with your local area
network IP address, Subnet Mask, and Gateway. Clicking on the Edit Device
option will bring up the “Edit Device Window” (as shown in the image below)
to start editing. Please leave the HTTP Port to 80 (system default) and the
Media Port to 34567 (system default) as recommended. The MAC address only
identify the NIC card, please leave the MAC address as is.
NOTE:
If you are having difficulty using Internet Explorer to access, please
change the HTTP port from 80 to other port such as port 83 or 85.
Содержание ClockCam-WiFi
Страница 1: ...CLOCKCAM WIFI User s Manual Wall Clock iSecurity Camera with Micro SD Recorder 12 6 9 3...
Страница 43: ...39...
Страница 154: ......


