142
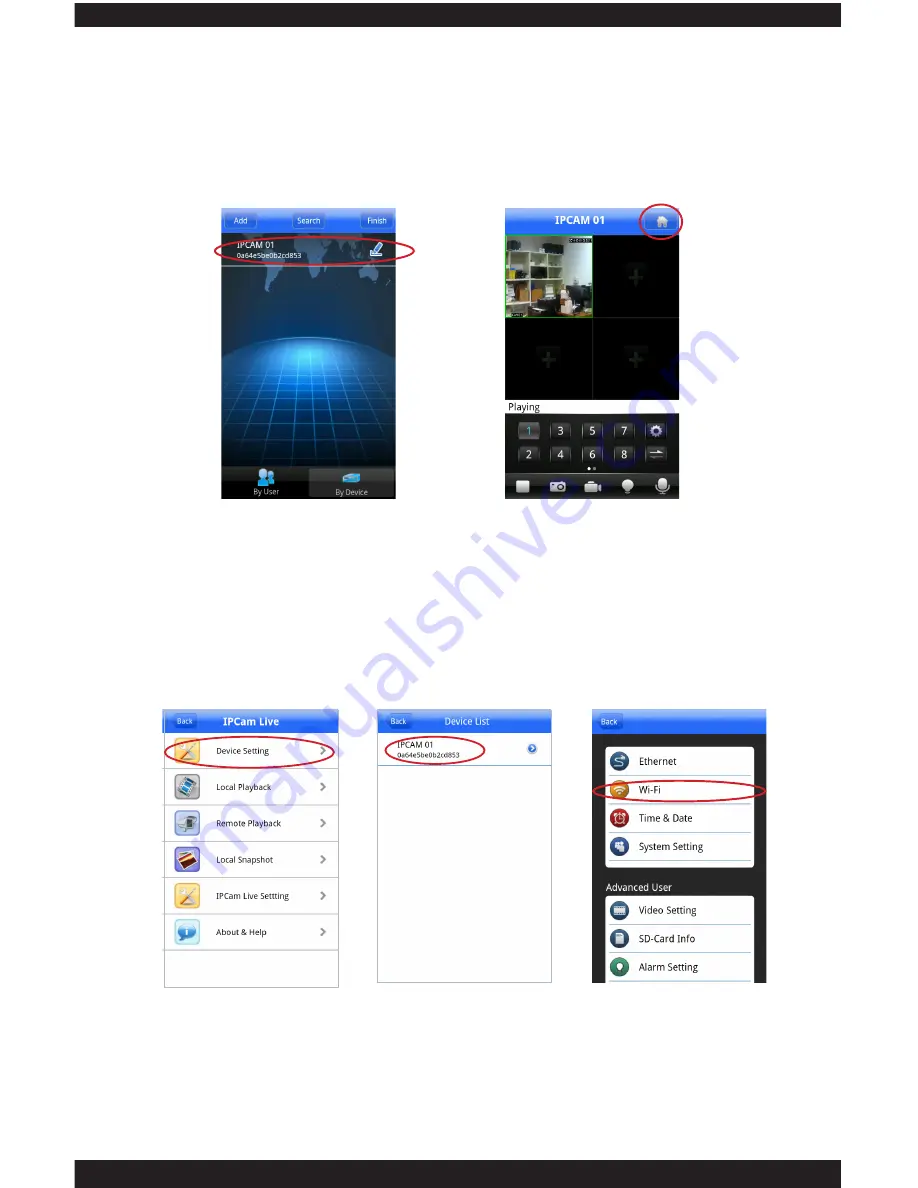
3. Now select your device (fig. 2.7) to bring up the live view screen (fig 2.8).
NOTE: The following images will appear stating “Connecting…” and “Buffering…”
If successful, your cameras image will be displayed.
Fig2.7
Fig2.8
WI-FI SETUP
1.
Tap on the “Home” icon located on the upper right hand corner of the screen
(fig. 2.8). Select
“Device Setting”
(fig. 3.1). Select your device (fig. 3.2). Select
“Wi-Fi”
(fig. 3.3).
NOTE: STEP 2 must be complete before beginning STEP 3 Wi-Fi Setup.
Fig3.1
Fig3.2
Fig3.3
2. Make sure both
“Enable” & “DHCP”
are enabled (green check mark) and click
“Search”
(fig. 3.4). Select the Wi-Fi name that is associated with your network
by tapping on the name (fig.3.5).
Содержание ClockCam-WiFi
Страница 1: ...CLOCKCAM WIFI User s Manual Wall Clock iSecurity Camera with Micro SD Recorder 12 6 9 3...
Страница 43: ...39...
Страница 154: ......


