background image

9

Introduction

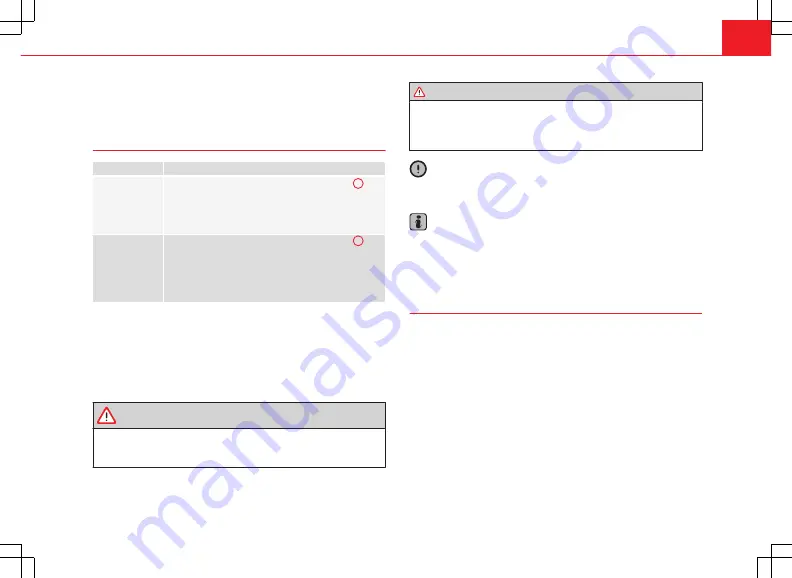
If the vehicle battery has been disconnected, switch on the ignition before
re-connecting the unit.

Adjusting the base volume

effect

Action

Increase the vol-
ume.

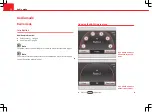
On the radio: Turn the volume control 


⇒ 

Fig. 1


1

clockwise.
On the multifunction steering wheel: Turn the volume
control up or press the corresponding button (depend-
ing on equipment fitted) 

⇒ 

Booklet Instruction Manual

Lower the vol-
ume.

On the radio: Turn the volume control 


⇒ 

Fig. 1


1

 an-

ticlockwise.
On the multifunction steering wheel: Turn the volume
control down or press the corresponding button (de-
pending on equipment fitted) 

⇒ 

Booklet Instruction

Manual

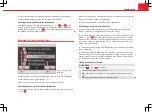
Changes to the volume are indicated by a “bar” on the screen. During this
time the unit cannot be operated.

At “0” the unit is muted (display: 

) and the current Media source is stop-

ped.

It is possible to preset certain volume settings and adjustments

⇒ 

page 99.

WARNING

Your attention may be distracted from the traffic if you use the radio and
navigation system while driving, resulting in accident.

Always stay alert and drive responsibly.

WARNING (Continued)

Select volume settings that allow you to easily hear signals from out-

side the vehicle at all times (e.g. emergency service sirens).

If the volume is too high, you could damage your hearing. Even if the

volume is too loud for a short period only.

CAUTION

The vehicle loudspeakers may be damaged if the volume is too high or the
sound is distorted.

Note

If the base volume has been turned up high to play an audio source
(e.g. due to very quiet audio output from an external audio source), lower
the volume again before switching audio source.

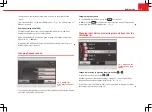
Additional information and display options

The text displayed on the screen may vary depending on the settings and
may not match the illustrations shown here.

All displays appear only after the radio-navigation system has completed
start-up.

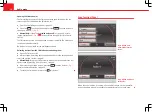
Depending on the vehicle, the changes to the air conditioning settings or
the texts relating to driver assistance systems fitted at the factory are dis-
played. These displays disappear automatically when they are no longer re-
quired.

Содержание MEDIA SYSTEM 2.2

Страница 1: ...SEAT MEDIA SYSTEM 2 2 Owner s manual 5P0012720EA Ingl s 5P0012720EA 10 13 GT9...
Страница 2: ...rvices 19 DAB digital radio mode 22 Media mode 27 MEDIA IN multimedia interface 40 Navigation 45 Introduction to navigation 45 Enter destination 51 Destination memory 57 Route guidance 62 Telephone co...

Страница 3: ...ed in your vehicle in some details Directions and positions of components e g right left front rear are al ways relative to the direction of travel of the vehicle unless otherwise sta ted The equipmen...

Страница 4: ...WARNING Before starting the trip you should familiarise yourself with the dif ferent functions of the radio and navigation system High audio volume may represent a danger to you and to others Adjust t...

Страница 5: ...r hearing Even if the volume is too loud for a short period only WARNING The recommendations and traffic signs shown by the navigation system may differ from the true traffic conditions Traffic signs...

Страница 6: ...been ejected CAUTION Any foreign objects attached to a data medium and non round data media can damage the CD player Only clean standard 12 cm CDs should be used Do not stick stickers or other items t...

Страница 7: ...ivate a function area RADIO switch on the radio and change frequency band page 12 MEDIA change to Media mode page 27 PHONE switch on the Telephone function page 74 1 2 NAV open the Navigation main men...

Страница 8: ...in Media mode page 27 While navigating to display current position of vehicle or program med destination page 45 Press the back button to close menus and pop up windows AUX IN multimedia socket for co...

Страница 9: ...owered when reverse gear is en gaged If talking on the telephone through the radio and navigation system the volume of the conversation is also lowered automatically when reverse gear is engaged Note...

Страница 10: ...use the radio and navigation system while driving resulting in accident Always stay alert and drive responsibly WARNING Continued Select volume settings that allow you to easily hear signals from out...

Страница 11: ...ssing and holding Function buttons on the screen Active areas of the screen that call up a certain function are called function buttons These buttons are operated by briefly pressing the screen or by...

Страница 12: ...ayed Opening the marked list item Press the setting knob Scroll through lists quickly scroll marker If there are more items available than can be displayed on the screen a type of scroll bar is displa...

Страница 13: ...nnels tall buildings or mountains may affect the radio signal Note Foil or metal coated stickers attached to the windows may affect reception on vehicles with a window aerial Opening the RADIO main me...

Страница 14: ...d function but ton The currently selected frequency band is indicated above the station display and in the bottom line of the screen Changing frequency band In the RADIO main menu press the RADIO unit...

Страница 15: ...station list is available for the AM frequency band Selecting stations from the FM station list and saving them Open the FM station list Mark a station by turning the setting knob and press the settin...

Страница 16: ...e RADIO main menu and select the frequency band page 13 Press the Extras function button In the pop up window press the Manual function button Fig 8 The frequency of the currently selected station is...

Страница 17: ...displayed If even though the check box has been ticked the station buttons are not displayed the radio text option may be activated page 19 Saving stations in station button If a station is saved to...

Страница 18: ...ons page 16 Turn the setting knob Fig 1 10 to select a station button The station stored to the marked station button will be displayed Press the setting knob to select the displayed station OR Briefl...

Страница 19: ...may be interrupted Fixed For as long as possible the unit only switches to alternative frequencies for the selected radio station that broadcast the same re gional service DAB settings in units with a...

Страница 20: ...ted If the RDS service is available and the quality of reception is good enough the station name may be displayed in Radio mode Fig 15 Automatic station tracking Some FM stations broadcast different c...

Страница 21: ...e acti vated regardless of the audio mode currently playing Traffic news monitoring with the TP function is only possible if the TP station is available Some stations that do not broadcast their own t...

Страница 22: ...erally poor No TP is displayed Incoming traffic announcement Fig 18 Incoming traffic announcement An incoming traffic announcement will interrupt the active audio mode A pop up window opens Fig 18 If...

Страница 23: ...ditional services are used to send additional information to the ra dio e g news sports weather warnings etc DAB is currently not available in all areas When the DAB radio mode is ac tive in areas whe...

Страница 24: ...g 1 3 After you have reached the last or first DAB station in the currently selec ted ensemble the unit changes to the first or last DAB station of the next ensemble Please note If is displayed the un...

Страница 25: ...ch can be played with the corresponding DAB station Opening and closing the DAB station list In DAB radio mode press the Band function button and press the DAB List function button in the pop up windo...

Страница 26: ...function button While the stations are being updated a pop up window opens and the vol ume of the DAB radio is muted The pop up window closes once the update is complete The currently playing DAB sta...

Страница 27: ...ed behind the station name When the station can be found again in DAB the FM display disappears If the reception of a DAB station is poor and it cannot be found on FM either the radio volume is muted...

Страница 28: ...igital Audio specification CD ROM CD R and CD RW audio data CDs up to max 700 MB megabytes compli ant with ISO 9660 or in the Joliet file system SD and MMC memory cards up to max 2 GB giga bytes and S...

Страница 29: ...he Internet Due to the larger quantity of data it takes longer to read a data medium containing compressed audio files MP3 WMA etc than a normal audio CD Complex folder structures can also slow down t...

Страница 30: ...the MEDIA main menu various media sources can be selected and played page 38 Press the MEDIA unit button The last Media source played continues to be played The Media source being played is displayed...

Страница 31: ...the point where it is drawn in automatically When the CD is inserted playback will start automatically Ejecting CDs Press the unit button The CD in the drive will be ejected and must be removed withi...

Страница 32: ...ing upwards until the card clicks into place Playback starts automatically if supported audio files are stored on the memory card Removing a memory card To avoid damaging it the memory card should be...

Страница 33: ...open the media selection menu Fig 34 Press the AUX function button to start playback of the external audio source over the vehicle speakers page 36 The output volume of the connected external audio so...

Страница 34: ...ble to the user This source can be used to play audio from an external player connected to a Rear Seat Entertainment RSE device through the vehicle sound system1 The audio from the external player con...

Страница 35: ...nected to the RSE continues playing When playback on the external audio source has finished or if the exter nal player is disconnected from the AUX RSE connector the radio and navi gation system remai...

Страница 36: ...e on the radio navigation system page 8 Start playback on the Bluetooth external audio source Depending on the unit you can start playback of the Bluetooth audio source via the Media selection menu pa...

Страница 37: ...as required to scroll between the available Media sources Press the unit button to close the Media selection menu without changing it If a Media source is currently not available it is shown as disab...

Страница 38: ...ted from any menu via the arrow buttons on the unit Opening and scrolling through the track list Open the MEDIA main menu Press the Select function button or turn the setting knob Fig 1 10 to open the...

Страница 39: ...in MP3 mode Fig 38 MEDIA main menu with selected play back mode Depending on the setting subfolders may be included in the selected play back mode page 39 This setting must be defined before the playb...

Страница 40: ...ume of the other audio sources page 32 Function button Effect Bluetooth settings Press to enter the BT settings menu to view the list of de vices connected search for devices etc BT Audio volume Adjus...

Страница 41: ...via the radio navigation system Where this manual refers to external data media this means multimedia de vices containing supported audio files such as MP3 players iPods and USB memories External data...

Страница 42: ...an be read via the MEDIA IN multimedia interface can be displayed played and controlled on the radio navigation system In the case of MTP players it may take a few minutes before the device is ready f...

Страница 43: ...and navigation system An external data medium correctly connected to the MEDIA IN multimedia interface can be controlled through the radio and navigation system Depending on the unit when an external...

Страница 44: ...error messages after connecting an external data medium Error message Cause Procedure Device not suppor ted Playback from the ex ternal data medium or communication via the adapter cable used is not p...

Страница 45: ...al input Therefore to play audio from a device connected to the AUX RSE input first make sure that there are no devices or cables connected to the MEDIA IN interface Note For further information pleas...

Страница 46: ...tern Europe and one for Eastern Europe with and without DAB respectively page 22 In normal circumstances all the necessary navigation data is already stored in the navigator The maps stored in the sys...

Страница 47: ...chnical Service without needing to download the data from the SD card to the internal memory of the navigator this option is recommended if temporarily using a navigation database e g different geogra...

Страница 48: ...al zone we recommend you use the option to navi gate with the SD card rather than using the internal data stored in the navi gator To switch on navigation from the SD card insert the card in the radio...

Страница 49: ...gation main menu In the Navigation main menu press the NAV unit button to switch to the map view Fig 45 Press the NAV unit button again to switch back to the Navigation main menu Fig 44 Selecting dest...

Страница 50: ...he on screen keyboard can be defined in the system set tings page 99 Input windows for free text input An input window for free text input allows any letters digits and special characters to be entere...

Страница 51: ...ess to go back to the input window for letters and Press to move the cursor to the left or right on the input line Press to enter a space Characters with Hold down to display a pop up window with spec...

Страница 52: ...ress is then narrowed down further by select ing the street and house number or a junction The address selections are made in a series of input windows In the Navigation main menu press the function b...

Страница 53: ...possible to end destination entry After selecting a city press the City centre function button to end the des tination entry and start route guidance to the city centre The Finish function button appe...

Страница 54: ...has been started are automatically stored in the Last destinations list Fig 51 Manually stored destinations are stored in the Destination memory page 57 Open the Navigation main menu Press the functio...

Страница 55: ...a destination in the list by turning the setting knob Fig 1 10 and press to start route guidance page 11 Alternatively Browse the list by dragging the scroll marker on the screen and select a destinat...

Страница 56: ...iled information of the desired point of interest A keyword may be the known part of a name e g Lakeside Starting from the search area centre the unit searches for points of interest which contain the...

Страница 57: ...er on the screen and select a destination to start route guidance page 11 Press the Details function button Press the Start function button in the detailed view to start route guidance In the list vie...

Страница 58: ...tion to navigation page 45 Entering a destination page 51 Automatically stored last destinations Fig 57 List of recent destinations Up to 50 destinations for which route guidance has been started are...

Страница 59: ...e of your own first press the Delete function button and then enter your own chosen name for the destination page 49 Press OK to store the destination under the currently displayed name in the Destina...

Страница 60: ...stina tions to be deleted in the next menu Press All destinations to delete all destinations in the destination memory and Last destinations OR press Last destinations to delete all destinations in th...

Страница 61: ...on it must be renamed in the Destination memory Otherwise the stored position will be overwritten the next time a flagged destination is stored Select the flagged destination in the Destination memory...

Страница 62: ...sition function button to store your current geographical po sition longitude and latitude as the home address OR press Address to open the destination window Home address Fig 63 The name Home addr is...

Страница 63: ...y notes page 4 Unit overview page 6 Introduction to navigation page 45 Entering a destination page 51 WARNING The recommendations and traffic signs shown by the navigation system may differ from the t...

Страница 64: ...d motorways Navigation announcements When the route has been calculated the first announcement is given Up to three navigation announcements are given before a turn e g within a town Prepare to turn l...

Страница 65: ...ute Fig 67 Briefly press the bottom right or bottom left area of the screen to display the function buttons again Fig 66 Pressing the NAV unit button switches between the Navigation main menu and the...

Страница 66: ...st shown map view Displaying speed limits If there is a speed limit stored in the navigation data for the road along which you are travelling this will be displayed on the map During route guidance th...

Страница 67: ...he Stop function button Resume route guidance to the last destination In the map view pressing the Start function button always automatically resumes route guidance to the last destination Fig 69 Ente...

Страница 68: ...detour After a few seconds route guidance is resumed to the final destination You may then enter an other detour If the Stop function button is selected during route guidance to a detour page 66 you h...

Страница 69: ...function button The item is marked as excluded and the function button changes to Exclude to If instead of the button Exclude to Re open appears in the route list this means that the section has alre...

Страница 70: ...n the information window press the Route function button Press the Lift cong excl function button in the pop up window Note It is also possible to enter or cancel an exclusion while viewing the TMC tr...

Страница 71: ...e traffic incident that was present when the route was originally calculated is now no longer reported Note Avoiding an incident based on TMC traffic reports may not always save time if for instance t...

Страница 72: ...rea you are currently travel ling through Note The quality of the dynamic route guidance depends on the information con tained in the TMC traffic reports The radio stations are responsible for the con...

Страница 73: ...n Setup menu Navigation Fig 75 Navigation setup menu Fig 76 Navigation setup menu Press the SETUP unit button from any navigation menu to open the Naviga tion setup menu Fig 75 Function button Effect...

Страница 74: ...me The estimated travelling time to the final destination is displayed Enter home address See Destination memory page 57 Demo mode this permits virtual navigation to the destination entered page 71 Po...

Страница 75: ...one can be used inside the ve hicle the driver will not have to remove their hands from the steering wheel nor will be distracted from traffic Please observe instructions concerning the use of mobile...

Страница 76: ...other languages the predefined language for the voice control system will depend on the country in which the vehicle is sold Please ask the Technical Service to change the predefined language if requi...

Страница 77: ...phones are totally safe Therefore some experts recommend that use of mobile phone be kept to a minimum until the results of current research are published If a mobile phone is used inside the vehicle...

Страница 78: ...ile phone via the radio and navigation system it is necessary to establish a connection between both units once The mobile phone can be connected to the radio and navigation system in two ways active...

Страница 79: ...obile phone and confirm Some mobile phones permit a Bluetooth connection us ing the Secure Simple pairing method In this case you are not asked to enter a PIN from the mobile phone but to confirm that...

Страница 80: ...files It is only possible to connect one mobile phone to the hands free profile of the radio and navigation system at a given time Up to two different Bluetooth devices can be connected at the same ti...

Страница 81: ...elephone will automatically link up with the SEAT tele phone system under the following conditions The mobile phone is switched on and the Bluetooth function and visibili ty are activated The mobile p...

Страница 82: ...nually in the telephone setup menu page 81 Setup menu Telephone SETUP The functions activated with the Bluetooth settings button are required for the connection of a mobile phone or an external Blueto...

Страница 83: ...ifunction steering wheel buttons on right side Button effect Button Push to talk or PTT button Short press start or cancel voice control interrupt on go ing message in order to speak next Short press...

Страница 84: ...l buttons on right side Button effect Push to talk or PTT button Short press Start or cancel voice control interrupt on going message in order to speak next Turn right roller Select number letter Sele...

Страница 85: ...ibility is activated when connecting a telephone via Bluetooth Connection with a media player or a mobile phone compatible with playing music Mobile phone battery level regardless of whether it is in...

Страница 86: ...only available when a mo bile phone is connected The instructions given by the phone and or acces sory manufacturers should be observed The text displayed on the instrument panel may vary slightly fr...

Страница 87: ...ough the address book in alphabetical order Select the required number mobile work pri vate general no Confirm selection or select the option Call The call will be connected Play or restore the call n...

Страница 88: ...ages which have been left in the voice mailbox The first time this menu option is used the Bluetooth system will search the phone book for the voicemail number It searches for key words such as voice...

Страница 89: ...1 10 or by moving the scroll marker page 11 Press the setting button to select the highlighted entry in the phone book Alternatively Press directly on the entry in the list If only one phone number i...

Страница 90: ...ters you have entered Delete characters in the input line until a name is suggested Both upper and lower case are accepted when searching for an entry in the phone book Press the setting button OK to...

Страница 91: ...displayed and edited in an input window Viewing phone numbers in a phone book entry and opening them in the input window Select the phone number and press the Details function button Fig 86 If severa...

Страница 92: ...l Enter and call a phone number Fig 90 PHONE main menu Fig 91 DIAL menu It is possible to enter a phone number manually using the PHONE main menu In the PHONE main menu press the A function button Fig...

Страница 93: ...l assistance button Fig 92 The system automatically starts to call the SEAT technical assistance service This service operates via a local call in the country in which the vehicle is sold and via roam...

Страница 94: ...1 10 Press the setting knob to dial the number OR Press the required entry to make the call Alternatively press the function button or the lower unit button to make the call Accepting and alternating...

Страница 95: ...utton in the pop up window to add both callers to the conference call The display will show Conference An additional incoming call may be accepted during a telephone confer ence It is possible to alte...

Страница 96: ...nce cue is given with the available options and the system waits for a new spo ken instruction After the second failed attempt the system repeats the sec ond part of the assistance cue If the system s...

Страница 97: ...does not say a COMMAND the Operation cancelled dialogue is started TIMEOUTS are considered each time that the system is waiting for a verbal instruction from the user and the user remains silent HELP...

Страница 98: ...e TIMEOUT T1 the system starts an ini tial assistance cue with the DIALOGUE Please repeat If the user remains silent for a time T2 the system starts a second assistance cue with the DIALOGUE The avail...

Страница 99: ...the se lected language If the language is modified through the instrument panel the selected lan guage may not be available in the radio and navigation system In this case the voice recognition syste...

Страница 100: ...tive settings menu for the currently selected mode Additional Information Safety notes page 4 Unit overview page 6 Radio settings menu page 12 Media settings menu page 27 Navigation settings menu page...

Страница 101: ...ion button opens a pop up window in which you can set the automatic audio volume reduction applied when the parking distance warning system PDC is active When reverse gear is en gaged the volume of th...

Страница 102: ...Switch the confirmation tone for pressing a func tion button on or off Factory settings restore the unit to its original factory settings Air conditioning announcements 3 s 5 s 10 s Changes to the ai...

Страница 103: ...e for other radio transmission networks En hanced Other Network GALA Speed Controlled Volume SCV GPS Global Positioning System FM Frequency modulation very high frequency VHF HFP Wireless telephony ha...

Страница 104: ...services 92 Car park search 54 CD eject in Cabriolet models 30 CD mode See MEDIA 30 Changing frequency band 13 Changing station names 20 Checkbox ticking and clearing 10 Code number 8 Commands 96 Conf...

Страница 105: ...itioning displays 100 Brightness 100 Keyboard layout 100 Kilometres or miles 101 Map view 100 Dynamic route guidance 69 E Enter mark Cursor 50 Entries deleting See Deleting 100 EON 20 102 Explosion ar...

Страница 106: ...e 36 Changing track 37 Display information 29 Ejecting CDs Cabriolet 30 Extras 38 Fast forward 37 Input volume 39 iPod 43 Main menu 29 MDI 40 MDI volume 39 Media source selection menu 36 Memory card c...

Страница 107: ...st destinations 57 Editing the home address 60 Enter destination 51 Entering a detour 66 Entering an exclusion 70 Excluding types of route 63 Fast route 62 Flagged destination 59 Home address 53 Incom...

Страница 108: ...ion 14 Settings 17 SETUP 17 Station buttons 16 Station name 20 Station names 13 Station scan 14 Station tracking 19 Storing stations 16 TP Traffic Programme 19 20 Tuning to a station frequency 15 Radi...

Страница 109: ...hone users Delete 81 Things to note Radio coding 8 volume reduction 8 Timeout 8 TMC Dynamic route guidance 69 TMC traffic reports 70 Touchscreen 10 TP Traffic Programme 19 20 Display 21 Traffic announ...

Страница 110: ...W Warnings 4 Wireless communication interface 35 109 Index...

Страница 111: ...k All texts illustrations and standards in this handbook are based on the status of information at the time of printing Except for error or omission the information included in the current handbook is...

Страница 112: ...SEAT MEDIA SYSTEM 2 2 Owner s manual 5P0012720EA Ingl s 5P0012720EA 10 13 GT9...

Отзывы: