Changing one of these settings also changes the other setting based on the difference.
To prevent hunting in infrared (IR) lighting, set these luminance levels to widely different values.
Using one of these alarm input terminals as the Day/Night switching terminal, however, enables the camera to be
switched between the color and black-and-white video modes when an external control signal is received.
1
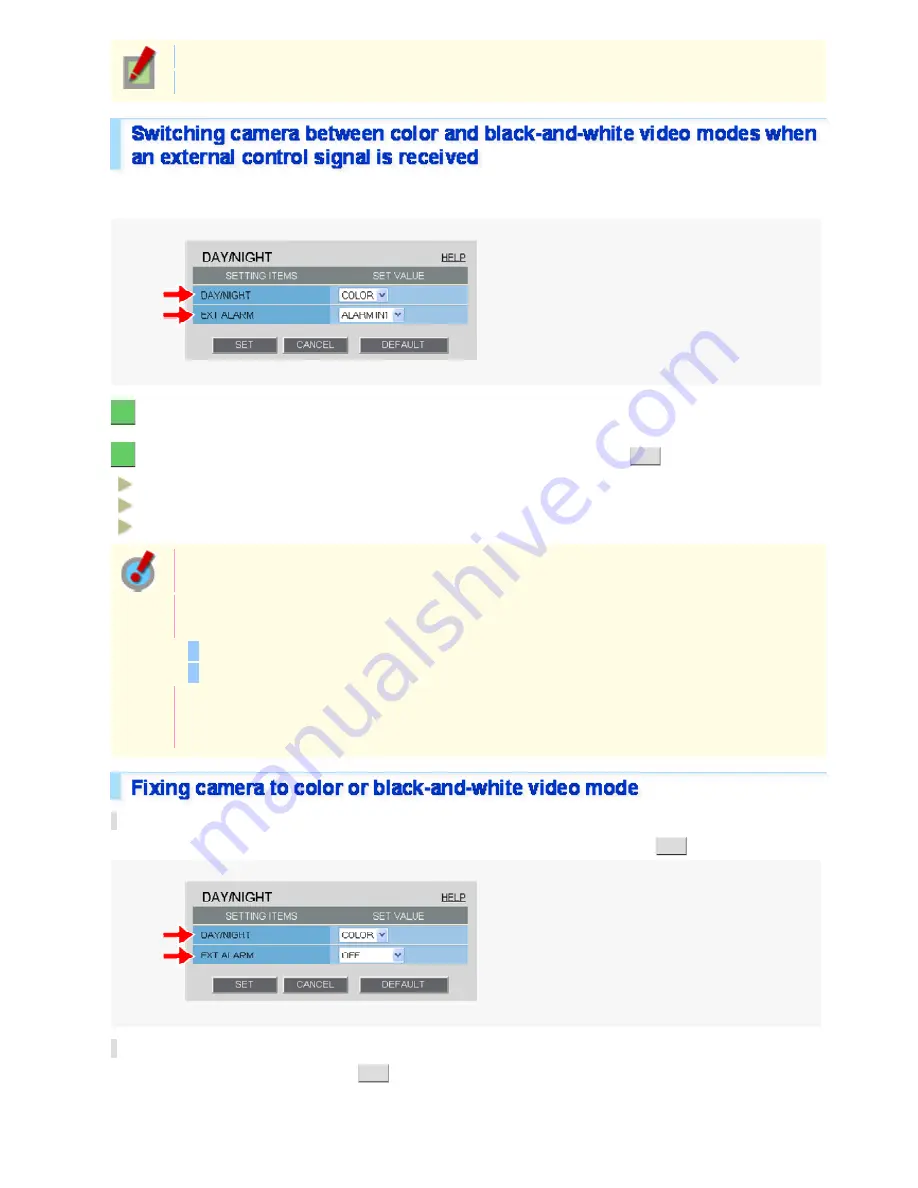
In [DAY/NIGHT], select “COLOR”.
2
In [EXT ALARM], select the desired alarm input terminal and click
SET
.
ALARM IN1:
Sets the ALARM IN1 terminal as the Day/Night switching terminal.
ALARM IN2:
OFF:
Sets the ALARM IN2 terminal as the Day/Night switching terminal.
Fixing Camera to Color Video Mode
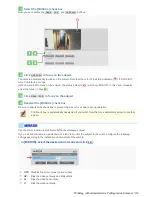
You need to enable the ALARM IN1/2 terminal and configure the signal polarity in [POLARITY] on
the ALARM SETTINGS screen.
Depending on the [POLARITY] setting, the camera will be switched between the color and black-and-
white video modes as follows (commonly applied to CAM1 and CAM2):
If [POLARITY] is set to “NO”: Color mode when open; Black-and-white mode when closed
If [POLARITY] is set to “NC”: Color mode when closed; Black-and-white mode when open
If you set [EXT ALARM] to “ALARM IN1” or “ALARM IN2”, the corresponding alarm input terminal will
serve dedicatedly as a Day/Night switching terminal, so you can see only the item [POLARITY] on
the ALARM SETTINGS screen.
Fixing Camera to Color Video Mode
In [DAY/NIGHT] and [EXT ALARM], select “COLOR” and “OFF”, respectively, and click
SET
.
Fixing Camera to Black-and-White Video Mode
In [DAY/NIGHT], select “B/W” and click
SET
.
Working with Administrator Configuration Screens 32/66


