2
REC MODE SET
30
English
SE
TTIN
GS
1
Press the [MENU] button.
The MENU indicator lights, and the <MAIN MENU> screen
appears.
2
Select “2. REC MODE SET”, and press
the [
] button.
The <REC MODE SET> screen appears.
3
Press the [
] and [
] buttons to select
the desired item, then press the [
]
button.
4
Press the [
] and [
] buttons to change
the setting, then press the [
] button.
5
Use the same procedure to set the other
items as needed.
6
Press the [EXIT/OSD] button.
The display returns to the normal screen.
Use a cable to connect the control terminals as shown in
the following.
When “OVER WRITE” is set to “OFF” and the hard disk
becomes full, the FULL indicator lights and recording stops.
To start recording again, first follow the steps below to
erase the images recorded so far.
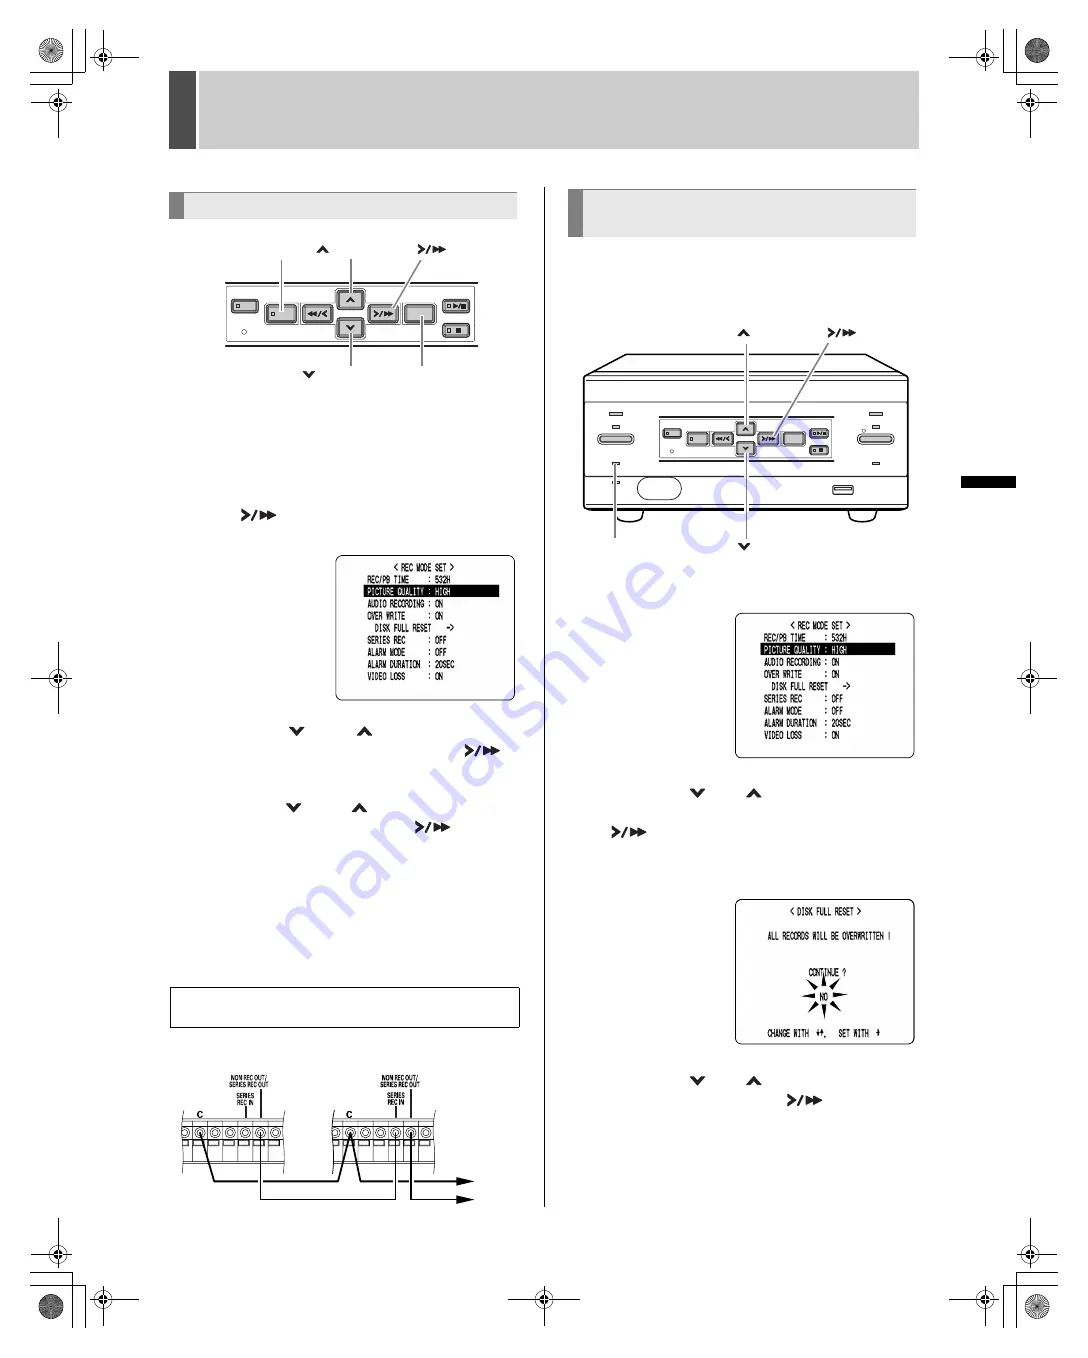
1
Display the <REC MODE SET> screen.
2
Press the [
] or [
] button to select
“DISK FULL RESET”, then press the
[
] button.
The <DISK FULL RESET> screen appears with “NO”
flashing.
3
Press the [
] or [
] button to select
“YES”, then press the [
] button.
The images recorded so far are erased, and the display
returns to the normal screen.
The FULL indicator goes out, and you can record until the
disk becomes full.
Settings
Connecting several digital video recorders to
make series recordings
[
] button
[MENU] button
[
] button
[
] button
[EXIT/OSD] button
1st
DVR
2nd
DVR
3rd
DVR
Starting recording again when the
FULL indicator lights
[
] button
[
] button
[
] button
FULL indicator
e00_l8hae_us_7.book Page 30 Thursday, April 8, 2004 11:14 AM


