E-5
フィルター
交換目安
右の
色と
同程度
に汚れ
た時は、
交換して
くださ
い。
右の
色にな
らなく
ても、に
おい
が
気に
なる
時は交
換して
くださ
い。
汚れ色目安
Tabs
Filter
Supports
Pre-filter
Plastic Protector
FRONT
Filter
Filter
Pre-filter
Net
Filter
Supports
Pre-filter
Attachment
Slots
w
q
q
Release Button
Press
Press
Front Cover
w
e
Tabs
Front
Cover
q
Tabs
Tabs
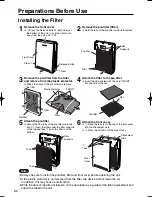
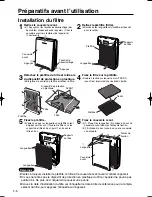
Preparations Before Use
Installing the Filter
1
3
2
4
5
6
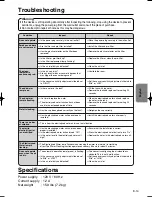
Note:
¡
Always be sure to install the pre-filter, filter and front cover before operating the unit.
¡
If the plastic protector is not removed from the filter, the device will not clean the air.
In addition, this may cause a malfunction.
¡
Write the date of the filter installation on the date label as a guide for the filter replacement and
attach the label to the unit.
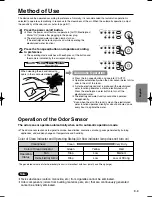
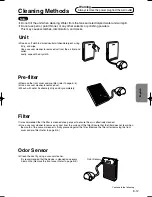
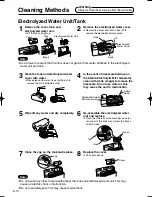
Remove the pre-filter (filter).
¡
Hold the tabs of the pre-filter and pull to remove.
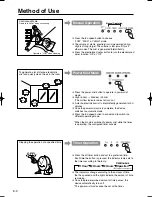
Remove the front cover
¡
q
Press the Release buttons (both sides) at
the bottom of the unit,
w
pull the front cover
away from the unit, and
e
lift.
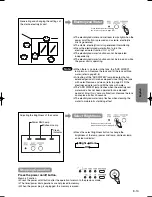
Attach the filter to the pre-filter.
¡
Insert the side printed with the word “FRONT”
into the side of the net.
Remove the pre-filter from the filter
and remove from the plastic protector.
¡
Widen the frame of the pre-filter and remove
the filter.
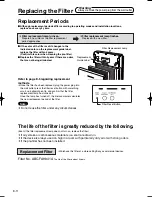
Attach the front cover.
¡
q
Place the tabs (3) at the top of the front cover
into the attachment slots.
¡
w
Press the bottom until the cover clicks.
Attach the pre-filter.
¡
Ensure that the tabs of the pre-filter are to the
front.
q
Insert the filter under the filter supports
at the top and then
w
push the filter in at the
bottom.
ABC-VW24A_GB_US.qxd 09.10.1 4:52 PM ページ5

