background image

Settings


 Library / Media 

Settings


 CAS 

ENG

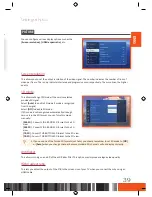
Media renderer

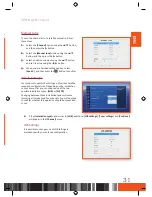
DLNA Media Renderer is one DLNA functionality that enables you to remotely control viewing of content on 

device. Instead of browsing DMS (Digital Media Server) directly on STB, you can browse DMS (Digital Media 

Server) on tab or phone and also control from the playback of content on STB. DMR (Digital Media Renderer) is 

advertising itself on network, so it is available to every DLNA Media Controller in local network.

Media renderer name

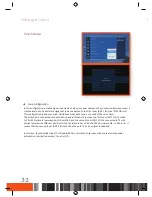
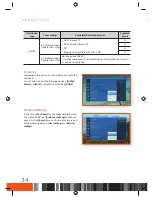
DLNA Media Renderer is visible in network under certain name so called friendly name. Predefined value is [STB] 

+ ip address of STB. This name can be changed via Settings menu: Library - Media Renderer name.

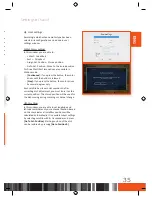
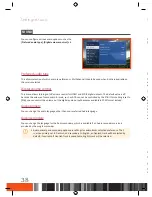
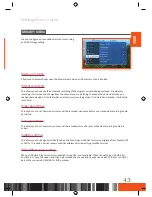
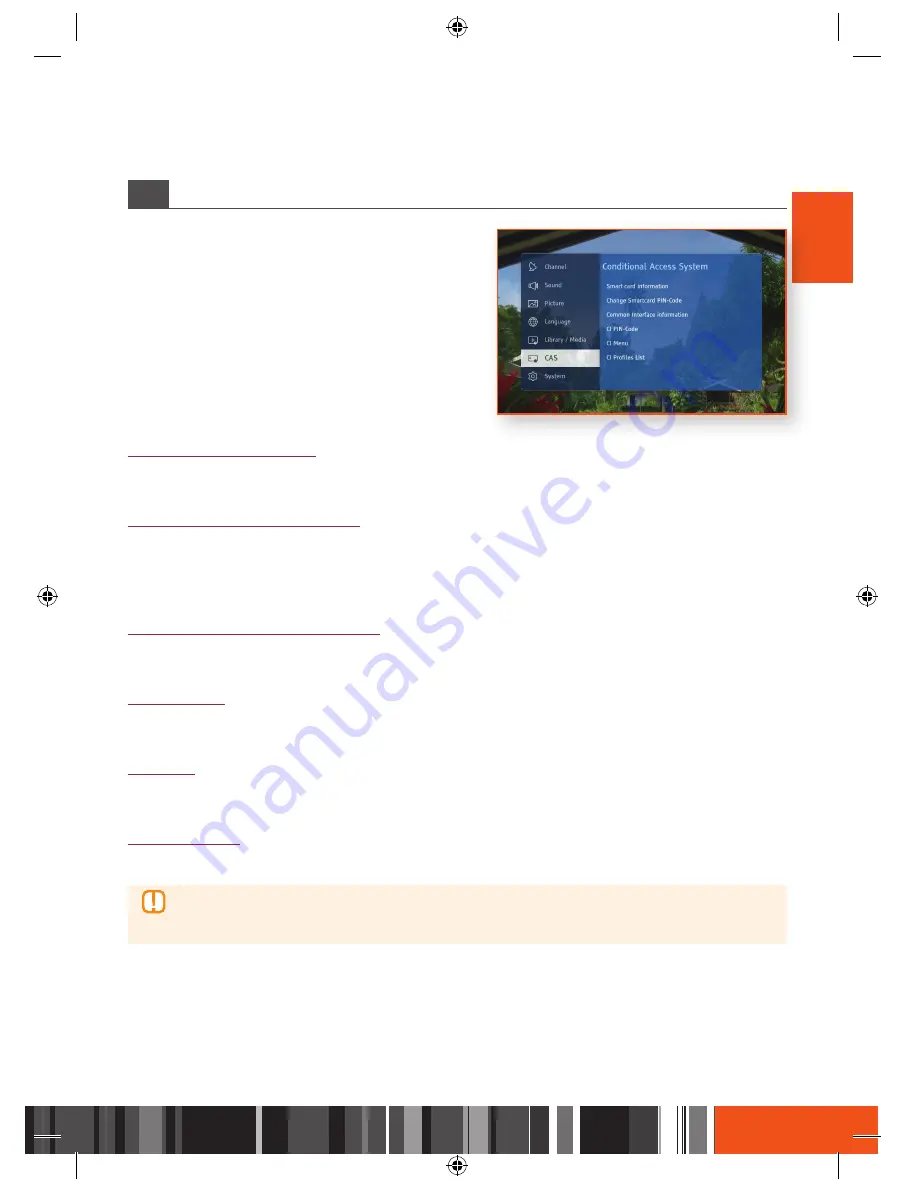
 Cas 

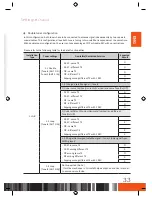
This section of the Settings contains information about 

Conditional Access System i.e. inserted Smart Card and 

CI+ module. 

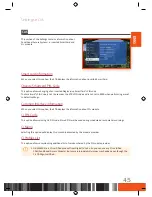
Smart card information

When you select this option, the STB displays the information about inserted Smart Card.

Change Smartcard PIN-Code

This option allows changing of an inserted Nagravision Smart Card’s PIN code.

The Smartcard’s PIN Code is not the same as the STB’s PIN code and is not set to 0000 when performing a reset 

to default settings.

Common Interface information

When you select this option, the STB displays the information about CI+ module.

CI PIN-Code

This option allows storing CI+ PIN code. Stored PIN will be used during scheduled or automatic recordings. 

CI Menu

Selecting this option will display CI content broadcasted by the module provider. 

CI Profiles List

This option allows downloading additional list of services shared by the CI module provider.


\

GX-SM650SJ is a CI+ certified product from Digital TV Labs. So you can use any CI+ certified 

CAM(Conditional Access Module). But some interoperability issues may happen even though the 

CI+ CAM got certified.

45

Содержание GX-SM650SJ

Страница 1: ...afety and to prevent property losses Please read this document carefully for proper use Part No GL68 00686A Ed 01 USER MANUAL GX SM650SJ Samsung Electronics UK Ltd Euro QA Lab Blackbushe Business Park Saxony Way Yateley Hampshire GU46 6GG United Kingdom ...

Страница 2: ...government office for details of where and how they can take these items for environmentally safe recycling Business users should contact their supplier and check the terms and conditions of the purchase contract This product and its electronic accessories should not be mixed with other commercial wastes for disposal This guide may be changed for product improvement standardization or other techni...

Страница 3: ...OR ADJUSTMENTS OR PERFORMANCE OF PROCEDURES OTHER THAN THOSE SPECIFIED HEREIN MAY RESULT IN HAZARDOUS RADIATION EXPOSURE DO NOT OPEN COVERS AND DO NsOT REPAIR YOURSELF REFER SERVICING TO QUALIFIED PERSONNEL This product satisfies CE regulations when shielded cables and connectors are used to connect the unit to other equipment To prevent electromagnetic interference with electric appliances such a...

Страница 4: ...ast 5cm around all sides Never place the STB on soft furnishings or carpets Do not put anything on the STB which might spill liquid into it or place it in an environment where it may be subject to moisture or rain Do not place the STB on top of other powered electrical equipment such as an amplifier or DVD player Do not operate in an enclosed space such as a Hi Fi cabinet Do not allow the power ca...

Страница 5: ... to an HDMI supported AV receiver 20 Method 2 Connecting to an AV receiver with Optical input 20 Connecting to a Network Router 21 Wired Network 21 Connecting the Power 22 Settings 23 The Setup Procedure 23 Run the first installation procedure 23 Scanning 25 Software Upgrade 27 Main Menu 28 Accessing the Settings Screen 29 Remote Control 29 Channel 30 ASTRA channel list update 30 Auto tune 30 Manu...

Страница 6: ...tles secondary 42 Library Media 43 Media auto open 43 Instant recording 43 Initial guard time 43 Final guard time 43 Subtitle settings 43 HDD USB storage settings 43 Media renderer 44 Media renderer name 44 CAS 45 Smart card information 45 Change Smartcard PIN Code 45 Common Interface information 45 CI PIN Code 45 CI Menu 45 CI Profiles List 45 System 46 Product information 46 Auto Turn off 46 Tim...

Страница 7: ...nding live TV 59 Recording programs 60 Channel list 62 Locking channels 62 Favourites list 62 Sorting channel list 64 Using the HbbTV 65 Watching Picture In Picture 66 Using the Library 67 Contents Timer list 67 Contents 67 Timer 67 To select all deselect all timers 67 To delete the timer 68 To sort timers 68 To add timer 68 To edit timer 68 Media Play 69 Playing Files on a USB Device 69 Controlli...

Страница 8: ... wording 77 Network Service Disclaimer 78 Allgemeine Geschäftsbedingungen HD 79 Limited Warranty to Original Purchaser 83 Open Source License Notice 84 A Key Ima Supp Elec Using chann Enjo Allow Con You c remo Dolb Produ supp Hbb Innov the b PIP Allow scree CI Comm DLN Techn home Contents 06 ...

Страница 9: ...on on the remote control or scheduling recording of programs via the EPG for instance Dolby Digital Plus Sound Produces realistic digital sound by connecting the product to a STB amplifier through the HDMI port which supports Dolby Digital Plus HbbTV Innovative and interactive hybrid television connecting conventionally broadcasted TV with a multimedia from the broadband internet PIP Picture in Pi...

Страница 10: ...ology that enables the delivery of broadcast signal to multiple users over a single coaxial cable Channel list Preview This function allows previewing a channel in a mini popup screen when the channel is focused on a channel list Customized channel lists It allows channel list and list of favorites edition Channels can be modified internally in the STB system or exported to USB storage and changed...

Страница 11: ...ower supply for the drives after connecting too many devices at once to passive HUB Recommended is usage of the HUB with external power supply There is no limitation neither size nor speed for the drive to be used in media library to store pictures or music Nevertheless there are minimum requirements to assign device to PVR functionality This minimum requirements are recommended to play video from...

Страница 12: ...ontrol AAA Size Power Adapter Power Cable SCART Gender Cable HD Supplement GX 6 50SJ User Manual Smart Card You can purchase the cable accessories not supplied with the product from a local Samsung dealer Not supplied cable HDMI cable Coaxial cable LAN cable Optical cable Scart cable Fro This s 7 Se 7 seg mode mode Table 10 ...

Страница 13: ...ue is presented with blinking colon every second When the STB goes to energy saving mode from standby mode only dot is being displayed to show that the device is connected to electricity Table below shows display behaviors at different STB states STB State 7 display state Live Channel number Standby mode Current time blinking colon per second Energy Saving mode Passive standby Displaying dot no bl...

Страница 14: ...connect the Satellite antenna cable from your cable system 3 A digital audio output port which is connected to an audio system with an OPTICAL OUT port with an optical cable 4 Port that connects to the external USB device 1 rear panel 1A 5 To connect to TV with an HDMI cable 6 LAN connection to router for interactive functionality 7 To connect a TV with a SCART gender cable 8 To connect external p...

Страница 15: ... to select a subtitle available for current channel Rewind Rewind the program recording Play Pause Play and pause the program recording Change to Time Shift mode Stop Stop the playback or recording Forward Fast forward the program Put the STB in stand by mode no signal to TV Return to the previous menu To execute as corresponding colors shown on the menu Used to select an audio track available for...

Страница 16: ... Point the remote control towards the television 3 Press the TV button to set the remote to TV mode 4 Press and hold the TV button and then enter the two figure code in the table to the right that corresponds to the brand of your television by pressing the appropriate number buttons If your television is compatible with the remote control it will turn off The remote is now programed to operate the...

Страница 17: ...9 LG TV 06 19 20 21 22 78 LOEWE TV 06 69 LOEWE OPTA TV 06 57 MAGNAVOX TV 40 METZ TV 57 MITSUBISHI TV 06 48 62 65 MIVAR TV 52 77 NEC TV 83 NEWSAN TV 68 NOBLEX TV 66 Brand Code NOKIA TV 74 NORDMENDE TV 72 73 75 PANASONIC TV 53 54 74 75 PHILIPS TV 06 55 56 57 PHONOLA TV 06 56 57 PIONEER TV 58 59 73 74 RADIOLA TV 06 56 RADIOMARELLI TV 57 RCA TV 45 46 REX TV 74 SABA TV 57 72 73 74 75 SALORA TV 74 SANYO...

Страница 18: ...XT TV Port Scart Connection This section describes how to connect to a TV with Scart cable TV SCART Gender Cable 1 Connect the small end of the Scart cable gender supplied to the EXT TV port at the rear of your STB 2 Connect the large end scart jack of the Scart cable gender to your TV using an scart cable not supplied 3 Turn on the product and TV 4 Press the input selector on your TV remote contr...

Страница 19: ... the other connections When you change connections turn off all devices before you start An HDMI cable outputs digital video audio so you don t need to connect an audio cable If you use an HDMI to DVI cable to connect to your display device you must also connect the Digital Audio Out on the product to an audio system to hear audio Depending on your TV certain HDMI output resolutions may not work P...

Страница 20: ...ndard This makes it possible to control the STB using a TV remote control or to control the TV using the STB remote control in the case of the automatic power on function Supported functions are Automatic power off when the Standby button is pressed on the TV the TV goes to standby mode together with the STB Automatic power on when the Standby button is pressed on the STB the STB wakes up from sta...

Страница 21: ...le tuner configuration does not support connecting two satellite dishes separately to the STB To receive multiple satellites signal a DiSEqC switch should be used in between dishes and tuner where tuners are connected to switch independently Tuner loop configuration In this configuration antenna signal is passed by only one coaxial cable and the connection between tuners is created internally This...

Страница 22: ...cord until you have made all the other connections When you change the connections turn off all devices before you start 3 Press the input selectors of the connected audio system and TV until the video signal from the product appears on your TV and you hear the audio signal through your audio system Method 1 Connecting to an HDMI supported AV receiver Use an HDMI cable not included Method 2 Connec...

Страница 23: ...dband service Router Broadband service with integrated router Broadband modem Internet access to HbbTV service may not be allowed depending on the router you use or your ISP s policy For more information contact your ISP Internet Service Provider DSL users please use a router to make a network connection To use the Samsung Link function with your PC you must connect your PC to your network 21 ...

Страница 24: ...creen To turn off the product press the Power button on your remote control To turn it on press the Power button again Power Adapter Power Cable If power is disconnected from the STB while it is operating normally the product will turn on automatically when power is reconnected If the STB has been turned off or left unplugged for more than 1 week the device may lose authorization for satellite TV ...

Страница 25: ...ct the STB to a TV for the first time the product turns on automatically and the first installation screen appears If the installation screen does not appear change the TV s source setting to the source you ve connected the product to for example HDMI 1 HDMI 2 For instructions see your TV s user s manual 3 Use the buttons to select an installation mode and then press the v button Auto Manuelles Se...

Страница 26: ...elect Next and then press the v button on the remote control For more information about quick scanning see Quick Scanning on page 25 Auto Search This option will linearly scan all transponders on the Astra and HotBird satellites one by one For advanced configuration of SatCR or satellite dish with positioned motor please skip this step and configure the settings manually When you press skip button...

Страница 27: ...sponder 1 111 12 60375 GHz Horizontal 22000 KS s 5 6 DVB S QPSK 2 108 12 55150 GHz Vertical 22000 KS s 5 6 DVB S QPSK 3 57 10 83225 GHz Horizontal 22000 KS s 3 2 DVB S2 8PSK If the STB is in the SatCR environment then there can t be any scanned channel In that case you have to upgrade the software according to the USB update way NOT the OTA update way The USB update is described in Settings System...

Страница 28: ...en appears with showing the numbers of the TV and radio channels found Select Save and press the v button to confirm Auto scanning can take several minutes depending on the satellite selected Manual Scanning Manual scanning allows the user to scan particular transponders Predefined transponder parameters may be used or the transponders to be scanned may be set manually Soft 1 2 26 ...

Страница 29: ...r STB with the latest software to use all the functionalities The detail upgrade way is described in Settings System Software upgrade 2 SatCR environment users have to do the USB Update way for the first time Refer to page 50 to do the software upgrade by the USB Update way 27 ...

Страница 30: ...els memorized See page 62 3 Library Provides access to and allows management of the list of recorded material See page 67 4 Media Plays videos photos or music content from an external USB storage device See page 69 5 Info Displays information about the channel currently being watched See page 54 6 Settings Set various functions to suit your personal preferences See pages 29 51 Acce 1 2 3 Rem 28 ...

Страница 31: ...ase refer to the remote control illustration and the Settings Control Button table in the below Remote Control 1 2 3 4 Settings Control Button Table 1 MENU Button Press to show the Main menu 2 RETURN Button Return to the previous menu 3 v Enter DIRECTION Buttons Press the buttons to move the cursor or select an item Press the v button to activate the currently selected item or confirm a setting 4 ...

Страница 32: ...ave them If a channel list has already been scanned you can choose the Update option to update the channel list Updating of the channel list is also performing automatically when the STB is booted or when the STB wakes up from the standby mode Auto tune When you select this option the STB automatically scans and indexes all channels received through the STB s cable input connector The channels in ...

Страница 33: ...m Installation type Your product supports the setting up of various satellite reception configurations Depending on the installation in your home first you can choose one of the two possible installation types LNB or SATCR Changing between those installation types will cause removing all services and Favorite Lists You will be asked to confirm whether this operation should be proceeded or not 1 If...

Страница 34: ...e limitation is connected with polarization and lo hi band E g when the first tuner ANT 1 IN is tuned to TS with Horizontal polarization LNB sets 18V and the second tuner ANT 2 IN is connected to TS with Vertical polarization LNB sets 13V But it is not possible to have 18V and 13V on single cable so 18V is set It means that the second tuner ANT 2 IN cannot be tuned to TS and no signal is observed ...

Страница 35: ...ferent TS Zapping among different TS with 1 REC O O O O O 1 2 Loop Tuner1 ANT 1 IN 1 2 1 Merged satellite signal Tuner1 1 Under same Position Horizontal Vertical and same Tone On Off 2 REC same TS 2 REC different TS PIP same TS PIP different TS Zapping among different TS with 1 REC O O O O O 2 Under different Position Horizontal Vertical and different Tone On Off 2 REC same TS 2 REC different TS P...

Страница 36: ...lp description and User manual to avoid user confusion Positioner According to this option you can disable or enable the positioner You can select one of the following options DiSEqC Motor USALS or disable it by selecting NONE Positioner Settings If one of the Positioner types between DiSEqC motor and USALS additional Positioner Settings option will appear in the Channel menu You are able to use o...

Страница 37: ...released Step If you press the button the motor drives by several degrees only Each satellite has its own slot number So after correcting dish adjustment you must store it as the current position This stored position will be used for the dish moving during scanning or channel change USALS settings In this window you are able to set longitude and latitude coordinates of your antenna location Based ...

Страница 38: ...Cable settings option will appear in Channel menu Single Cable settings SatCR allows the connection up to 8 STBs via single coaxial cable There are 4 and 8 slot devices available on the market Each device must be assigned to unique slot number and its corresponding frequency Splitters must be used to connect STBs to common coaxial cable SatCRs support switching between two satellites DiSEqC A and ...

Страница 39: ...this functionality a USB storage device has to be connected to the STB In this case channel list will be saved in the ChList xml Exporting Importing channel list You can export or import channel list to or from USB storage This functionality is a quick and easy way to save and restore favorite services lists after factory reset It is also possible to transfer saved favorite channels between device...

Страница 40: ... the volume but the digital audio output becomes available in PCM format instead Audio primary You can change the audio language other than your preferred Audio language Audio secondary You can change the language for the Audio secondary which is available if an Audio secondary service is provided by the program provider Audio primary and secondary options are settings for audio tracks selection p...

Страница 41: ... If 3D mode is not recognized automatically although service is in the 3D format you can force this mode manually SBS 3D Convert SIDE BY SIDE 3D format to the 3D view SBS 2D Convert SIDE BY SIDE 3D format to the 2D view TB 3D Convert TOP BOTTOM 3D format to the 3D view TB 2D Convert TOP BOTTOM 3D format to the 2D view If you use one of the forced 3D formats not Auto you should remember to set 3D m...

Страница 42: ...ously watch channels programs from both tuners One of the services is displayed on main screen while second one is displayed in popup window PIP can be used only while STB is connected to TV via HDMI cable SCART output is automatically disabled when PIP option is set to On For more details how to use PIP functionality refer to chapter Using the Basic Functions Watching Picture In Picture Channel l...

Страница 43: ...provide CVBS signal only or both CVBS and RGB Generally RGB signal provides better quality Setting this option does not affect HDMI digital output Information banner timeout This allows you to change the display time for the service information that appears at the top of the screen when you change channels or press the INFO button Screen saver You can set the time delay for the screen saver If the...

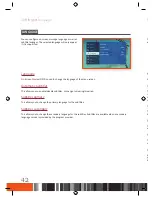
Страница 44: ...is allows you to enable disable subtitles or change to Hearing Impaired Subtitles primary This allows you to change the primary language for the subtitles Subtitles secondary This allows you to change the secondary language for the subtitles Subtitles are available when a secondary language service is provided by the program provider Lib You c and U Med Allow Inst This a recor chang same Initi Thi...

Страница 45: ...Initial guard time This allows you to set how many minutes will be recorded in advance before your scheduled recording should be started Final guard time This allows you to set how many minutes will be recorded more after your scheduled recording should be ended Subtitle settings This allows you to change Color Size Position and Encoding of subtitles for movies displayed from Media USB or DLNA Thi...

Страница 46: ...trol from the playback of content on STB DMR Digital Media Renderer is advertising itself on network so it is available to every DLNA Media Controller in local network Media renderer name DLNA Media Renderer is visible in network under certain name so called friendly name Predefined value is STB ip address of STB This name can be changed via Settings menu Library Media Renderer name CAS This s Con...

Страница 47: ...forming a reset to default settings Common Interface information When you select this option the STB displays the information about CI module CI PIN Code This option allows storing CI PIN code Stored PIN will be used during scheduled or automatic recordings CI Menu Selecting this option will display CI content broadcasted by the module provider CI Profiles List This option allows downloading addit...

Страница 48: ... the STB automatically If the STB has been turned off or left unplugged for more than 1 week the device may lose authorization for satellite TV services To restore satellite TV services please contact your satellite TV service provider Timeout to power saving mode This lets you set the STB go into the deep standby mode automatically from the standby mode The deep standby mode means the most Low Po...

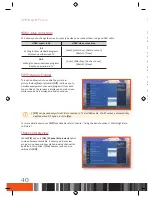
Страница 49: ... the remote control 2 Select Settings System and then press the button 3 Select Network settings and then press the button 4 Select Auto in the Network Settings screen 5 Select OK and then press the v button The STB detects the wired connection verifies the network connection and then connects to the network Manual If you have a static IP address or the Automatic procedure does not work you ll nee...

Страница 50: ... Reset to defaults and then press the v button to confirm 6 When the factory reset is completed the product will restart and the first installation procedure starts again on the screen You must enter your 4 digit PIN by using the number buttons on the remote control to access the Reset function If you didn t change the PIN use the default PIN 0000 Please note that once you perform the Reset to def...

Страница 51: ... update the image from USB if connected or from the satellite OTA Update You can use manual update to update the software through your network connection 1 Press the MENU button on the remote control 2 Select Settings System Software upgrade and then press the v button 3 Choose OTA mode by pressing the button 4 Select Search and press the v button 5 A Searching for new software window appears on t...

Страница 52: ...cond pop up to download and save the firmware file to your PC 9 Copy the files LoaderImage bin and MainAppImage bin to the main directory of your USB flash drive 10 Insert the USB flash drive into the USB port of the STB 11 In the STB s menu go to Settings System Software upgrade 12 Select USB in the mode and select Search and then press the v button on the remote control 13 The STB searches for t...

Страница 53: ...then press the button 3 Select Change STB PIN Code and then press the button 4 Under Current STB PIN code enter the old PIN by using the number buttons on your remote 5 Under New STB PIN code enter the new PIN by using the number buttons 6 Under Confirm new STB PIN code enter the new PIN again 7 Select Save and then press the v button on your remote When the PIN is changed successfully then PIN co...

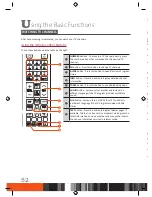
Страница 54: ... TOOLS button Press this button to use additional options 6 AUDIO button Lets you select another audio track in a different language if the TV program provides multi track sound 7 SUB button Lets you turn on off DVB or TXT subtitles in a different language if the TV program provides subtitle tracks 8 TEXT button Press this button to display Teletext pages if available Teletext is a free service br...

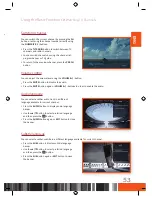
Страница 55: ... the MUTE button to disable the audio Press the MUTE button again or VOLUME buttons in order to enable the audio Audio language You can select another audio track in a different language available for current channel Press the AUDIO button to display audio language banner Use the button to select preferred language and then press the v button Press the AUDIO button again or EXIT button to close th...

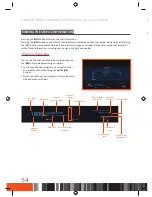
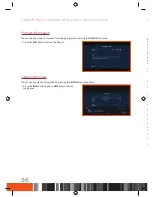
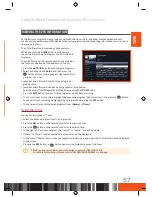
Страница 56: ...nformation including data on signal strength and quality Channel Information You can see the channel info banner by pressing once the INFO button while watching a program You can see the next programs on current channel and another channel by using the buttons You can check the current program s status channel title and broadcast time Start time Program time Next program Current program progress C...

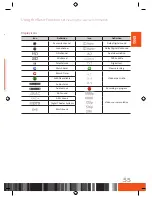
Страница 57: ...by Digital Sound Lock channel Dolby Digital Plus Sound HD channel Audio description SD channel DVB Subtitle Parental Lock Digital text Watch timer New recording Record Timer Video aspect ratio Subtitle available Audio stereo Audio mono Recording in progress AAC sound Video source resolution AAC sound Digital Theater Systems Multi Sound 55 ...

Страница 58: ...utton twice Press the EXIT button to close the banner Signal Information You can see the signal information by pressing the INFO button three times Press the INFO button again or EXIT button to close the banner View EPG conti upco The E When contr displa The c the fu Pre Sel v pro Jum gre Jum Sea Pre To You You Usin You c Sel Pre Pre To If t In t on Pre 56 ...

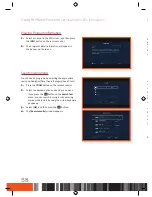
Страница 59: ...gory Search Text Genre using the TOOLS button Press the EXIT button to return to the program you have been watching To set a reminder or recording highlight the upcoming program that interests you and press the v button You can also set a recording by highlighting a program and pressing the REC button You can view the list of scheduled programs from Library Timer Using the Timer You can set two ty...

Страница 60: ...search options Day Time Genre Category Search text 1 Press the TOOLS button on the remote control 2 Select the desired option and set it as you want If you press the v button on the Search Text menu you can search for program by entering words or characters by using the virtual keyboard popped up 3 Select OK and then press the v button 4 The Search results window appears Pau While press mode revie...

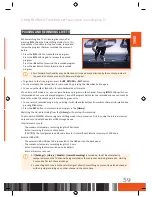
Страница 61: ...color while the unseen part is marked by green color You can watch recorded program by selecting it with and buttons from within channel information and pressing OK button Press the REC button to store recorded program in the Library Watching the stored recording from the Library will not stop this recording The model GX SM650SJ allows using time shifting mode in two scenarios First by using the i...

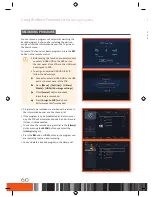
Страница 62: ...B HDD to the USB port on the rear panel of the STB 2 Go to Menu Settings Library Media HDD USB storage settings 3 Press Format button and check formatting is succeeded 4 Press Assign to PVR and check Performance test is succeeded Programs to be recorded are marked with red icon in the information banner and the channel list If the program is to be broadcasted at a later time or day the STB will au...

Страница 63: ... recording in the background Available scenarios are Service on tuner 1 ANT 1 IN Service on tuner 2 ANT 2 IN Case 1 Watch live REC Case 2 Watch REC REC Case 3 Time shift REC The Dual REC feature is fully available on all services only when the Tuner settings option is set to Double tuner and both tuners are connected independently to the dish The Loop configuration restricts available services as ...

Страница 64: ...ay differ from the locations of installed ASTRA satellite antenna Locking channels You can lock a specific channel Once locked you must enter your PIN code in order to view those locked channels Select a channel in the Channel list and then press the Red button on the remote control to lock a channel Favourites list You can designate frequently watched channels as Favourites Favourite channels are...

Страница 65: ...V select channel you want to add by highlighting the channel 6 Press the v button to add the selected channel to the favourite channel list 7 If you add all necessary channel to favourite channel list press the RETURN button on the remote control Remove Favourite Channels Remove channels from a Favourite channels list 1 In the Channel list press the Yellow button 2 Press the button on the remote c...

Страница 66: ...ls in the Channel list You can order the list by name or number 1 In the Channel list press the TOOLS button on the remote control 2 Select the sort option you want and then press the v button Usi HbbT broad boxes launc If an is sup using HbbT To us the in NETW the d optio settin 64 ...

Страница 67: ...e service you can launch it at any time by pressing the RED button on the remote control while watching a TV program If an HbbTV Hybrid Broadcast Broadband TV option is supported by the program you can start HbbTV by using the RED button on the remote control when HbbTV supporting program is displayed on screen To use the HbbTV service connect your STB to the internet Refer to Page 21 CONNECTING T...

Страница 68: ... controls by pressing RETURN button Deactivating the PIP window controls will pass control for main display but PIP will still be visible To close the PIP window press PIP button on RCU If both PIP and Channels list preview option are enabled a small PIP window will be displayed while browsing channel list The PIP window is placed just next to channel list window and presents live preview of curre...

Страница 69: ...te control to display the program information of the selected recording Press the v button on the remote control to playback the selected content Timer You can see the list of scheduled programs Playback related buttons To return to normal speed playback press the p button p button Pause or resume playback button Stops playback Fast Rewind During playback press the button Each time you press the b...

Страница 70: ... To add timer 1 Press the TOOLS button on the remote control 2 Select Add timer and then press the v button on the remote control 3 You can now select the Type Bouquet channel Date Start Stop Frequency Initial guard time Final guard time and title of the new timer To edit timer 1 Select a timer by pressing the Yellow button on the remote control 2 Press the TOOLS button on the remote control 3 Sel...

Страница 71: ...dia and then press the v button When the USB storage device is connected to the product you can see the USB directory on the Media screen 5 Select Photo Music Video or All and then press the v button 6 Use the buttons to select the desired device and then press the v button Depending on how the contents are arranged you will see either folders individual files or both 7 If necessary use the button...

Страница 72: ... remote control 2 Press the TOOLS button on the remote control 3 Select Delete on the pop up window 4 Confirm with the v button on the remote control To copy the files 1 Select files by pressing the Yellow button on the remote control 2 Press the TOOLS button on the remote control 3 Select Copy on the pop up window Press the Green button to create a new folder Press the Red button to see the root ...

Страница 73: ...he TOOLS button on the remote control 2 Select Sort on the pop up window and then press the v button on the remote control 3 Choose the sorting mode and the sorting order you want to do 4 Confirm with the v button on the remote control To select all the files 1 Press the TOOLS button on the remote control 2 Select Select all on the pop up window and then press the v button on the remote control To...

Страница 74: ...edia Renderer device profiles DLNA Media Player allows you to perform the following operations Discover DLNA media servers Show the list of media servers available in Media Network Refresh the list of servers by sending M SEARCH request Browse all servers as classic storage directory and display files according to DLNA type provided by server or extension if available Pla For HD In the are li DLNA...

Страница 75: ... DLNA Media Controller device or program preferably a phone or a tab Change the Renderer s name in Settings menu When a device is requesting the playback for the first time a banner is shown and you can make decision For the Media renderer trick modes are not supported audio jumps are limited to 15 second steps and files are not cached Network configuration Default gateway must be set properly Add...

Страница 76: ...our STB is power ON y y Check the connection between the TV input port set and the STB output port y y Check if your TV input source is correct When you use HDMI then the TV input source must be HDMI or the connected HDMI port No if there are one more HDMI input ports When you use SCART then the TV input source must be AV The use of SCART isn t recommended due to the low resolution y y If the HDMI...

Страница 77: ...t In the TV and the STB again First installation screen is shown again after performing the Reset to default settings y y It is a correct operation When you perform the Reset to default settings in Settings System All settings including the PIN will revert to the factory settings When the factory default settings are restored all stored user data is deleted During the booting No signal screen keep...

Страница 78: ...1 4 USB port USB 2 0 1 rear panel 1A 1 front panel 0 5A Power Power Consumption Power On Max 35 W Power Off 0 5 W Power Rating DC 14 V 2 5 A Network Wired LAN RJ 45 Ethernet Port x 1 100M BASE TX Satellite RF Input Tuning Range 950 MHz to 2150 MHz Input Signal Level 25 dBm to 65 dBm Symbol Rates 1 45 MS s RF Demodulation DVB S QPSK DVB S2 QPSK 8PSK DiSEqC Support DiSEqC 1 2 LNB Current Max 350 mA ...

Страница 79: ...DLNA Logo and DLNA CERTIFIED are trademarks service marks or certification marks of the Digital Living Network Alliance The CI Plus Logo is a trademark of CI Plus LLP Manufacturer wording This device enables the reception of Sky channels with a Sky CI Plus Module With a Sky CI Plus Module and a CI capable Samsung STB you can receive Sky The Sky CI Plus Module is easy just plug it together with you...

Страница 80: ...ITY OR COMPLETENESS OF ANY CONTENT OR SERVICE MADE AVAILABLE THROUGH THIS DEVICE AND UNDER NO CIRCUMSTANCES INCLUDING NEGLIGENCE SHALL SAMSUNG BE LIABLE WHETHER IN CONTRACT OR TORT FOR ANY DIRECT INDIRECT INCIDENTAL SPECIAL OR CONSEQUENTIAL DAMAGES ATTORNEY FEES EXPENSES OR ANY OTHER DAMAGES ARISING OUT OF OR IN CONNECTION WITH ANY INFORMATION CONTAINED IN OR AS A RESULT OF THE USE OF ANY CONTENT ...

Страница 81: ...eiben unberührt 1 5 Der Digitalempfänger das Wiedergabegerät z B TV und die Programmangebote sind ausdrücklich nicht Leistungsgegenstand Zertifizierte Digitalempfänger sind im Handel erhältlich Ihre Installation obliegt dem Nutzer Im Falle technischer oder allgemeiner Probleme mit dem Digitalempfänger liegt die Verantwortung für den Kundenservice beim Hersteller des Digitalempfängers 1 6 Die Anzah...

Страница 82: ...eischaltung verkürzen Der Erwerb einer HD Karte beinhaltet jedoch nicht den Anspruch auf Verlängerung derselben 3 5 Die Programmangebote und Services Dritter und deren Empfang bzw Nutzung können gesonderte Kosten auslösen für die der Nutzer selbst verantwortlich ist 4 Beachtung von Urheberrechten 4 1 Die HD Software und die HD Karte sind rechtlich geschützt Soweit Programme von Lizenzgebern zur An...

Страница 83: ...er Kündigung abmahnen wenn nicht der Verstoß so schwer wiegt dass HDP eine Fortsetzung des Nutzungsverhältnisses nicht zumutbar ist 7 5 Bei einem auf dem Verschulden des Nutzers beruhenden Nutzungsausschluss gemäß Ziffer 7 3 bleibt der Nutzer auch für den Zeitraum des Nutzungsausschlusses und der Leistungsunterbrechung zur Zahlung der Vergütung verpflichtet 8 Gewährleistung 8 1 HDP erbringt Leistu...

Страница 84: ...en sämtliche vertraglichen und gesetzlichen Ansprüche die wegen der Nutzung des HD Services geltend gemacht werden können 10 Kündigung des Vertrages und Änderung des HD Services 10 1 Der Vertrag über die Nutzung des HD Service läuft für die jeweils vereinbarte Dauer ab Aktivierung der HD Karte Eine Verlängerung setzt voraus dass die HD Karte nicht gem Ziffer 1 8gesperrt ist Unberührt hiervon bleib...

Страница 85: ... um es an die technischen und oder sicherheitstechnischen Normen dieses anderen Landes anzupassen Solche Veränderungen sind nicht auf Material oder Verarbeitungsfehler des Gerätes zurückzuführen und werden von dieser Garantie nicht abgedeckt Die Kosten für solche Veränderungen sowie für dadurch am Gerät entstandene Schäden werden nicht erstattet 5 Ausgenommen von der Garantieleistung sind a Regelm...

Страница 86: ...x Open Source License Notice Open Source License Notice Open Source used in this product can be found on the following webpage http opensource samsung com Open Source License Notice is written only English 84 ...

Отзывы: