background image

Tel: 886.2.2175 2930 Email: [email protected] 

www.salukitec.com


48 


Cycle Mean: The arithmetic mean over the first cycle in the waveform 


Positive OverShoot: Positive Overshoot = (Max - Top)/Amp x 100 %, Measured over the entire waveform 


Negative OverShoot: Negative Overshoot = (Base - Min)/Amp x 100 %, Measured over the entire waveform. 

3)


Horizontal 


Period: Time to take for the first signal cycle to complete in the waveform 


Frequency: Reciprocal of the period of the first cycle to complete in the waveform 


Rise Time: Time taken from lower threshold to upper threshold 


Fall Time: Time taken from upper threshold to lower threshold 


+Duty Cycle: Positive Duty Cycle = (Positive Pulse Width)/Period x 100%, Measured of the first cycle in 
waveform. 


-Duty Cycle: Negative Duty Cycle = (Negative Pulse Width)/Period x 100%, Measured of the first waveform. 


+Pulse Width: Measured of the first positive pulse in the waveform. The time between the 50% amplitude points 


-Pulse Width: Measured of the first negative pulse in the waveform. The time between the 50% amplitude 
points 

4)


Clear Item 

Clear all measure items on display screen. 
5)


Edit Item 

Click “Measure->Edit Item”. User can select Maximum 8 measure options to measure. 
Note: The results of the automatic measurements will be displayed on the bottom of the screen. Maximum 8 results 
could be displayed at the same time. When there is no room, the next new measurement result will make the 
previous results moving left, out of screen. 
6)


DVM 

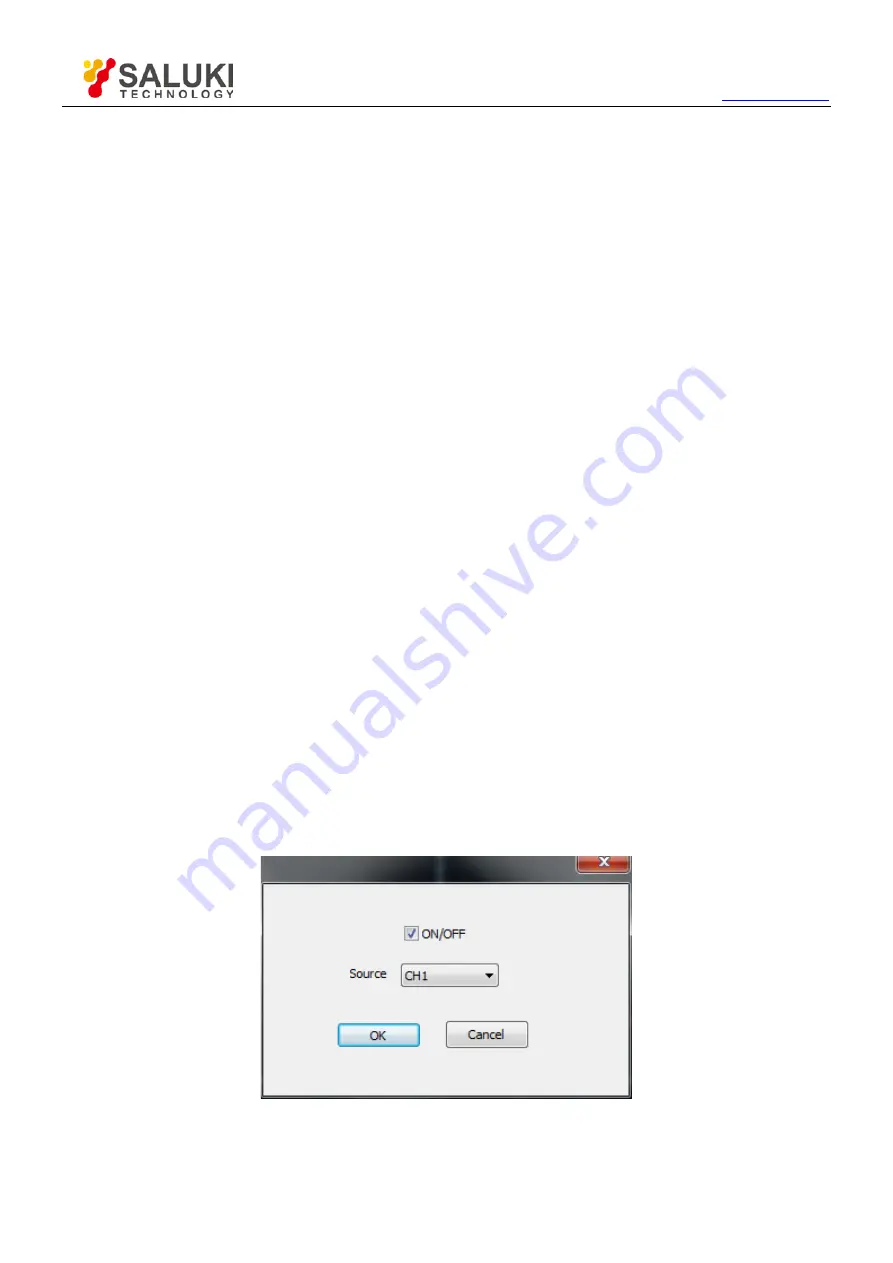
Click “Measure->DVM”, the DVM dialog will be showed. 


Turn on/off the DVM measure column, and it will be displayed on top right corner on the screen. Also you can drag it 
to any location. 

Содержание MO1072 Series

Страница 1: ...0MSa s Real Time sample rate 20 more automatic measurement function PASS FAIL Check function 2 CH Oscilloscope or 16CH Logic Analyzer 1CH Oscilloscope 8CH Logic Analyzer Waveform averaging afterglow l...

Страница 2: ...le is very convenient during your application Build in Lithium Battery with 4 hours endurance no need of external power Good mechanical design with small size which is convenient for traveling Technic...

Страница 3: ...s DC Gain Accuracy 3 Trigger Trigger Source CH1 CH2 EXT Trigger Mode Auto normal singal Trigger Type Edge Alternative Trigger Sensitivity 0 02 division Trigger Range 4V Trigger Precision 4division Mea...

Страница 4: ...erating 0 40 Non operating 20 60 Humidity Below 35 90 relative humidity 35 40 60 relative humidity Volume 190mm x 100mm x 35mm Weight 0 7KG net weight Standard Package 230x175x75cm Gross weight approx...

Страница 5: ...MO1072 Modular WIFI Oscilloscope User Manual Saluki Technology Inc...

Страница 6: ...kitec com 2 The document applies to the modular WIFI oscilloscopes of the following models MO1072 Modular WIFI Oscilloscope MO1072L Modular WIFI Oscilloscope MO1072 Modular WIFI Oscilloscope standard...

Страница 7: ...hich should not be modified or tampered by any organization or individual or reproduced or transmitted for the purpose of making profit without its prior permission otherwise Saluki will reserve the r...

Страница 8: ...886 2 2175 2930 Email sales salukitec com www salukitec com 4 Contacts Service Tel 886 2 2175 2930 Website www salukitec com Email info salukitec com Address No 367 Fuxing N Road Taipei 105 Taiwan R...

Страница 9: ...onnection Mode with PC 26 4 4 The User s Interface 27 4 5 The Menu System 29 4 6 Setup the Oscilloscope 30 4 7 Set Horizontal System 30 4 7 1 Horizontal Setting 30 4 7 2 Application of the X Y Operati...

Страница 10: ...5 4 1 Horizontal Setting 59 5 4 2 The Application of the X Y Operation 60 5 5 Set Vertical System 60 5 6 Set Trigger System 61 5 7 Save and Load 62 5 7 1 Save Load File 62 5 7 2 Save Load Reference 62...

Страница 11: ...d fire or shock hazard observe all ratings and markings on the product Consult the product manual for further ratings information before making connections to the product Use Proper Probe To avoid sho...

Страница 12: ...ndicate that when you read this mark personal injury may be caused to immediately Waning The term Danger is used in the manual to indicate that when you read this mark personal injury may not be cause...

Страница 13: ...on protocol between the oscilloscope and the tablet is freely available so it is easy for third party developers to develop applications for other purposes Finally it is equipped with a USB port for c...

Страница 14: ...10 3 Quick Start In addition to the list of general features on the next page this chapter describes how to do the following tasks Connections and Indications Set Connection Mode Charging the battery...

Страница 15: ...rs for waveform display 3 EXT Input connector for an external trigger source Use the Trigger menu to select the Ext source 4 CAL Probe compensation output 5 GND Ground terminal 6 Power Button Power on...

Страница 16: ...mode If there is data transfer between the device and APP this indicator is quick blinking Otherwise the indicator is off In Wi Fi mode if there is communication link between the device and APP the in...

Страница 17: ...illoscope Check the shipping container for damage Keep the damaged shipping container or cushioning material until the contents of the shipment have been checked for completeness and the instrument ha...

Страница 18: ...e probe for the fattest square wave being displayed on the oscilloscope 5 Repeat if necessary WARNNING To avoid electric shock while using the probe be sure the perfection of the insulated cable and d...

Страница 19: ...ector of Probe compensator 2 Set the CH1 probe attenuation of the oscilloscope to X10 The default is X1 3 Attach the tip of probe and ground nip to the Connector of Probe compensator Click the AUTO bu...

Страница 20: ...nstall Software Install Driver Set Connection Mode with PC The User s Interface The Menu System Set Oscilloscope Set Horizontal System Set Vertical System Set Trigger System MATH an FFT Save and Load...

Страница 21: ...e software before using the oscilloscope on Windows PC 1 While in Windows insert the installation CD into the CD ROM drive 2 The installation should start up automatically Otherwise open Windows Explo...

Страница 22: ...Tel 886 2 2175 2930 Email sales salukitec com www salukitec com 18 4 Choose a destination directory Click Next to continue 5 Check the setup information Click Next to start copying of files...

Страница 23: ...Tel 886 2 2175 2930 Email sales salukitec com www salukitec com 19 6 This Status dialog is displayed during copying of files 7 Updating your system configuration...

Страница 24: ...e 4 2 Install Driver Caution You must install the driver before connect the device with Windows PC via USB cable Not need to install driver if you connect with PC via Wi Fi 1 Connect the A Type Plug o...

Страница 25: ...Tel 886 2 2175 2930 Email sales salukitec com www salukitec com 21 3 New hardware is found 4 New hardware search wizard starts...

Страница 26: ...Tel 886 2 2175 2930 Email sales salukitec com www salukitec com 22 5 New hardware search wizard starts to search the drive 6 New hardware wizard installs software...

Страница 27: ...l 886 2 2175 2930 Email sales salukitec com www salukitec com 23 7 Finish new hardware search wizard 8 New hardware is found 9 New hardware wizard installs software and finish new hardware search wiza...

Страница 28: ...s the output to the external driver The red molded hood on the auxiliary USB A connector enables the user to quickly distinguish between main and auxiliary power If the DSO instrument does not work th...

Страница 29: ...86 2 2175 2930 Email sales salukitec com www salukitec com 25 2 Right click MO1072 select Update driver software According to the installation wizard to install 3 The driver has been successfully inst...

Страница 30: ...3 Set connect mode to USB mode Please refer to Set Connection Mode 4 Double click shortcut icon on desktop to open software It will communicate with the device automatically 5 If the device is connec...

Страница 31: ...click in toolbar to connect via Wi Fi 5 If the device is connected with PC successfully the status information will display Connected on bottom status bar 4 4 The User s Interface Click the software i...

Страница 32: ...can change the CH1 CH2 volt div coupling and probe attenuation 5 The Trigger Panel In this panel the user can change the trigger mode sweep source and slope 6 Displays the system time 7 Battery Level...

Страница 33: ...he oscilloscope is in auto mode and is acquiring waveform in the absence of triggers Trig D The oscilloscope has seen a trigger and is acquiring the post trigger data WAIT All pretrigger data has been...

Страница 34: ...signal Save Setup The oscilloscope software saves the current setup before you close the oscilloscope software The oscilloscope recalls this setup when you run the software next time You can use the F...

Страница 35: ...ode This is only available when set to 500ms div or slower Caution If the time div bigger than or equal to 500ms the format will change to Roll mode automatically If you want to select Scan mode pleas...

Страница 36: ...Ellipse Method to observe the phase difference between the two channels Signal in X Y Format Instruction of the Ellipse Method Sin A B or C D where phase shift in degrees between the two signals From...

Страница 37: ...el Coupling Click Couple in Vertical Setup window You can set the coupling to DC AC or GND If you set the coupling to DC it blocks the AC component of the input signal AC the input signal is capacitiv...

Страница 38: ...al voltage levels at the probe tip Bandwidth Limit The oscilloscope is set to full bandwidth and will pass the high frequency component in the signal if the BW Limit was turned off The oscilloscope wi...

Страница 39: ...rigger mode to trigger on Rising edge or Falling edge Trigger Mode Edge Trigger Sweep Set the sweep mode to Auto Normal or Single Auto Performs the acquisition freely in absence of valid trigger It al...

Страница 40: ...gger Setting window 1 Adjust the Trigger Mode to Edge 2 Set the Trigger Sweep to Single 3 Set the Trigger Source to CH1 4 Set the Trigger Slope to which means you select the rising edge 5 Adjust the V...

Страница 41: ...division Operate Four Types A B Add source A and source B A B Subtract source B from source A A x B Multiply source A by source B A B Divide source A by source B In this function use the addition sub...

Страница 42: ...he FFT mode for the following types of analysis To use the FFT mode you need to click Setup FFT to open the FFT setting window The FFT setting window You can select the Source channel Window algorithm...

Страница 43: ...d to the display window more information is displayed by using scroll bar The FFT display Windows 4 11 Save and Load 4 11 1 Save and load file Click File in main menu to save data setup and image 1 Sa...

Страница 44: ...l Function On Off Turn on off the reference channel Load Click Load to load the rfc file that was selected The load file window will appear Save Click Save to save the waveform to rfc file The saved s...

Страница 45: ...Setup Save Setup You can use the File Save Setups in main menu to permanently save setting Load Setup You can use the File Load Setups in main menu to permanently recall setup 4 12 Display System Clic...

Страница 46: ...lick Display Grid in main menu The grid shows Intensity Click Display Intensity in main menu The following figure shows the intensity dialog It shows the display parameters setting You can change the...

Страница 47: ...graticule cursor measurement or performing an automatic measurement 4 13 1 Scale measurement Graticule This method allows you to make a quick visual estimate and take a simple measurement through the...

Страница 48: ...as cross lines on the display and measure the vertical and horizontal parameters Do these steps 1 Click Cursor Source select CH1 select CH2 if you want measure CH2 2 Click Cursor Type select Vertical...

Страница 49: ...ursor measure result display on status bar 5 Vertical The Vertical cursors appear as vertical lines on the display and measure the vertical parameters Do these steps 1 Click Cursor Source select CH1 s...

Страница 50: ...ay and measure the horizontal parameters Do these steps 1 Click Cursor Source select CH1 select CH2 if you want measure CH2 2 Click Cursor Type select Horizontal 3 Push left mouse button and the Horiz...

Страница 51: ...20 parametric auto measurements 12 voltage and 8 time measurements 1 Source The user can use the Source menu to select a measure source CH1 or CH2 2 Vertical Maximum Voltage of the absolute maximum l...

Страница 52: ...waveform Duty Cycle Negative Duty Cycle Negative Pulse Width Period x 100 Measured of the first waveform Pulse Width Measured of the first positive pulse in the waveform The time between the 50 amplit...

Страница 53: ...the signal in evenly spaced intervals to construct the waveform Average In this acquisition mode the oscilloscope acquires several waveforms averages them and displays the resulting waveform You can u...

Страница 54: ...n x x Acquisition When you acquire a signal the oscilloscope converts it into a digital form and displays a waveform The acquisition mode defines how the signal is digitized and the time base setting...

Страница 55: ...rt button Start recording the waveform And waveform files are saved in path Stop button Stop record the waveform Play back Interval Set the time interval of play back Also user can set time interval m...

Страница 56: ...stop when output Mask Setting Vertical Set the vertical limit range Horizontal Set the horizontal limit range Create button Click this button to create Pass Fail area according to the mask Save button...

Страница 57: ...When you click the Factory Setup in Utility menu the oscilloscope displays the CH1 and CH2 waveforms and removes all other waveforms The oscilloscope set up for normal operation when it is shipped fro...

Страница 58: ...form 1 Click print in File menu or Hotkeys Ctrl P to set the current waveform 2 Click the Print Preview in File menu to get into the Preview windows 3 Click the Print Preview in File menu to get into...

Страница 59: ...sales salukitec com www salukitec com 55 5 IOS Application User Interface Menu System Connect with Apple Andriod Set Horizontal System Set Vertical System Set Trigger System Save and Load Display Syst...

Страница 60: ...division on the screen By selecting different time div settings it is possible to zoom in on the frozen waveform on the screen 3 Battery level 4 Trigger State 5 Function menu RUN Run the application T...

Страница 61: ...sition icon and move left or move right the horizontal trigger position will display on the screen Click Trigger Indicator in main menu and slid the slider to enable the function 8 CH2 Zero level The...

Страница 62: ...up 2 The indication of communication USB WI FI is slow blinking Hotspot creates own wireless local area network WLAN 3 Connect your Apple Android device with Wi Fi hotspot Click Setting Wi Fi options...

Страница 63: ...e Easylink button until the USB Wi Fi LED off release Easylink button The device will reboot automatically If the device doesn t reboot automatically reboot it manually After rebooted the device will...

Страница 64: ...on the top left corner of the screen Volt DIV Use gestures to set volt div Coupling Select the channel coupling DC AC GND Probe Select the attenuation factor for the probe To check the probe attenuat...

Страница 65: ...ing picture shows the waveform of inversion Reset Double click the icon to reset the waveforms to the vertical center position on the screen Move the waveform Drag Vertical Position icon to move wavef...

Страница 66: ...Double click trigger icon to set trigger level to the vertical midpoint between the peaks of the trigger signal 5 7 Save and Load 5 7 1 Save Load File Click File Waveform Data in main menu to save wav...

Страница 67: ...uter Save Save the current reference waveform to your computer as rfc format You can change the vertical scale of a waveform The waveform display will contract or expand relative to the reference leve...

Страница 68: ...oscilloscope can recall the last setup before the oscilloscope software was running any saved setups or the factory setup You can use the File Setups Load Setups in main menu to permanently recall set...

Страница 69: ...sor display window 5 9 2 Measure Click Measure in main menu DVM DVM Display RMS and frequency of measured waveform of CH1 or CH2 Slid the slider to enable the DVM function You can see it on top right...

Страница 70: ...w salukitec com 66 More information please refer to Measure 5 10 Acquire 5 10 1 Capture Mode There are three capture modes Normal Roll and Scan mode Please refer to Set Horizontal System Y T Format 5...

Страница 71: ...Tel 886 2 2175 2930 Email sales salukitec com www salukitec com 67 6 Android Application User Interface Menu System Connect with Andriod Set Vertical System Set Trigger System Measure Signal...

Страница 72: ...beam to sweep one major division on the screen 3 Trigger State 4 Function menu RUN Run the application Tap RUN menu again to stop it 5 AUTO Automatically set the oscilloscope controls to generate a us...

Страница 73: ...f CH2 10 CH1 waveform Click on the waveform to select the channel If the channel is select you can see yellow background of CH1 waveform or blue background of CH2 waveform 6 2 Menu System The Main Men...

Страница 74: ...o a signal source 5 Tap the app to open it Then click RUN button The scope is ready to use If you can t connect it successfully please do as the followings 1 Close the APP 2 Long press the Easylink bu...

Страница 75: ...tec com 71 Trigger Setting Please refer to set trigger system Trigger Level Trigger Level icon User can also drag the trigger icon on screen to adjust the trigger level 6 6 Measure Signal Click Measur...

Страница 76: ...DC GND Input Impedance 1M 25pF Probe Attenuation Factors 1X 10X 100X 1000X Max Input Voltage 35Vpk DC peak AC 10 kHz without external attenuation Horizontal Scanning Speed Range Sec div 5ns div 500s...

Страница 77: ...gger Type Edge trigger Trigger Mode Auto Normal and Single Source CH1 CH2 EXT Sensitivity 0 02 div increments Trigger level 4 divisions Measurement Cursor Amplitude difference between cursors V Time d...

Страница 78: ...damages to the surface of the device or probes not use any abrasive or chemical cleaning agents Cleaning In order to keep the instrument clean you need to check often whether the channels are dusty o...

Отзывы: