


- 88 -
MF 6990dn - Agoris C935
12 -
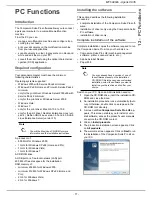
PC Functions
Cover page
The cover page is part of a faxed document automatically
generated by your machine in which information
concerning the sender, the recipient, the send date and
time, comments, etc., appear.
This page can be sent alone or as the first page of a fax,
but always in the same communication as the fax. It is
possible to send a document with a cover page from the
multifunction machine or from the hard disk. In the latter
case, part of the information on the cover page can be
entered by the user on the emission request. A cover
page template must be created before sending a
document using it. However, once the cover page is
created, a cover page template can be used for all sent
documents.
Your machine allows you to create and personalize
several cover pages templates that can be selected for an
emission.
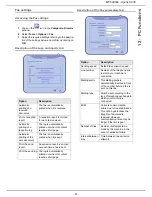
Creating a cover page template
Creating a cover page template creates a template in
which fields (fax number, comment, subject, etc.) will be
completed automatically by the Fax application using the
information provided for each document recipient.
There are two steps to creating the cover page template:
•
First step
: Create a background image with the re-
quired logos and page formatting.
•
Second step
: Add the field you want to be displayed
on the cover page: fax number, comment, subject, etc.
As mentioned before, these fields will be completed
by the Fax application when the document is sent.
Creating a background image
For the first step, there are two ways of creating a
background image.
You can:
•
Option (A)
: Design this background image in another
application (such as Word, Excel, etc.);
OR
•
Option (B)
: Scan a sheet of paper containing the page
formatting of the cover page.
Details concerning option A and option B:
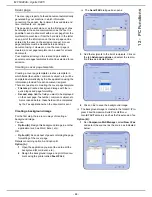
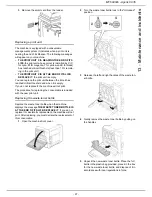
Option (A):
1
Open the application you want to use to edit the
background (Word, Excel, etc.).
2
Design the background image and print this docu-
ment using the printer called
Fax HFCv2
.
>
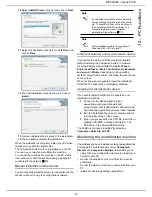
The
Send FAX
dialogue box opens:
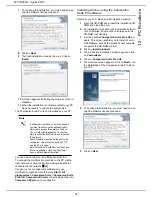
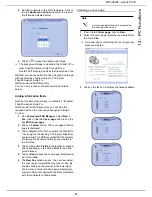
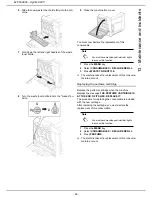
3
Add the recipients to the list of recipients. Click on
the tab
Advanced options
and select the resolu-
tion
Fine
as indicated below:
4
Click on
to save the background image.
>
The background image is created in the folder C:\Pro-
gram Files\Companion Suite Pro LH2\Docu-
ments\FAX\Temporary and has the file extension .fax.
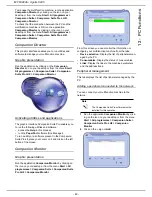
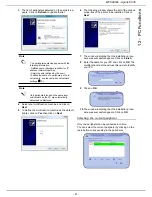
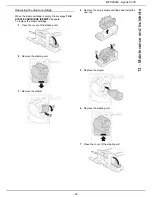
Option (B):
1
Run
Companion FAX Manager
, select
New > Fax
and select the scanner as the source as indicated
below:
Содержание MF 6990dn - Agoris C935
Страница 1: ...TELECOM User Manual MF 6990dn Agoris C935...


