


- 100 -
MF 6990dn - Agoris C935
13 -
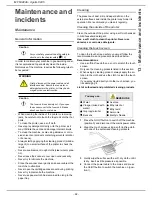
Maintenance and incidents
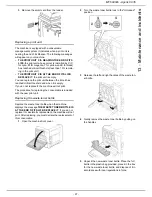
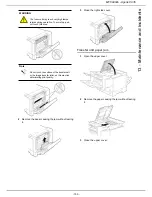
Replacing the feeder shoe
Replace the feeder shoe on the autofeed scanner when
the machine displays the message
THE SCANNER
FEEDER IS AT THE END OF ITS LIFE: REPLACE IT
.
After replacing, you must declare the replacement of this
consumable.
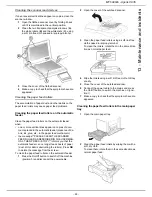
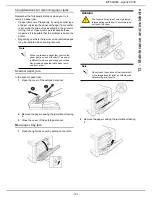
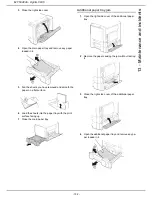
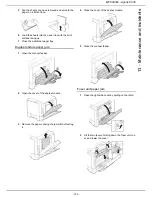
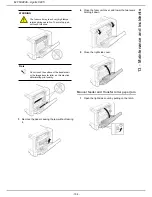
1
Open the cover of the autofeed scanner.
2
Press down on the tab on the feeder shoe and lift
to remove it.
3
Unpack the new feeder shoe, place it in its housing
and clip in into place.
4
Close the cover of the autofeed scanner.
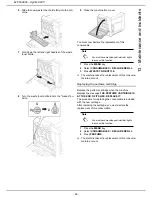
You must now declare the replacement of this
consumable:
Administrator rights
1
Press the
MENU
key.
2
Select
CONSUMABLES
>
DECLARE REFILL
.
3
Press
SCANNER FEEDER
.
>
The machine takes the replacement of this consuma-
ble into account.
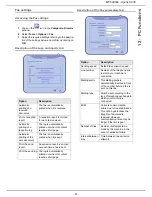
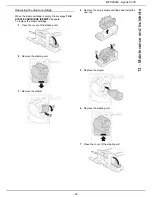
Calibrating colours
The machine automatically calibrates the colours
regularly, after a consumable is replaced or after a
variation in temperature or humidity.
You can manually perform this operation:
1
Press the
MENU
key.
2
Select
SETTINGS
>
SCANNER/PRINTER
.
3
Press
CALIBRATE
.
Servicing
In order to ensure the performance of your machine, the
printer should be serviced (drum change, etc.) every 120
000 pages printed.
The feeder shoe should be replaced about every 50 000
pages scanned on the autofeed scanner.
Contact your retailer to have servicing carried out.
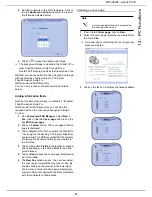
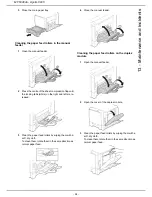
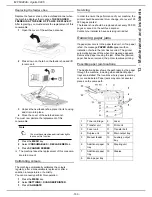
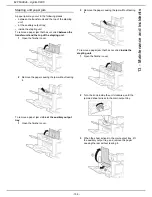
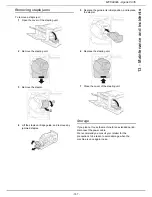
Removing paper jams
If a paper jam occurs in the paper feed unit, or if no paper
is fed, the message
PAPER JAM
appears with an
indication of where the jam has occurred. The printer
automatically goes offline when this message appears.
Remove the paper causing the jam. When the jammed
paper has been removed, the printer resumes printing.
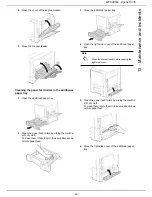
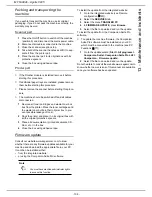
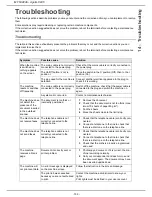
Possible paper jam locations
The illustration below shows the path taken by the paper
through the machine, including when additional paper
trays are installed. The locations where paper jams may
occur are indicated. Paper jams may occur at several
places on the same path.
Note
You must have machine administrator rights
to access this function.
1
Toner cartridge
9
Laser
2
Transfer unit
10
Print unit
3
Fuser unit
11
Transfer belt
4
Duplex unit
12
Main output tray
5
Manual feeder
13
Auxiliary output
tray
6
Additional paper
tray
14
Stapling unit
7
Additional paper
tray
15
Staples
8
Main paper tray
Содержание MF 6990dn - Agoris C935
Страница 1: ...TELECOM User Manual MF 6990dn Agoris C935...


