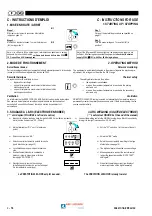
PRESTOTIG
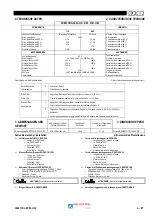
200
AC
/
DC
C
- 17
A
V
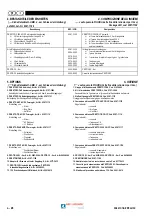
Réglage : par appui gâchette ou -
Adjustment: by pr or - torch trigger
Continuer par
Continue by
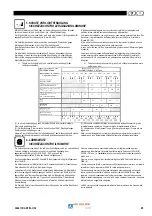
Gas
0.4
Pré-débit de gaz (de 0.0 à 20s)
Gas pre-flow (from 0.0 to 20s)
Appui bouton cycle
Pressing cycle button
G - L
5
Post-débit de gaz bas avec I mini (de 2 à 26 s) / Low gas post-flow with minimum I (from 2 to 26 s)
"
G -H
15
Post-débit de gaz haut avec I maxi (de 2 à 26 s) / High gas post-flow with maximum I (from 2 to 26 s)
"
UPS
1.0
Temps de rampe de montée (de 0.1 à 7s) / Sloping ramp time (from 0.1 to 7s)
"
SCU
30
Courant de palier de présoudage (CC : de 0 à 100%, CA : de 30 à 100%)
Pre-welding increment current (DC: from 0 to 100%, AC: from 30 to 100%)
"
1 - 3
50
Réglage courant final en mode spécial / Final current adjustment in special mode
STS
OFF
Réglage 2 Temps spécial / Special 2-stroke adjustment
SFS
OFF
Réglage 4 Temps spécial (utilisation d’un 2
ème
courant)
Special 4-stroke adjustment (use of a 2
nd
current)
"
C-C
OFF
Test du circuit de refroidissement = ON / Cooling circuit test = ON
"
E.S
OFF
Arrêt urgence / Emergency shutdown
"
POS
Sin
Réglage de la demi-onde positive avec la gâchette de la torche (sinus / rectangle / triangle)
Adjustment of positive half-wave with the torch trigger (sine / rectangle / triangle)
"
nEG
rEC
Réglage de la demi-onde négative avec la gâchette de la torche (sinus / rectangle / triangle)
Adjustment of negative half-wave with the torch trigger(sine / rectangle / triangle)
"
PRO
Appuyer sur la gâchette de la torche
①
ou
②
/
Press torch trigger
①
or
②
①
Mémorisation des nouvelles valeurs, sortie soudage / Memorization of new values, exit welding
②
Si la mémorisation n’est pas nécessaire, continuer / If memorization is not necessary, continue
Ö
Appui bouton cycle / Pressing cycle
button
FAC
Appuyer sur la gâchette de la torche pour sortir (retour aux valeurs pré-réglées en usine)
Press torch trigger to exit (return to values preset in the plant)
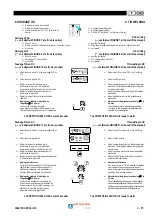
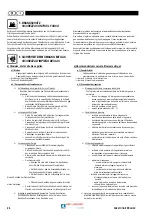
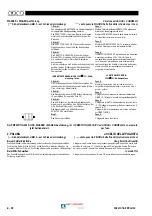
Utilisation des 2 boutons de torche
Õ
Õ
SFS
OFF
Ö
Ö
Use of 2 torch buttons
1.
Appuyer sur bouton principal (maintenu) = Prégaz, H.F., Palier Présoudage
1.
Press main button (held in) = Pre-gas, H.F., Pre-welding stage
2.
Relâcher bouton principal = Soudage I nominal
2.
Release main button = Nominal I welding
3.
Appuyer 2
ème
bouton (maintenu) = Courant de palier Post soudage
3.
Press 2
nd
button (held in) = Post-welding stage current
4.
Relâcher 2
ème
bouton = Remontée en I soudage nominal
4.
Release 2
nd
button = Return to nominal I welding
5.
Appuyer bouton principal (maintenu) = Evanouissement, palier Post soudage
5.
Press main button (held in) = Slope out, Post-welding stage
6.
Relâcher bouton principal = Extinction d'arc, Postgaz.
6.
Release main button = Arc extinction, Post-gas.
Utilisation d'un seul bouton de torche (Réglage du 2
ème
courant par I3 en %)
Õ
Õ
SFS
1
Ö
Ö
Use of a single torch button (Adjustment of 2
nd
current via I3
in %)
Exemple : (
voir dépliant FIGURE 12 à la fin de la notice)
Example: (
see fold-out FIGURE 12 at the end of the manual)
I soudage 200 A, I3 50% - réglage palier 30 A
200 A welding I, I3 50% - 30 A stage adjustment
1.
Appuyer bouton principal (maintenu) = Prégaz, HF, Courant palier Présoudage
1.
Press main button (held in) = Pre-gas, H.F., Pre-welding stage current
2.
Relâcher bouton principal = Soudage I nominal 200 A
2.
Release main button = 200 A nominal I welding
3.
Appui bref bouton principal = Soudage 2
ème
courant 50 % = 100 A
3.
Short press on main button = 50% current 2
nd
welding = 100 A
4.
Appui long bouton principal = Evanouissement, palier Post soudage 30 A
4.
Long press on main button = Slope out, 30 A Post-welding stage
5.
Relâcher bouton principal = Extinction d'arc, Post gaz.
5.
Release main button = Arc extinction, Post-gas
Utilisation des 2 boutons de torche
Õ
Õ
SFS
2
Ö
Ö
Use of 2 torch buttons
1.
Appuyer bouton principal = Prégaz
1.
Press main button = Pre-gas
2.
Relâcher bouton principal = HF, courant palier Présoudage
2.
Release main button = H.F., Pre-welding stage current
3.
Appuyer bouton principal (maintenu) = I soudage nominal
3.
Press main button (held in) = nominal welding I
4.
Relâcher bouton principal = Evanouissement, palier Post soudage
4.
Release main button = Slope out, Post-welding stage
5.
Appuyer 2
ème
bouton = Extinction d'arc, Post gaz.
5.
Press 2
nd
button = Arc extinction, Post-gas
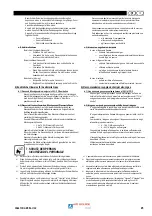
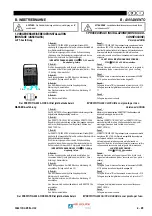
En électrode
In electrode
ATTENTION : lors de la dernière déconnexion du générateur,
il faut veiller à ce que la LED
du choix de cycle soit
allumée.
CAUTION: at the time when the power-source is last
disconnected, one must ensure that the
LED for the
cycle selection is lit up.
☞
Tourner le commutateur de mise en marche
de l’appareil (à l’arrière) et appuyer en même
temps sur le bouton de choix de cycle (en face
avant).
2T
4T
PAC
☞
Turn the equipment's On/Off selector-switch
(at the rear) and press the cycle selection
button at the same time (on front panel).
☞
Quand les écrans affichent " _ _ _ ", lâcher le
bouton de choix de cycle.
☞
When the screens display " _ _ _ ", release the
cycle selection button.
☞
"Ht I" "0.5" apparaît.
H t I
0 . 5
☞
"Ht I" "0.5" is displayed.

