PRESTOTIG
200
AC
/
DC
C
- 15
4. SOUDAGE TIG
4. TIG WELDING
☞
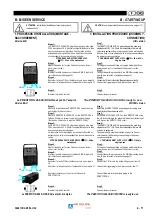
Brancher la torche de soudage.
☞
Raccorder l'alimentation en gaz.
☞
Mettre l’interrupteur "0/1" sur 1 (à l'arrière du
poste).
☞
Connect the welding torch.
☞
Connect the gas supply.
☞
Put the "0/1" switch on 1 (at the rear of the set).
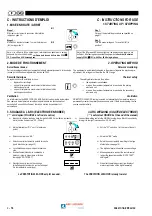
Amorçage PAC
PAC striking
(
voir dépliant FIGURE 7 à la fin de la notice)
(
see fold-out FIGURE 7 at the end of the manual)
☞
poser la buse,
☞
position the nozzle,
☞
mettre en contact l'électrode et la pièce
Ö
léger court circuit,
☞
bring the electrode and the part into contact
Ö
slight court circuit,
☞
arc allumé.
☞
arc ignited.
Amorçage H.F
H.F striking
(
voir dépliant FIGURE 8 à la fin de la notice)
(
see fold-out FIGURE 8 at the end of the manual)
☞
poser la buse,
☞
position the nozzle,
☞
amorçage H.F. sans contact,
☞
H.F. striking without contact,
☞
arc allumé.
☞
arc ignited.
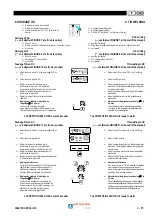
Soudage TIG en DC
TIG welding in DC
(
voir dépliant FIGURE 10 à la fin de la notice)
(
see fold-out FIGURE 10 at the end of the manual)
☞
Sélectionner le mode 2t, 4t en amorçage PAC ou
H.F.
2T
4
T
P
A
C
☞
Select the 2t, 4t mode in PAC or H.F. striking.
☞
Sélectionner la polarité DC-.
AC
DC- DC+
☞
Select the DC- polarity.
☞
Régler le courant de soudage par le
potentiomètre repéré 9. L’ampèremètre
numérique préaffiche la valeur du courant à vide.
☞
Régler le temps d'évanouissement par le
potentiomètre repéré 9a.
☞
Régler le courant final par le potentiomètre
repéré 9b.
☞
Adjust the welding current via the potentiometer
marked 9. The digital ammeter pre-displays the
no-load current value.
☞
Adjust the slope-out time via the potentiometer
marked 9a.
☞
Adjust the final current via the potentiometer
marked 9b.
☞
Réglage du calibre de l'électrode en
tungstène
∅
0 à 4,0 mm
Le courant d’amorçage est réglé
automatiquement en fonction du diamètre de
l’électrode en tungstène choisi pour l'application.
0
0
1,6
1,0
2,4
3,2
4,0
∅
☞
Adjustment of tungsten electrode size
∅
0 to
4.0 mm
The striking current is automatically adjusted
according to the tungsten electrode diameter
selected for the application.
Le PRESTOTIG 200 AC/DC est prêt à souder.
The PRESTOTIG 200 AC/DC is ready to weld.
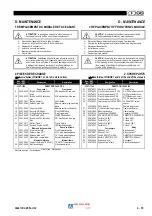
Soudage TIG en AC
TIG welding in AC
(
voir dépliant FIGURE 11 à la fin de la notice)
(
see fold-out FIGURE 11 at the end of the manual)
☞
Sélectionner le mode 2t, 4t en amorçage PAC ou
H.F.
2T
4
T
P
A
C
☞
Select the 2t, 4t mode in H.F. or PAC striking.
☞
Sélectionner la polarité AC.
AC
DC- DC+
☞
Select the AC polarity.
☞
Régler le courant de soudage par le
potentiomètre repéré 9. L’ampèremètre
numérique préaffiche la valeur du courant.
☞
Régler le temps d'évanouissement par le
potentiomètre repéré 9a.
☞
Régler le courant final après évanouissement par
le potentiomètre repéré 9b.
☞
Adjust the welding current via the potentiometer
marked 9. The digital ammeter pre-displays the
current value.
☞
Adjust the slope-out time via the potentiometer
marked 9a.
☞
Adjust the final current after slope-out via the
potentiometer marked 9b.
☞
Réglage de la balance
Il n'est actif qu'en soudage TIG AC. Il permet de
régler la demi-onde positive et négative. Il
améliore le décapage ou la pénétration et
optimise la partie terminale de l'électrode.
☞
Réglage du calibre de l'électrode en
tungstène
∅
0 à 4,0 mm
Il forme automatiquement une sphère sur
l’électrode en tungstène après validation du
bouton poussoir. Le courant d’amorçage est
réglé pour le diamètre de l’électrode en
tungstène choisi pour l'application.
0
2
5
1
3
4
2
5
1
3
4
0
0
1,6
1,0
2,4
3,2
4,0
∅
☞
Adjustment of balance
This is only active in TIG AC welding. It enables
one to adjust the positive and negative half-
wave. It improves the pickling or penetration and
optimizes the electrode end part.
☞
Adjustment of tungsten electrode size
∅
0 to
4.0 mm
This automatically forms a sphere on the tungsten
electrode after validation ont the push button. The
striking current is adjusted according to the tungsten
electrode diameter selected for the application.
Le PRESTOTIG 200 AC/DC est prêt à souder.
The PRESTOTIG 200 AC/DC is ready to weld.


