"!
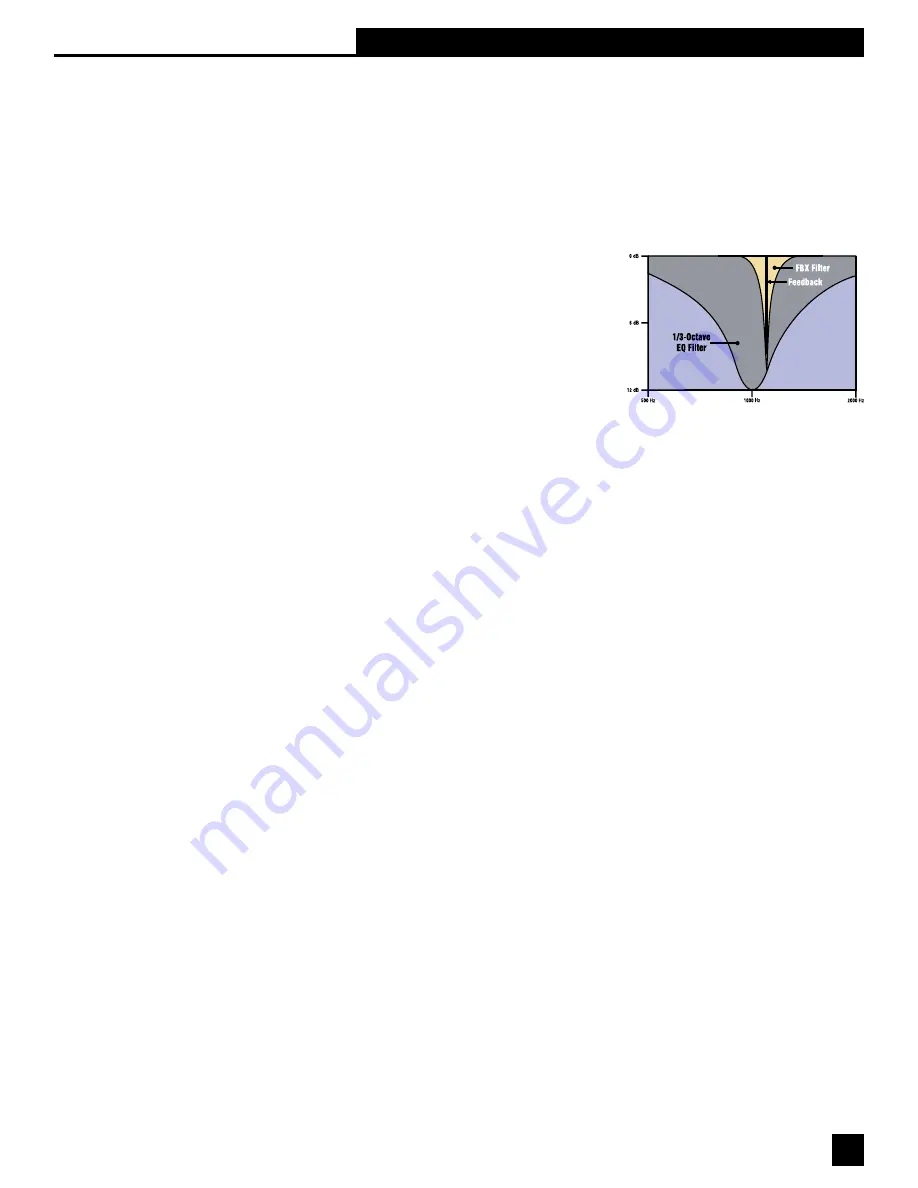
The patented Sabine FBX filter is essentially a parametric filter that is
automatically activated when
acoustical feedback occurs. It is placed exactly at the frequency of the feedback, to the minimum depth
necessary to remove it, with a very narrow notch (typically 1/10 octave wide). The accuracy, narrow
width, and minimum depth of the FBX filter means it can be placed with little or no adverse affect on the
purity of the audio signal. In fact, because audio system gain is often limited by the onset of feedback
as volume rises, FBX-equipped sound systems are both louder and clearer than systems that rely on
alternative EQ filtering, or ignore feedback control altogether.
An additional very important benefit of the FBX algorithm is its
ability to quickly and accurately distinguish feedback from audio
program, allowing the automatic placement of filters during
performance as well as setup.
Please note that graphic EQ and FBX filters are available using
the front panel controls of your GRAPHI-Q. Parametric filters can
only be set using the GRAPHI-Q Remote Software, with an RS-
232 connection made to a computer controller.
9.3. RECOMMENDED EQ USAGE
9.3.1. Set the Graphic EQ First
Because of the considerations discussed above, Sabine recommends first adjusting graphic equalization
settings, before addressing use of FBX or parametric filters. Graphic EQ filters will compensate for
uneven system frequency response that arises from room acoustics and system components, with the
ultimate goal of producing a balanced sound.
What constitutes a “balanced sound” is of course a subject of endless debate. Suffice it to say that
making a system sound as good as it can is both a scientific and an artistic process. There are many
well-documented methods of optimizing your system, and useful measurement tools and techniques, but
ultimately the skill of the operator is the determining factor of sound quality.
So you may elect to adjust your graphic EQ settings purely on the basis of what sounds good to your
ears, or you may opt to use a reference microphone and Real Time Analyzer to set your system EQ, or
you may combine these techniques.
Here are a few suggestions that may prove helpful:
•
SET THE RANGE. Before you make any adjustments, set your graphic EQ range to allow either
a ±6 dB or ±12 dB range of adjustment. The unit arrives from the factory preset to 12 dB range. To
change to 6 dB, simultaneously press both the delay up and down buttons on the GRAPHI-Q front
panel (for two channel units, either channel’s buttons will produce the same result). (NOTE: this
toggles the selection of 12 and 6dB ranges, and will switch back to 6 if you’re already set to 12).
Whenever the range is set to 6dB the LED in the lower right corner of the front panel will light.
•
BOOST = CUT. Try to balance the degree of frequency cut and boost when you make your graphic
EQ adjustments. This will make before/after comparisons more accurate and meaningful; otherwise,
whichever condition is louder overall may sound better to your ears and cloud your judgment.
Additionally, due to the bell-shaped boost or cut characteristics of EQ filters, the more extreme the
boost or cut, the more “ripple” (peaks or dips centered at the EQ slider frequencies) there will be in
the resultant system frequency response.
•
VARY LEVEL AND LOCATION. If you’re making adjustments on the basis of what you’re hearing,
listen to the system at various locations in the auditorium, and over a range of playback levels. Both
location and system gain can radically affect the perceived frequency balance.
Section Nine: Suggestions for Optimal Use of the GRAPHI-Q


