15
7. Montage Rotor
Rotor Assembly
Der Rotor ist mit Selten Erden Magneten be-
stückt. Durch die starken Magnetfelder kön-
nen Späne und Partikel auf der Innenseite
des Rotors anhaften.
Späne und magnetische Partikel lassen sich
mit einen handelsüblichen Haftmagneten
von der Rotorscheibe aufsammeln.
The rotor is fitted with rare earth magnets. Due
to the strong magnetic fields chips or particles
may adhere to the interior surface of the rotor.
Chips and magnetic particles may be picked off
the rotor by a commercial magnetic clamp.
Im Rotor befindet sich ein Magnet. Achten
Sie auf magnetische Kräfte, wenn Sie ein ak-
tives medizinisches Implantat haben. Halten
Sie einen Abstand zwischen Implantat und
Rotor von mindestens 2 cm ein.
An annular magnet is located in the rotor. If you
wear an active medical implant, beware of mag-
netism and keep a minimum distance of 2 cm
between the implant and the rotor.
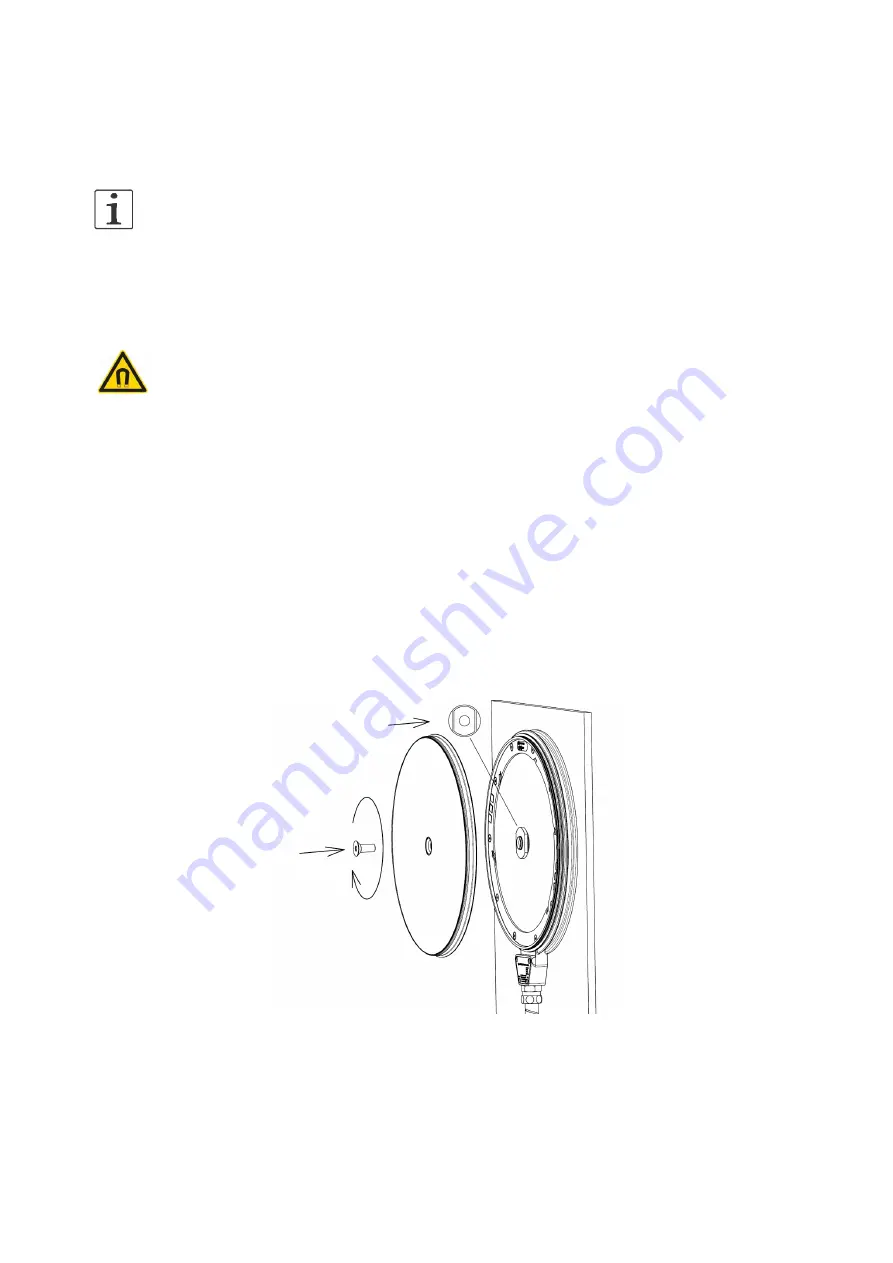
Reinigen Sie die Rotorscheibe von anhaften-
den Partikeln und Spänen. Setzen Sie dann
den Rotor auf den Flansch des Stators auf.
Schrauben Sie die Senk-schraube M10x1
(Drehmoment 2Nm, max. 2,5Nm) in der
Mitte ein und ziehen Sie diese fest. Halten
Sie dabei am äußeren Rand den Rotor mit
der Hand fest. Prüfen Sie zum Abschluss den
mechanischen Freilauf des Rotors durch
Drehen von Hand.
Clean the rotor from adhesive particles or
chips. Put the rotor onto the flange of the sta-
tor. Screw and tighten the M10x1 (torque 2Nm,
max. 2,5Nm) countersunk screw into the center
manually supporting the rotor edge. Finally,
check the freewheel performance of the rotor
by manually turning the device.
Abb./ Fig. 7
M10x1
2Nm, max. 2,5Nm
Содержание P-11500
Страница 14: ...14 Abb Fig 6 2 Abb Fig 6 3...


