background image


Orion X Installation and Operations Manual 

109


Viewing Firmware Status through the OSD 

 Select 

Status > Firmware

 in the main menu. 


Figure 98. Viewing Firmware Status through the OSD 


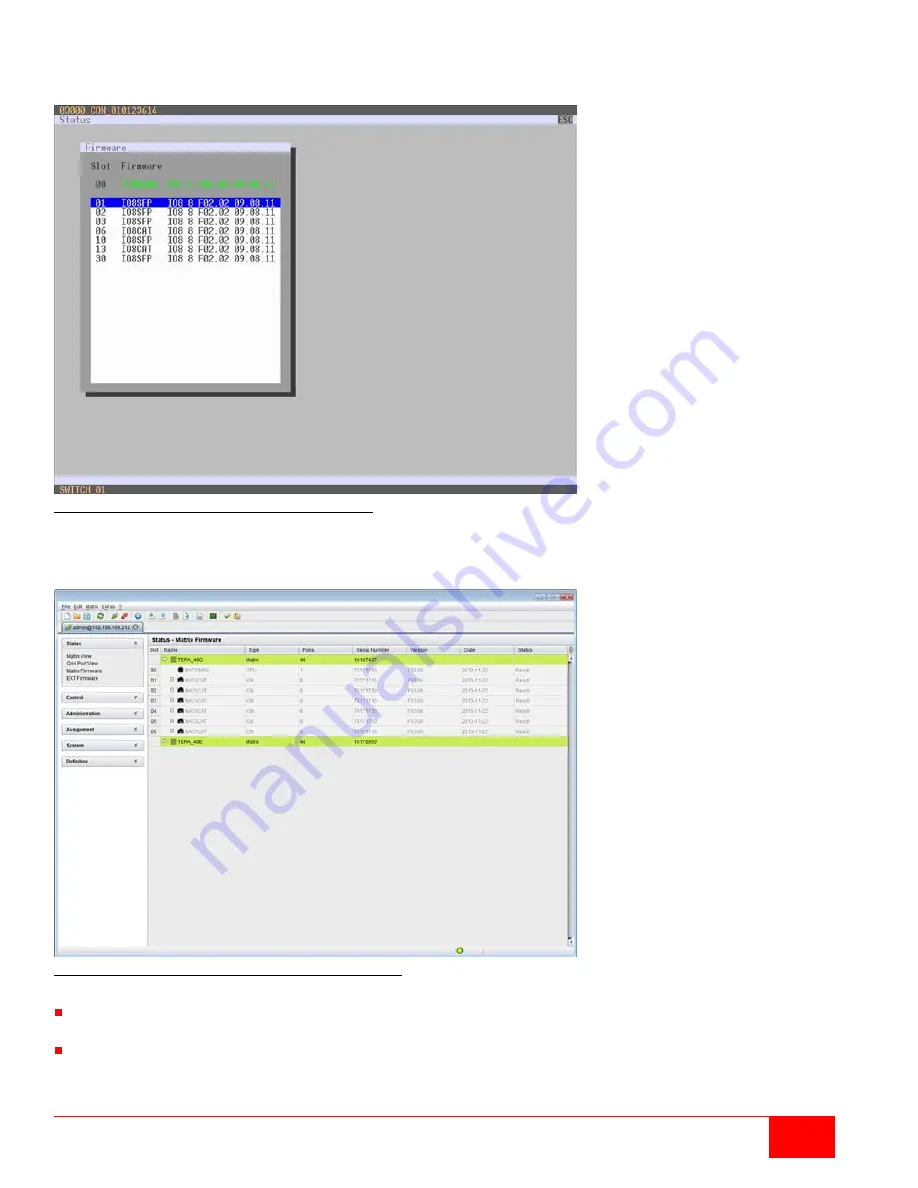
Viewing Firmware Status through the Java Tool 

Select 

Status > Matrix Firmware 

in the task area. 


Figure 99. Viewing Firmware Status through the Java Tool 


To read out the firmware status and store it locally (file extension 

.dtf

), select 

Matrix > Save Firmware 

Status to File...


To read out the overall status of the matrix and store it locally (file extension 

.zip

), select 

Matrix > Save 

Status to File... 

or press the respective button in the symbol bar. 


Содержание Orion X OXC-08-GBIC/8FM

Страница 1: ...Orion X Enterprise KVM Switch CATx or Fiber 48 576 Ports Installation and Operation Manual 10707 Stancliff Road Houston Texas 77099 Phone 281 933 7673 techsupport rose com ...

Страница 2: ...nsit to prepay shipping charges to the warranty service location and to use the original shipping container or its equivalent You must call for a return authorization number first Under no circumstances will a unit be accepted without a return authorization number Contact an authorized repair center or Rose Electronics for further information ALL EXPRESS AND IMPLIED WARRANTIES FOR THIS PRODUCT INC...

Страница 3: ...iate radio frequency energy and if not installed and used in accordance with the instruction manual may cause harmful interference to radio communications Operation of this equipment in a residential area is likely to cause harmful interference in which case the user will be required to correct the interference at their own expense The product safety of the devices is proven by their compliance wi...

Страница 4: ...gnment 22 Virtual CPU 22 Virtual Console 24 System Settings 26 System Data 26 Automatic ID 28 Access Control 30 Switch Settings 32 Network 34 Date and Time 36 User Settings 38 User 38 User Favorites List 40 User Macros 41 Extender Settings 44 Flex Port Extender Units 45 USB 2 0 Extender 46 Extenders for UNI I O Boards USB 2 0 USB 3 0 48 CPU Device Settings 50 Console Device Settings 52 CON Devices...

Страница 5: ...94 Power Up and Power Down Functions 94 Restart 94 Factory Reset 95 Power Down 95 Summary of Keyboard Commands 96 Diagnostics and Status Indicators 98 Status LEDs 98 CPU Board 98 I O Board 99 I O Board Ports 100 Fan Tray 100 Power Supply Unit Orion X 288 160 101 Power Supply Unit Orion X 80 48 101 Port Status 102 Port Status Matrix Grid 105 Extender OSD 106 Network Status 107 Firmware Status Matri...

Страница 6: ...cess Control through the OSD 31 Figure 25 Modifying Access Control through the Java Tool 31 Figure 26 Modifying Switch Settings through the OSD 33 Figure 27 Modifying Switch Settings through the Java Tool 33 Figure 28 Modifying Network Settings through the OSD 35 Figure 29 Modifying Network Settings through the Java Tool 35 Figure 30 Modifying Date and Time Settings through the OSD 36 Figure 31 Mo...

Страница 7: ...ure 73 Matrix Update through the Java Tool 79 Figure 74 Extender Update in Standard Mode through the Java Tool Step 1 Upload Firmware 80 Figure 75 Extender Update in Standard Mode through the Java Tool Step 2 Update Firmware 81 Figure 76 Extender Update in Expert Mode Step 1 from the Java Tool 81 Figure 77 Extender Update in Expert Mode Step 2 from the Service Mode of the OSD 82 Figure 78 License ...

Страница 8: ...ndices Page Appendix A General Specifications 122 Interfaces 122 DVI D Single Link 122 USB HID 122 RJ45 Network 122 RJ45 Serial 122 RJ45 Interconnect 122 Fiber SFP Type LC Interconnect 122 SDI Interconnect 123 Interconnect Cable 123 CATx 123 Fiber 124 Coaxial 124 Connector Pinouts 125 CPU Board 125 I O Board 126 Power Supply 127 Environmental Conditions 127 Size 127 Shipping Weight 128 MTBF 128 Ap...

Страница 9: ...ovides the flexibility and security required for today s business environment Rose Electronics Orion X System is designed to be configured to meet system demands one user or multiple users two computers or hundreds All configurations offer standard features that allow for easy secure and complete access to as many computers as the system has from one or multiple KVM user stations The Orion X unit ...

Страница 10: ...red as an input or output depending on the type of device that is connected If a CPU device is connected the port becomes an input If a CON device is connected the port becomes an output Scalable chassis allows for addition of more I O cards as the system grows additional cards in increments of ports Switch between video sources of the same resolution instantly with no delay or display blanking Ca...

Страница 11: ...ash drives Audio Compatible with analog and digital audio devices Serial Accepts RS 232 serial control communication Interconnect CATx cable allows a maximum distance of 460 ft 140 m on either side of the switch Single mode fiber cable allows up to 3 280 feet 1 km on either side of the switch Multi mode fiber cable allows up to 32 808 feet 10 km on either side of the switch To use PS 2 keyboards a...

Страница 12: ...es The CPU units are connected to the computers video keyboard and mouse ports using standard video and USB or PS 2 cables CON Units are connected to console display keyboard mouse and USB peripherals The communication between the Orion X matrix and the CPU Units CON Units takes place over the interconnect cables Figure 1 System Overview 1 Source computer CPU 2 CPU Units 3 CATx or Fiber Interconne...

Страница 13: ...60 and 288 ports The following views of the Orion X matrix illustrate the available chassis types Figure 2 Orion X 288 Port Model 1 Slot for power supply unit 1 2 Slot for fan tray 1 3 Slot for power supply unit 2 4 Slot for fan tray 2 5 Slots for I O boards 1 36 6 Slot for power supply unit 3 7 Grounding 8 Slot for CPU board ...

Страница 14: ...Grounding 8 Slot for CPU board Figure 4 Orion X 80 Port Model 1 Slot for fan tray 1 2 Slot for power supply unit 1 3 Slots for I O boards 1 10 4 Slot for power supply unit 2 5 Slot for CPU board 6 Slot for air filter 7 Slot for fan tray 2 Figure 5 Orion X 48 Port Model 1 Slot for fan tray 1 2 Slot for power supply unit 1 3 Slots for I O boards 1 6 4 Slot for power supply unit 2 5 Slot for CPU boar...

Страница 15: ...interconnect cables 2 Connect the CONs unit to the console devices monitor keyboard and mouse 3 Connect the 5VDC power supply units to the CON units and apply power 4 Check the basic function of the CON units by displaying the OSD menu with Hot Key o 5 Connect the source computer CPU to the CPU unit of the extender by using the provided connection cables 6 Connect the CPU unit to the matrix by usi...

Страница 16: ...d by the activities of another user Figure 6 Single head KVM Matrix 1 Source computer CPU 2 CPU Units 3 Interconnect cables 4 Orion X matrix 5 CON Units 6 Console monitor keyboard mouse If a single head console is used it is possible to access dual head or quad head computers but control is only possible at monitor 1 Video from a single source can be switched to any number of monitors simultaneous...

Страница 17: ...hen the Orion X is used as a Video Matrix up to 288 input ports can be switched to up 288 output ports depending on the components and equipment Figure 7 Video Matrix 1 Video Source e g SDI Camera 2 Interconnect cables 3 Orion X Matrix 4 Video Sink e g Monitor ...

Страница 18: ... IP Address field The Sub Matrices must be connected through their chassis network connectors RJ45 to the same network as the master matrix The Enable LAN Echo option must be activated at the master matrix When a switching command is executed at the master matrix the synchronized matrices will receive a network notification that the master is switching and they will also switch automatically Switc...

Страница 19: ...trix and at least one slave matrix Up to 16 matrices can be interconnected in a matrix grid installation Orion units in a Matrix Grid are connected to each other by Grid Lines The Grid Lines may connect the slave matrices directly to the master matrix or to other slave units The Matrix Grid can be set up in several ways such as a ring a hub and spokes or a fully connected configuration depending o...

Страница 20: ...commands are available If no keyboard command is executed within 10 seconds after activating Command Mode the matrix will automatically exit Command Mode The following table lists the keyboard commands to enter and to exit Command Mode and to change the Hot Key sequence Function Keyboard Command Enter Command Mode default 2x Left Shift or Hot Key Exit Command Mode Esc Change Hot Key sequence curre...

Страница 21: ... switching on the CON unit or plugging in a keyboard Control Options The Orion X contains an internal CPU that allows control of all functions from any console without the need for an external CPU The following methods are available to configure and or operate the Orion X through the OSD through the Java Tool through the serial interface Control through the OSD The Orion X can be configured throug...

Страница 22: ...elds Line up with wrap around In menus Line up without wrap around Cursor Up In input fields Line down with wrap around In menus Line down without wrap around Cursor Down Previous page in menus with more than one page Page Up Next page in menus with more than one page Page Down Next input field Tab Previous input field Left Shift Tab Next option in selection fields Previous option in selection fie...

Страница 23: ...D names in ascending order by pressing the keyboard command twice Name F2 Go to the next result in the list of results of the search field Next F3 Go to the previous result in the list of results of the search field Previous F4 Refresh the currently shown list Refresh F5 Jump between the search field and the list of results Find F6 Password request Access to the configuration menu requires adminis...

Страница 24: ...ver network cable for a direct connection between a computer and the matrix or a standard CATx cable for a connection through a switch or hub Do not use a network connection that is primarily used to transmit audio data between the Java Tool and the matrix Use the appropriate network cable s to make the desired connections between the RJ45 ports of the computer and the CPU board of the matrix Star...

Страница 25: ... Operations Manual 17 Figure 12 Java Tool Connect Screen Up to twelve connections between the matrix and Java Tool software can be established at the same time Java Tool Screen structure Figure 13 Java Tool System Data Screen ...

Страница 26: ...en context specific selection menus Right mouse button Keyboard Control The following keyboard commands are available Function Keyboard Command Cursor to the left Cursor Left Cursor to the right Cursor Right Line up Cursor Up Line down Cursor Down Previous page in input or status menus with more than one page Page Up Next page in input or status menus with more than one page Page Down Next field i...

Страница 27: ...ntil the sort direction arrow disappears Filter Function Lists and tables in the Java Tool can also be filtered to display only relevant results 1 To activate a filter click the right mouse button on the header of the column to be filtered and select Set Filter 2 Enter the word or part of a word to be used as a filter into the header The filter results are shown immediately 3 To delete a filter cl...

Страница 28: ...tem in the menu bar Options menu The Java Tool can be adapted and customized by changing its settings from their default values To activate or change the default settings proceed as follows Select Extras Options in the menu bar The Default Settings tab will open The following default settings can be changed Option Description IP Hostname Default IP address of the matrix required for connection Use...

Страница 29: ...e Finish button The report will be created as a PDF file Figure 15 Java Tool Configuration Report Control through the Serial Interface The Orion X operating system has a number of functions that can be controlled via serial interface There are message packets for switching single or all available connections both unidirectional and bidirectional In addition there are other messages packets for an ...

Страница 30: ...PU which is then assigned to a real CPU the real CPU needs to be changed just once and all consoles will receive the video signal of the new CPU This can be done through the OSD or the Java Tool Assignment through the OSD Select Assignments Virtual CPU devices in the main menu Figure 16 Virtual CPU Devices Assignment through the OSD To make an assignment proceed as follows 1 Select the virtual CPU...

Страница 31: ...tion Send Send assignments to the matrix Reload Reload changes When the Auto Send function in the left lower corner of the working area is ticked switching operations will be performed immediately without confirmation from a press of the Send button The selection boxes in the Real CPU column contain a filter function for an easy selection of single CPUs from a larger group of CPUs The Java Tool ad...

Страница 32: ...receive the video signal The last real console that is assigned to a virtual console will also have keyboard and mouse control This can be done through the OSD or the Java Tool Assignment through the OSD Select Assignments Virtual CON devices in the main menu Figure 18 Virtual CON Devices Assignment through the OSD To make an assignment proceed as follows 1 Select the real console in the Real Devi...

Страница 33: ...le column to get a list of all available virtual consoles 3 Select the desired virtual console Select between the following buttons Button Function Send Send assignments to the matrix Reload Reload changes When the Auto Send function in the left lower corner of the working area is ticked switching operations will be done immediately without confirmation by pressing the Send button The selection bo...

Страница 34: ...rent configuration of the matrix to flash memory every 10 minutes Note During saving of the configuration the matrix will not be operational Saving occurs if changes have been made to the configuration or switching operations have been executed since the last save Deactivated Function not active default Enable COM Echo Activated Echo all switching commands in the matrix through the serial interfac...

Страница 35: ... 1 9 Adjustment of the vertical mouse speed 1 slow 9 fast default value 5 Double Click Time 100 800 Specify the maximum time interval between 2 mouse clicks that will be recognized as a double click default value 200 ms Keyboard layout Region Set the OSD keyboard layout based on the keyboard in use Modifying System Data through the OSD Select Configuration System in the main menu Figure 20 Modifyi...

Страница 36: ...odified Field Selection Description Enable Auto Config Activated Automatic creation of a new CPU or CON device when new extender units are connected default Deactivated Function not active ID Real CPU Device Numerical value Initial value of the automatic ID for real CPUs default value 1000 ID Virtual CPU Device Numerical value Initial value of the automatic ID for virtual CPUs default value 2000 I...

Страница 37: ... main menu Figure 22 Modifying Automatic ID Settings through the OSD Select between the following buttons Button Function Cancel Reject changes Okay Save changes Modifying Automatic ID Settings through the Java Tool Select the Automatic ID tab in System System Data Figure 23 Modifying Automatic ID Settings through the Java Tool ...

Страница 38: ...ess Control List No login required Deactivated Function not active default Enable new User Activated Newly created users automatically receive access to all CPUs Deactivated Function not active default Enable new CON Activated Newly created CON devices automatically receive access to all CPUs Deactivated Function not active default Auto Disconnect Activated The console will be automatically discon...

Страница 39: ...Access in the main menu Figure 24 Modifying Access Control through the OSD Select between the following buttons Button Function Cancel Reject changes Save Save changes Modifying Access Control through the Java Tool Select System Access in the task area Figure 25 Modifying Access Control through the Java Tool ...

Страница 40: ... disconnected Note To share K M control Force Disconnect must be deactivated Deactivated Function not active default CPU Auto Connect Activated If a console is not connected to a CPU an automatic connection to the next available CPU can be established by hitting any key or mouse button Deactivated Function not active default CPU Timeout 0 999 minutes Period of inactivity after which a console will...

Страница 41: ...witch in the main menu Figure 26 Modifying Switch Settings through the OSD Select between the following buttons Button Function Cancel Reject changes Save Save changes Modifying Switch Settings through the Java Tool Select System Switch in the task area Figure 27 Modifying Switch Settings through the Java Tool ...

Страница 42: ...on not active default Syslog Server Byte Enter the Syslog server s IP address in the form 192 168 1 1 Trace DEB Activate debug messages in Trace default NO Note The debug messages are exclusively for matrix diagnostics They should be activated only after consultation with Rose Electronics Otherwise increased data traffic might limit the performance of the equipment INF Activate information message...

Страница 43: ...work in the main menu Figure 28 Modifying Network Settings through the OSD Select between the following buttons Button Function Cancel Reject changes Okay Save changes Modifying Network Settings through the Java Tool Select System Network in the task area Figure 29 Modifying Network Settings through the Java Tool ...

Страница 44: ...r month Date 1 31 Enter date Year 1 99 Enter year Day of the week 1 7 Enter day of the week Hours 0 23 Enter hour Minutes 0 59 Enter minute Seconds 0 59 Enter second Note Date format according to English notation Modifying Date and Time Settings through the OSD Select Configuration Date Time in the main menu Figure 30 Modifying Date and Time Settings through the OSD To configure Orion X to use a t...

Страница 45: ...a Tool To configure Orion X to use a timeserver proceed as follows 5 Enable SNTP option 6 Enter the IP address of the SNTP server in the SNTP Server field 7 Select in the Time Zone field the time zone for the region where the Orion X is located 8 Click the Apply button to confirm the settings 9 Restart the matrix The system time will be now synchronized with the SNTP server To set the real time cl...

Страница 46: ... is necessary for access from the Java Tool or any web browser Deactivated Function not active default Power User Activated User has basic user rights Permission to switch consoles to CPUs in Extended Switching according to the CON or User ACL Deactivated Function not active Super User Activated Permission to switch any console to any CPU in Extended Switching Deactivated Function not active Admin...

Страница 47: ...the task area Figure 33 Modifying User Settings through the Java Tool Select between the following buttons Button Function New Open a new user configuration Delete Delete an existing user Apply Create a new user account Cancel Reject changes To create a new user proceed as follows 1 Click the New button 2 Press the OK button 3 Enter a user name 4 Enter a password 5 Select the desired privilege lev...

Страница 48: ...Access N User Favorites List This menu is used to create individual favorites lists of CPUs that users switch to frequently A favorites list can contain up to 16 different CPUs Switching between favorites can be done from the keyboard using a Hot Key This menu can be accessed in the OSD and the Java Tool Setting up User Favorites through the OSD Select Assignments User Favorites in the main menu F...

Страница 49: ...rst 16 CPU devices in the CPU available list will be moved to the favorites list 3 A selected CPU device within the favorites list can be moved up or down in the list by pressing the and keys 4 To remove a CPU from the favorites list select it and press the button If the button is pressed all CPU devices will be removed from the favorites list User Macros This menu is used to create macro commands...

Страница 50: ...n is forwarded to console P1 and is changed to a video only connection Push Video P1 CON The video signal of the user s current connection KVM or video only is forwarded to console P1 The user s connection remains unchanged KVM or video only Get P1 CON The user s console gets a KVM connection to the CPU that is currently connected to console P1 The connection of console P1 is changed into a video ...

Страница 51: ...the commands that should be part of the macro in the Function column Double click the Function column and select from the list of functions 3 Select the values for parameters P1 and P2 as required e g corresponding consoles and CPUs 4 Confirm the inputs by pressing the Apply button For convenient macro configuration the following context functions are available To assign a given user s macros to o...

Страница 52: ...settings can be modified Field Selection Description ID Text Numerical value of the extender ID For KVM Extenders the ID is the serial number provided by the extender unit and cannot be changed Name Text Name of the extender unit Fixed Activated Create an extender unit with a fixed port assignment default Deactivated Function not active Port 1 288 depending on the matrix I O Port number at which t...

Страница 53: ...unction New Unit Create a new extender unit Delete Unit Delete an existing unit Apply Confirm changes of an extender unit Cancel Reject changes Flex Port Extender Units Many extenders have functionality which is automatically recognized by the system and these extenders cannot be created manually This is the Flex Port function of the matrix Note The connection of fixed port extender unit e g USB 2...

Страница 54: ... the extender as a CON Unit set the USB CON standalone option to Y C 1 of Input Signals and confirm by pressing the Okay button 5 To configure the created extender as a CPU Unit set the USB CPU standalone option to Y C 1 of Output Signals and confirm by pressing the Okay button 6 To create an individually switchable device for the USB 2 0 CON extender select Configuration CON Devices and click the...

Страница 55: ...0 CON extenders now have to be assigned to either an existing CON Device in the Definition CON Devices screen or a new CON Device has to be created for the assignment by pressing the New button 7 The USB 2 0 CPU extenders now have to be either assigned to an existing CPU Device in the Definition CPU Devices screen or a new CPU Device has to be created for the assignment by pressing the New button ...

Страница 56: ...versal CPU option to N C 1 of Output Signals 3 To configure the created extender as a CPU Unit set the USB CPU standalone option to Y C 1 of Output Signals In addition set the Universal CPU option to N C 1 of Input Signals 4 To create an individually switchable device for the UNI CON extender select Configuration CON Devices and click the New R button Alternatively the UNI CON extender can be assi...

Страница 57: ... I O board when prompted by pressing the Yes button 4 To configure a CPU Unit select one of the extenders in the Ext Units list which is physically connected to a USB CPU Unit Select the UNI CPU USB item in the Type selection box of the Extender Type tab and confirm the settings by pressing the Apply button 5 Restart the I O board when prompted by pressing the Yes button 6 The UNI CON units now ha...

Страница 58: ...efault Allow Private Activated Allow switching to the respective CPU device in Private Mode Deactivated Function not active default Force Private Activated Force switching to the respective CPU only in Private Mode Deactivated Function not active default Fix Frame Activated Force showing a red frame when switching to the respective CPU Deactivated Function not active default Modifying CPU Settings...

Страница 59: ...er units Remove the selected extender units Remove all extender units The following keyboard commands can be used Function Keyboard Command Change assignment number of the EXT unit upwards Change assignment number of the EXT unit downwards To create a new CPU device proceed as follows 1 Click the New Device button 2 Select Create a real CPU or Create a virtual CPU If a template of an existing CPU ...

Страница 60: ...it Name Text Name of the CON Device Virtual Device Activated Create new CON device as a virtual one Deactivated Function not active default Allow User ACL Activated Allow activation of the User ACL at the local console Deactivated Function not active default Force Login Activated Force user login at this CON device Deactivated Function not active default LOS Frame Activated When the video signal b...

Страница 61: ...on CON Devices in the main menu Figure 46 Setting Up CON Devices through the OSD Select between the following buttons Button Function New R Create a new real console New V Create a new virtual console Edit Edit an existing console Delete Delete an existing console Cancel Reject changes Okay Save changes ...

Страница 62: ...l extender units The following keyboard commands can be used Function Keyboard Command Change assignment number of the EXT unit upwards Change assignment number of the EXT unit downwards To create a new console proceed as follows 1 Click the New Device button 2 Select whether to create a real console Create a real Console or a virtual console Create a virtual Console or whether a template of an ex...

Страница 63: ...onsole in the CON Devices list 2 Select the CPU Access Control tab 3 Assign access rights by using the right mouse button or the respective keyboard commands see the table below 4 Confirm the configuration by clicking the Apply button The following keyboard commands can be used Function Keyboard Command Add CPU to list Full Access F Add CPU to list Video Access V Add CPU to list No Access N Mouse ...

Страница 64: ...e and Keyboard Settings through the OSD Select between the following buttons Button Function Cancel Reject changes Okay Save changes Modifying Mouse and Keyboard Settings through the Java Tool Select Definition EXT Units in the task area Mouse and keyboard settings are found in the General OSD Data tab Figure 49 Modifying Mouse and Keyboard Settings through the Java Tool ...

Страница 65: ...Info Activated Update connection changes during fade in of Extender OSD default Deactivated Function not active Display Time 0 999 seconds Duration of OSD fade in default 10 Horizontal Position 10 pixels Horizontal OSD position default 2 Vertical Position 10 pixels Vertical OSD position default 2 Notes When setting the horizontal OSD position a prefixed minus describes the location with respect to...

Страница 66: ...red modifications to the Extender OSD Data settings 4 Click the Okay button to confirm the changes Modifying Extender OSD Settings through the Java Tool Select Definition EXT Units in the task area Figure 51 Modifying Extender OSD Settings through the Java Tool In order to change the Extender OSD settings proceed as follows 1 Select the console extender in the EXT Units list for which Extender OSD...

Страница 67: ...ect Assignments CON Favorites in the main menu Figure 52 Setting up Console Favorites through the OSD To create a list of favorites for the console in use proceed as follows 1 Select a CPU from the CPU Devices list Press the keyboard a key to move the selected CPU device to the CON favorites list Press the r key to remove a selected CPU from the favorites list Repeat the process to add more CPUs t...

Страница 68: ...d the first 16 CPU devices in the CPU available list will be moved to the favorites list 3 The position of a selected CPU device within the favorites list can be changed by pressing the and keys to move the selected CPU up or down in the list 4 To remove selected CPU devices from the favorites list press the button If the button is pressed all CPU devices will be removed from the console favorites...

Страница 69: ...ole s KVM connection is forwarded to console P1 and is changed to a video only connection Push Video P1 CON The video signal of the console s current connection KVM or video only is forwarded to console P1 The console s connection remains unchanged KVM or video only Get P1 CON The console gets a KVM connection to the CPU that is currently connected to console P1 The connection of console P1 is cha...

Страница 70: ...16 in the Key field to be used to invoke the macro 2 In the Function column select the action that should be part of the macro The selection list is opened by a double click on an empty field 3 Select in the P1 and P2 columns the appropriate parameters for the macro function e g consoles and CPUs 4 Confirm the inputs by clicking the Apply button For convenient macro configuration the following con...

Страница 71: ... 10 s any linked USB 2 0 3 0 extenders will not be switched for safety and stability An alternative to this approach is USB HID Ghosting described in the Keyboard Commands topic of the Operations section Parallel Operation can be configured in the OSD and the Java Tool Setting Up Parallel Operation through the OSD Select Configuration Switch in the main menu Figure 56 Setting Up Parallel Operation...

Страница 72: ...ursor beyond the edge of the current display to an adjacent display Multi Screen switching can also be done with keyboard commands The monitors can be arranged side by side in a 1 x 4 array or in a 2 x 2 grid layout The Extender Units assigned to the multi display CON Device must be physically connected to the same block of four ports on a matrix I O board in order for the Con Device to be eligibl...

Страница 73: ...rder to include them in Multi Screen Control 4 Select one or more Control displays within the CON Device by setting the Control function to Y in the display field Control displays are those extender units within the Multi Screen Control that have a keyboard and mouse connected These extender units have the ability to control the Multi Screen setup through the connected keyboard and mouse 5 The Own...

Страница 74: ...The fields for the configuration of the individual displays will be arranged accordingly 4 Select one or more control displays within the CON Device by setting the Control function to Y in the display field Control displays are those extender units within the Multi Screen Control that have a keyboard and mouse connected These extender units have the ability to control the Multi Screen setup throug...

Страница 75: ...n a freeze of all OSD menus for a few seconds The connections between consoles and CPUs are not affected If Auto Save is activated in the Configuration System settings an additional automatic saving of the configuration will be performed periodically Saving of Configurations internal This menu allows specifying a predefined internal storage location for saving the active configuration This does no...

Страница 76: ...en To save the configuration into an internal matrix memory location proceed as follows 1 Select Configuration Save As in the main menu 2 Select the desired storage location File 1 File 8 or Default 3 Save the configuration by pressing the keyboard Enter key Saving Internal Configuration through the Java Tool Figure 61 Saving Internal Configuration through the Java Tool To save the configuration i...

Страница 77: ...nfiguration through the OSD Active shows the current configuration s name and description In addition to the default configuration eight other configurations can be loaded Select the configuration to be loaded from the nine locations The selected configuration is immediately loaded and displayed in the menu as Active To load the configuration from the internal matrix memory proceed as follows 1 Se...

Страница 78: ...proceed as follows 1 Select Administration Activate Configuration in the task area during online mode 2 Select the required configuration 3 Load the configuration by pressing the Activate button Saving of Configurations External Configurations can also be saved as files which are stored outside of the matrix This menu can only be accessed from the Java Tool Figure 64 Saving External Configuration ...

Страница 79: ... Loading external configuration through the Java Tool To load an external configuration file proceed as follows 1 Select File Open during offline mode and select the storage location of the configuration file that is to be opened 2 Open the configuration by clicking the Open button 3 Select File Upload in the menu bar to transfer the opened configuration to the matrix Enter the necessary parameter...

Страница 80: ...iles for ease of offline editing with common spreadsheet applications Import and Export of configuration lists are only available through the Java Tool Export Options Configuration lists are exported in this menu Figure 66 Exporting Configuration Lists through the Java Tool To export proceed as follows 1 Select File Export in the menu bar 2 After opening the menu select the list to export Extender...

Страница 81: ...mber of ports in the entire system needs to be increased or when certain important connections should be distributed to several matrix switches for redundancy The Tie Lines are unidirectional and can only be used in one direction according to their configuration For cascading with bidirectional signal flows Tie Lines have to be set up in opposite directions To use Tie Lines between matrix switches...

Страница 82: ...Configuration CPU Devices in the main menu of the master matrix and press the New R button A switchable CPU Device will be created 8 Enter an appropriate Device name in the Name field 9 Assign the previously configured Extender Unit to the newly created Device by moving the Unit s definition from the Ext available field to the Ext assigned field and save the settings 10 Select Configuration EXT Un...

Страница 83: ...Unit was created select Definition CPU Devices in the task area of the Master Matrix and press the New button A switchable CPU Device will be created 9 Enter an appropriate name for the extender into the Name field 10 Assign the previously configured Extender Unit to the newly created Device by moving the Unit s definition from the Extender available field to the Extender assigned field and save t...

Страница 84: ...ured through the OSD or the Java Tool Administration of Settings Within a Matrix Grid some settings may apply only to the individual matrix switch and others are global settings that apply to the whole Matrix Grid The settings in the following screens have to be made separately for each matrix local settings or within the master matrix the Grid Master to affect all matrix switches in the Grid glob...

Страница 85: ... the main menu Figure 70 Setting Up a Matrix Grid through the OSD Step 1 2 Enter unique name for each Matrix switch into the Device field No two matrix switches within the Matrix Grid can use the same name 3 Enter a unique Grid name into the Name field The Grid name has to be the same within all Grid matrices Confirm these name choices by clicking the Okay button 4 Select Configuration Matrix Grid...

Страница 86: ... to CPU Devices Setting Up a Matrix Grid through the Java Tool To set up the Matrix Grid in the Java Tool execute the configuration wizard in the System Matrix Grid screen It will guide the user through the configuration of Matrix Grids Figure 72 Setting Up a Matrix Grid through the Java Tool Firmware Update This topic includes updating the firmware on the Orion X matrix and the extenders connecte...

Страница 87: ...sure that all USB 2 0 extenders are only connected to their assigned ports fixed ports before the matrix update is started or the stability of the update may be affected Performing the Update To perform the matrix update proceed as follows 1 Select Administration Update Matrix Firmware in the task area All updateable components of the matrix will be automatically selected and highlighted in green ...

Страница 88: ...Extender Update in Standard Mode through the Java Tool Step 1 Upload Firmware 2 Before the actual update process can begin all firmware files have to be uploaded to the respective I O boards of the extenders that have to be updated If a newer firmware is available the appropriate I O boards will be automatically selected for upload in the Selected column and highlighted in green 3 Start the upload...

Страница 89: ...put into Service Mode Each will be reactivated when its firmware update has completed Performing the Update in Expert Mode sequential Update Take the following steps to prepare for the extender update 1 Select Administration Update EXT Firmware and select Expert Mode in the upper part of the working area All extenders eligible for update will be automatically selected and highlighted in green Figu...

Страница 90: ...tionally the Service Mode is indicated by a red tool icon in the lower part of the working area of the Java Tool Figure 77 Extender Update in Expert Mode Step 2 from the Service Mode of the OSD 3 Start the update by clicking the Update button in the lower part of the working area 4 Quit Service Mode after updating by responding to the confirmation request in the pop up window or through Matrix Dea...

Страница 91: ...btain license keys This menu is accessible only from the Java Tool Figure 78 License Management through the Java Tool To activate a function bundle proceed as follows 1 Select Administration License Management in the task area 2 In the working area enter the license key in Activate Bundles License Key 3 Click the Activate button to enable the new function bundle It is not necessary to restart the ...

Страница 92: ...index number of the new CPU from the list of favorites and confirm with Enter Command Mode is closed and the console is connected to the new CPU with complete control Example Switch video keyboard and mouse to number 7 in the favorites list using the default hot key left Shift left Shift 7 Enter Note The fastest switching will be achieved when identical mice keyboards and monitors are used at all ...

Страница 93: ...d Mode is activated 2 Press the Backspace key on the keyboard The Command Mode is closed and the console is disconnected from the currently connected CPU Scan Mode Scan Mode enables fast switching between video inputs from different CPUs in the favorites list without continuously using the Hot Key The switching between two video signals can even take place within one frame 1 Start command mode wit...

Страница 94: ...Key o 2 Select the CPU device configured as a Tie Line in the CPU selection list and press Enter to switch to it 3 Open the OSD of the sub matrix with the following keyboard command Hot Key s o 4 Select the target CPU in the CPU selection list of the sub matrix and press Enter to switch to it Note The selected main matrix sub matrix mode will remain activated unless the other mode is manually acti...

Страница 95: ... EXT Units menu for those consoles where the selection list for CPU Devices should be available 2 Execute the key sequence for opening the OSD The selection list immediately appears in the preset position of the extender OSD Note Pressing F8 hides inactive CPU Devices for a simpler overview 3 Execute the desired switching operation by pressing the respective key as described in the following topic...

Страница 96: ... button Extended Switching Extended switching of any console to any CPU can be performed through the OSD or the Java Tool Extended Switching Through the OSD To switch any console to any available CPU proceed as follows Select Extended Switch in the main menu Note Pressing F8 hides inactive CPU Devices to provide a simpler overview Figure 81 Extended KVM Switching through the OSD 1 Select a CON dev...

Страница 97: ...l available physical extender units CPU units Select between the following switching functions Function Keyboard Command Set a video only connection Space Set a KVM connection Enter Set a KVM connection in private mode video sharing disabled Shift Enter Disconnect the CON device from the CPU device Backspace KVM Switching through the Java Tool There are two methods to perform switching operations ...

Страница 98: ... the same CPU The CON device currently has a Full Access connection CON device is connected with Shared Access with at least one additional console to the same CPU The CON device currently has a Video Only connection Use the following buttons to perform a switching operation Notes When the Auto Send function in the left lower corner of the work area is selected switching operations will be complet...

Страница 99: ...PU at that port To disconnect an existing connection between CON and CPU devices proceed as follows 1 Right click on the port to be disconnected 2 Select the Disconnect function in the pop up that appears The connected port will be disconnected immediately and all extenders assigned to those CON and CPU devices will be disconnected as well CON Switch KVM extender CON Units which offer the ability ...

Страница 100: ... to perform a switching operation by moving the mouse proceed as follows 1 Move the mouse pointer to the vertical or horizontal edge of the display that borders a neighboring display in the CON Device 2 Move the mouse pointer beyond the edge of the display USB HID switching will occur to the CPU displayed on the neighboring monitor The mouse pointer will appear on the adjacent display and any othe...

Страница 101: ...llows switching of USB 2 0 devices independently from KVM devices Notes Switching of USB 2 0 signals uses Extended Switching functionality as described earlier in this section When using parallel operation within the matrix set the Release Time in the Configuration Switch menu to 10 s or more Otherwise the USB 2 0 extender connection will not be established for reasons of security and stability Pr...

Страница 102: ...column of the working area 2 Activate the selected macro by clicking the Send button below the Presets column Notes A predefined switch macro can only be activated in when the Java Tool is in online mode Only switch macros that are hardware and current configuration compliant can be executed Serial Interface The Orion X allows switching via a serial interface RS232 Detailed information for the ser...

Страница 103: ...ory Reset in the main menu 2 Confirm the selection with the Okay button The Orion X will be reset to factory settings Resetting Through the Java Tool 1 Select Matrix Advanced Service Factory Reset in the menu bar 2 Confirm the selection with the Yes button Power Down A complete system shutdown or a partial shutdown of an I O board can be performed through the OSD To shut down the system proceed as...

Страница 104: ... CON Units with connection available for a local source and a redundant matrix interconnection Hot Key l Enter Switch to local source computer CPU only with HDMI CON Units with connection available for a local source Hot Key h w Enter USB HID Ghosting Write device descriptions of the input devices connected to the CON Unit into the CPU Unit Activate emulation in the CPU Unit Hot Key h e Enter Acti...

Страница 105: ...viously connected source computer CPU with a KVM connection Hot Key 1 16 Enter Space or Left Shift Enter Switch to a source computer CPU stored in the favorites List with a KVM connection video only or Private Mode connection Hot Key F1 F16 Execute a predefined macro Hot Key c new Hot Key Code Enter Change the Hot Key to one of the predefined values specified in the Hot Key table Hot Key c 0 new H...

Страница 106: ...tatus indication CPU Board Figure 86 CPU Board Status LEDs 1 Status LED 1 2 Status LED 2 Status LEDs for CPU Pos LED Status Description 1 Status 1 White CPU Board is in registration process Blue flashing Registration of the matrix has started Red flashing Registration in progress Green flashing Operating condition Green CPU Board de registered 2 Status 2 White CPU Board is in registration process ...

Страница 107: ...on process Red Yellow Flashing I O Board in Service Mode or firmware conflict with CPU Board Green Flashing Operating condition I O Board registered at the matrix Green I O Board de registered locking pin pulled out 2 Status 2 White I O Board boot process Blue I O Board registration process Blue Flashing Operating condition communication active with CPU Board active Red Flashing I O Board de regis...

Страница 108: ... interconnect cable 2 Link Status Green Off Port not activated Flashing Port activated no connection through interconnect cable On Connection through interconnect cable ok data traffic active Fan Tray Figure 89 Fan Tray Status LEDs 1 Status LED 1 2 Status LED 2 3 Hot Swap LED Pos LED Status Description 1 Status 1 Green On Operating Condition 2 Status 2 Red Off Operating Condition On Error Conditio...

Страница 109: ...ut OK Green On Operating condition 2 DC Output OK Green On Operating condition 3 O T Yellow Off Normal Temperature On High Temperature Power Supply Unit Orion X 80 48 Figure 91 Orion X 80 48 Power Supply Unit LEDs 1 DC Input Status LED Pos LED Status Description 1 DC Input OK Green On Operating Condition Off No Power Supply DC Input Red On Power Supply Unit not active Matrix is powered by a second...

Страница 110: ...s screen It can only be accessed from the Java Tool Viewing Port Status with the Java Tool The current port configuration of the Orion X is illustrated in this screen Select Status Matrix View in the task area when connected to the matrix Figure 92 Viewing Port Status with the Java Tool Example 1 Figure 93 Viewing Port Status with the Java Tool Example 2 ...

Страница 111: ...it Port is configured as Cascade CON port for cascading of matrices Port is configured as Cascade CPU port for cascading of matrices Port is a UNI port of an I O board that can be used for USB 3 0 or SDI switching UNI port is configured as CON port in order to connect USB 3 0 CON extenders for example UNI port is configured as CPU port in order to connect USB 3 0 CPU extenders for example Red fram...

Страница 112: ...t mouse button to display the same information and open the context menu for the currently selected port with available functions The following context functions are available Function Description Open Extender The screen for definition of the currently selected extender is opened Open Device The screen for definition of the currently selected console or CPU is opened Extended Switch The screen fo...

Страница 113: ...e screen is designed to show the matrix switches that are part of the Matrix Grid Each matrix is displayed in an optimized view of 24 ports per line in order to be able to show a larger number of ports Select Status Grid Port View in the task area when connected to the matrix Figure 94 Port Status Matrix Grid Note Functions colors and symbols used in the Grid Port View are identical to those used ...

Страница 114: ...e console has a video only connection to the displayed CPU Private Mode The console has a Private Mode connection to the displayed CPU Not connected The console is not connected to a CPU SHARED x device s shows the number of devices that are connected to the console s currently connected CPU e g 3 devices If the field is blank no other devices are connected to the current CPU Note If the Mouse Con...

Страница 115: ...is allowed to assign network settings dynamically Displays YES or NO IP Address The current IP address of the matrix whether provided manually or via DHCP Subnet Mask The current subnet mask whether provided manually or via DHCP Gateway The current gateway address whether provided manually or via DHCP MAC ID The MAC address of the matrix Viewing Network Status through the OSD Select Status Network...

Страница 116: ... will be shown on the right side of the working area Firmware Status Matrix The current firmware status of the installed boards is shown in this screen This screen can be accessed through the OSD or the Java Tool The following information is shown in this screen Field Description Name Description of the modules Type Type of the modules by functionality Ports Number of ports Version Complete descri...

Страница 117: ...rough the Java Tool Select Status Matrix Firmware in the task area Figure 99 Viewing Firmware Status through the Java Tool To read out the firmware status and store it locally file extension dtf select Matrix Save Firmware Status to File To read out the overall status of the matrix and store it locally file extension zip select Matrix Save Status to File or press the respective button in the symbo...

Страница 118: ...atus Extender The current firmware status of the connected extenders is shown in this screen This screen can only be accessed from the Java Tool The following information is shown in this screen Field Description ID Serial number of the extender Name Name assigned to the extender unit Type Description of the extender module and its components Port I O port where the extender is connected to the ma...

Страница 119: ...gging of the Orion X matrix activities including switching operations and the performance of function critical components like fans or power supply units is done in this screen It can only be accessed from the Java Tool To start Syslog Monitoring proceed as follows Select the Matrix Monitoring in the menu bar or click the Monitoring icon in the tool bar Figure 101 Syslog Monitoring with the Java T...

Страница 120: ... messages of a number of logged activities of the Orion X the Syslog Monitoring offers various filter options To set and activate a filter proceed as follows 1 Set the desired filter option s by activating the respective checkbox es 2 Activate the filter settings by pressing the Filter button To deactivate an activated filter setting press the Clear button The following filter options are availabl...

Страница 121: ...P Monitoring through the OSD Set the Enable option to Y Yes in the SNMP Agent group By activating this option permission is granted for an active query of the SNMP agent To configure a SNMP server through the OSD proceed as follows 1 Select Configuration SNMP in the main menu 2 Set the Enable Traps option to Y Yes in the SNMP Server group This function allows an active transmission of trap message...

Страница 122: ...t the status of fan tray 1 Fan Tray 2 Notification about the status of fan tray 2 Power Supply 1 Notification about the status of power supply unit 1 Power Supply 2 Notification about the status of power supply unit 2 Power Supply 3 Notification about the status of power supply unit 3 SNMP Monitoring through the Java Tool Select System Network in the task area Figure 103 SNMP Monitoring through th...

Страница 123: ...r Firmware Multi Screen Control Ext Units CPU Devices CON Devices User System Configuration Matrix Grid The following notification levels can be shown Level Description OK green System Check completed without any abnormalities WARNING yellow System Check found abnormalities in the configuration that are not system critical such as incomplete parts of the configuration firmware differences duplicat...

Страница 124: ...nal container or equivalent insured and shipped to Rose Electronics Attn RA__________ 10707 Stancliff Road Houston Texas 77099 USA Technical Support If you are experiencing problems or need assistance in setting up configuring or operating your Orion X unit consult the appropriate sections of this manual If however you require additional information or assistance please contact the Rose Electronic...

Страница 125: ...his Unit from its electrical outlet before cleaning Unplug this Unit from the electrical outlet and refer servicing to a qualified service center if any of the following conditions occur The power cord or connection cables are damaged or frayed The Unit has been exposed to any liquids The Unit does not operate normally when all operating instructions have been followed The Unit has been dropped or...

Страница 126: ... the power supply unit It will be recognized by the system and can now be used Fan Trays To replace fan trays proceed as follows 1 Unlock the locking screw s 2 Pull the fan tray out of its slot using the provided mount 3 Push a new or maintained fan tray into the slot 4 Lock the fan tray in place It will be recognized by the system and can be now be used CPU Board To replace the CPU board proceed ...

Страница 127: ...oard will be shown by a permanent green flashing of status LED 1 5 Reconnect all cables to the I O board Filter Pads Filter pads should be checked regularly for accumulated dust and cleaned with low pressure compressed air or with suction The inspection cycle depends on the ambient air and will vary based on the conditions However a period of 6 months should not be exceeded Filter pads or filter t...

Страница 128: ...ngth and quality of the interconnect cable to the units Fan Malfunction Problem Possible Reason Solution Fans only run under full load Communication to fan tray is not working Remove and reinstall fan tray Swap both fan trays to the other slot Restart the matrix Fans do not run LED OK on Fans defective Contact your dealer Fans do not run LED OK off Power supply Check power supply and power connect...

Страница 129: ... 105 Troubleshooting Blank Screen Problem Possible Reason Solution Monitors remain blank after switching operation Switching to a CPU port with no active source computer CPU Switch to a CPU Port with an active source computer CPU Connection of a console to a CON port or connection of a CPU to a CPU port not established correctly Check CON and CPU port connections on the matrix LED 1 on or LED 2 of...

Страница 130: ...phic tablets barcode scanners or special keyboards Support cannot be guaranteed however for every USB HID device RJ45 Network The communication of the Cat X devices requires a 1000BASE T connection The cabling must be according to EIA TIA 568 B 1000BASE T with RJ45 connectors at both ends All four wire pairs are used in both directions The cabling is suitable for a full duplex operation To connect...

Страница 131: ...installed shielded Cat X cable must be used throughout the interconnection link To maintain regulatory EMC compliance all Cat X cables should have ferrites installed on both cable ends close to the devices Type of Interconnect Cable The Orion X requires interconnect cabling specified for Gigabit Ethernet 1000BASE T The use of solid core AWG24 shielded Cat 5e or better is recommended Type of Cable ...

Страница 132: ...ouse breakout cable A DQ ZN B2Y 4G62 5 outdoor cable with protection against rodents Only use Single mode connection cables for fiber connections that are based on 3G SFPs Maximum Acceptable Cable Length Type of cable 1 25 Gbps 3 125 Gbps Single mode 9μm 32 800 ft 10 000 m 16 400 ft 5 000 m Multi mode 50μm OM3 3 280 ft 1 000 m 1 640 ft 500 m Multi mode 50μm 1 300 ft 400 m 650 ft 200 m Multi mode 6...

Страница 133: ... GND 11 T M D S data 1 GND 19 T M D S data 0 GND 4 n c 12 n c 20 n c 5 n c 13 n c 21 n c 6 DDC Input SCL 14 5VDC high impedance 22 T M D S clock GND 7 DDC Output SDA 15 GND 23 T M D S clock 8 Internal use 16 Hot Plug recognition 24 T M D S clock C1 Internal use C3 Internal use C2 n c C5 GND C4 Internal use Connector USB Type A Figure 107 CPU Board USB Type A Connector Pinouts Pin Signal Color 1 VC...

Страница 134: ...rs that are present on the different I O boards CATx I O Board with RJ45 Connector Figure 110 I O Board RJ45 Connector Pinouts Pin Signal Pin Signal 1 D1 5 D3 2 D1 6 D2 3 D2 7 D4 4 D3 8 D4 I O Port Fiber SFP Type LC Connector Figure 111 I O Port Fiber Type LC Connector Pinouts Diode Signal 1 Data OUT 2 Data IN SDI I O Board with Mini BNC Connector Figure 112 I O Board SDI Connector Pinouts Pin Sig...

Страница 135: ...rds I O Board max 13 W Environmental Conditions Operating Temperature 41 F to 113 F 5 C to 45 C Storage Temperature 13 F to 140 F 25 C to 60 C Relative Humidity Max 80 non condensing Size Orion X 288 port model Matrix 19 0 x 22 8 x 12 0 483 x 578 x 330 mm Shipping Box 25 6 x 26 8 x 29 9 650 x 680 x 760 mm Orion X 160 port model Matrix 19 0 x 15 8 x 12 0 483 x 400 x 330 mm Shipping Box 25 6 x 26 8 ...

Страница 136: ... on the FIT rates of the parts included FIT rates are based on normalized environmental conditions of T 140 F and activation energy Ea of 0 7 eV Calculations are based on 90 confidence limit It is estimated that temperature inside the housing will be 59 F higher than the ambient temperature Therefore the MTBF calculation refers to an ambient temperature of 113 F The humidity is limited to 60 Orion...

Страница 137: ...er Receiver Unit DVI D USB HID USB2 0 CATx OR2 SRDTXUD1D AUD Orion X Tender Receiver Unit DVI D USB HID Aud Ser CATx OR4 SRDTXTD1D AUD Orion X Tender Receiver Unit DVI D USB HID USB2 0 Aud Ser CATx OR4 SRDTXTD2D AUD Orion X Tender Receiver Unit Dual Head DVI D USB HID USB2 0 Aud Ser CATx Receivers Multimode Fiber Part Description OR2 SRDFMUD1D Orion X Tender Receiver Unit DVI D USB HID Fiber Multi...

Страница 138: ... D USB HID USB2 0 Fiber Multi Mode OT4 SLDFMTD1V Orion X Tender Transmitter Unit DVI I VGA USB HID USB2 0 Fiber Multi Mode OT2 SLDFMUD1D AUD Orion X Tender Transmitter Unit DVI D USB HID Aud Ser Fiber Multi Mode OT4 SLDFMUD1V AUD Orion X Tender Transmitter Unit DVI I VGA USB HID Aud Ser Fiber Multi Mode OT4 SLDFMTD1D AUD Orion X Tender Transmitter Unit DVI D USB HID USB2 0 Aud Ser Fiber Multi Mode...

Страница 139: ......

Страница 140: ...E COM sales rose com 800 333 9343 Rose Electronics 10707 Stancliff Road Houston Texas 77099 Rose USA 281 933 7673 Rose Europe 49 0 2454 969442 Rose Asia 65 6324 2322 Rose Australia 61 0 421 247083 WWW ROSE COM ...

Отзывы: