


2-86
LEF2-300
2
Adjustment
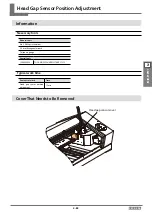
Head Gap Sensor Position Adjustment
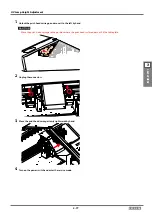
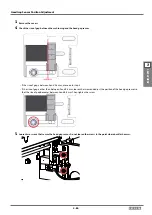
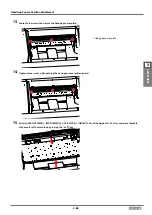
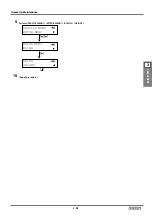
8.
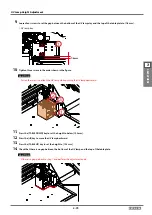
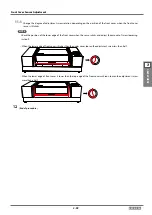
Turn the adjustment screw clockwise 90 degrees repeatedly until the status of sensor [A] is ON.
NOTE
When you turn the screw clockwise, the head gap sensor moves frontward.
HCPwFLRAT
* * * * *
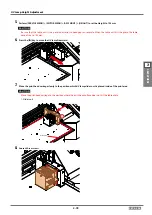
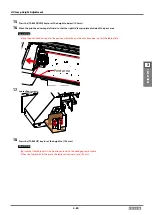
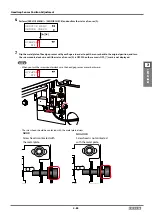
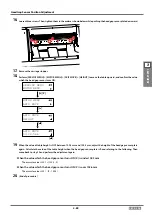
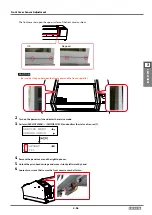
9.
Turn the adjustment screw clockwise three times more.
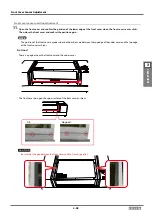
CAUTION
Confirm that the head gap sensor plate is center of the head gap sensor.
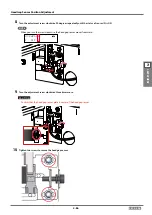
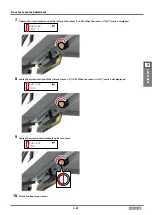
10.
Tighten two screws to secure the head gap sensor.
Содержание VersaUV LEF2-300
Страница 240: ...3 1 LEF2 300 3 supplement Chapter 3 Supplement Motor Errors 3 2 Service Call Errors 3 3 Sensor Map 3 6 Wiring Map 3 9 ...
Страница 249: ...3 10 LEF2 300 3 supplement Wiring Map ...
Страница 250: ...4 1 LEF2 300 4 Service Activities Chapter 4 Service Activities Installation Checklist 4 2 Maintenance Checklist 4 14 ...


