


Robotiq Finishing Kits- Instruction Manual
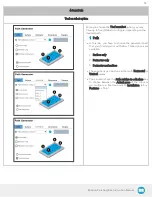
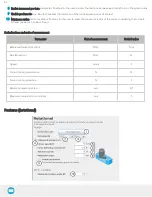
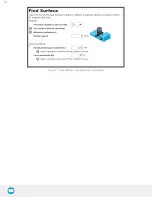
9-Point Path
1. Define the nine points that represent your surface.
2. Each point has its own node.
3. Choose Set Waypoint to define your waypoint
(bring the robot to where your corner is).
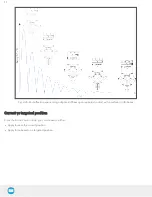
4. Make sure the point you are teaching fits the point
sequence on the illustration.
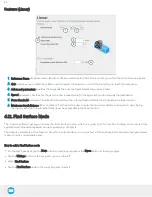
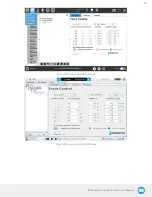
5. When it is defined, you can always move to the
point (click on move here) or change the waypoint
(click on Set waypoint).
6. Perform the same procedure for all nine points.
Make sure the corner you are teaching fits the
corners’ sequence on the illustration.
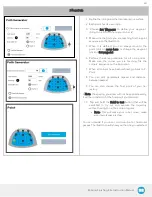
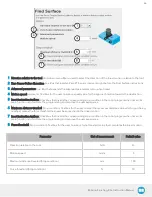
7. When all corners have been defined, go back to 9-
Point.
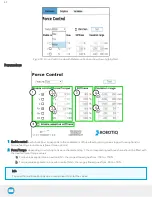
8. You can edit parameters (speed and distance
between passes).
9. You can also choose the final point of your tra-
jectory.
o Note: the spacing you enter will not be applied exactly,
it will be rounded to fit the final point you decided.
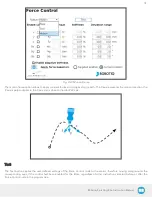
10. Tap and hold the Hold to test button (that will be
available) to try out and execute the trajectory
without having to run the entire program.
l
Note: this will make your robot move, make
sure its workspace is clear.
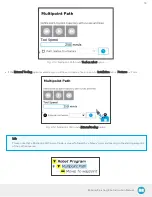
You can decide if you want to do vertical or horizontal
passes. The illustration will show you the one you selected.
60


