Tactical ResQmax Operation Manual
29
Servicing the Nozzle Valve Plug:
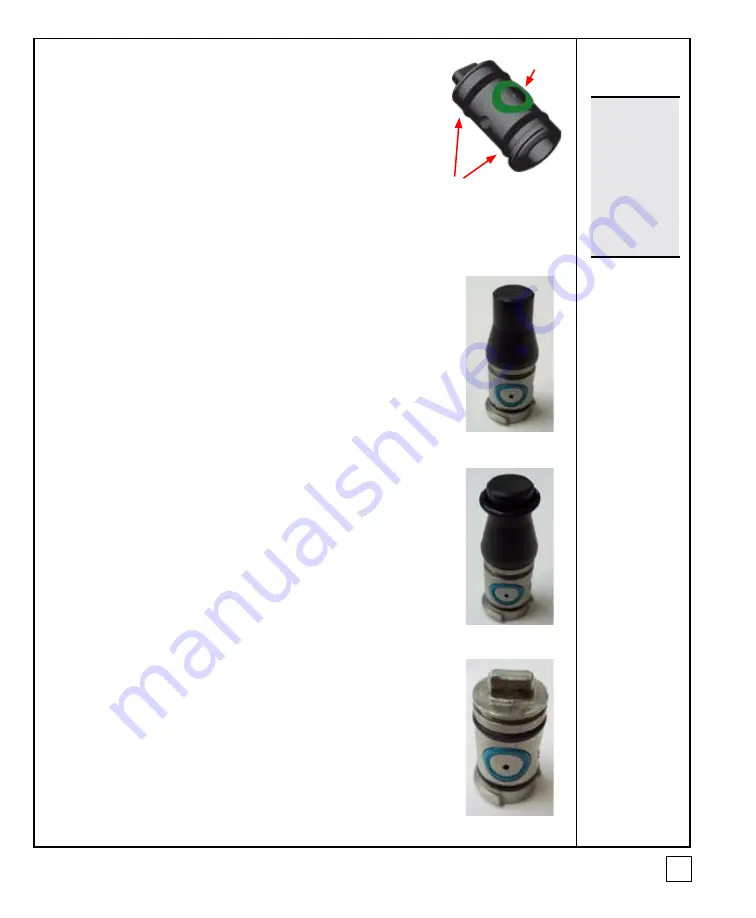
1. Remove and discard the Upper, Lower, and Face O-rings (Fig. 27).
2. Remove and inspect the Pressure Relief Assembly - if it has not burst,
it can be reinstalled.
3. Thoroughly clean the Nozzle Valve Plug as well as the bore of the
Nozzle Body.
4. Install the Face O-ring on the Nozzle Plug pressing it into place inside
the groove around the opening.
5. Install the Nozzle Plug Upper & Lower O-rings into place on the
Plug.
6. Verify that all O-rings are properly seated on the Nozzle Plug
(Fig. 28c).
7. Lubricate the new O-rings with petroleum jelly.
8. Lubricate the bore of the Nozzle and the Nozzle Plug with a light film
of petroleum jelly.
Note:
The Nozzle Plug
Face O-ring is
easily identified
by its blue/
green color.
No substitute
O-ring will
provide
adequate service
or performance.
Figure 27 - Nozzle
Valve Plug
Face O-ring
#60406
Upper/Lower
O-rings #60405
Installing the Nozzle Plug Valve O-rings with the Installation Tool:
1. Remove and discard the Upper, Lower, and Face O-rings (Fig. 27).
2. Remove and inspect the Pressure Relief Assembly - if it has not burst,
it can be reinstalled.
3. Thoroughly clean the Nozzle Valve Plug as well as the bore of the
Nozzle Body.
4. Install the green Nozzle Plug Face O-Ring.
5. Place the Installation Tool on the Nozzle Plug (Fig. 28a).
6. Slide the Nozzle Plug Upper O-Ring on the Installation Tool and push
it down until it drops into the top groove (Fig. 28b).
7. Slide the Nozzle Plug Lower O-Ring on the Installation Tool and push
it down until it drops into the bottom groove (Fig. 28b).
8. Remove the Installation Tool and verify that all O-rings are properly
seated on the Nozzle Plug (Fig. 28c).
9. Lubricate the new O-rings with petroleum jelly.
10. Lubricate the bore of the Nozzle and the Nozzle Plug with a
light film of petroleum jelly.
Figure 28a
Figure 28b
Figure 28c


