1.800.627.4499
DN-Series Integrated Programmable Controls
DOAS
100
3. Click on “Choose File” and locate the autorun.ap1 file on your PC that corresponds to the
controller. Click “OPEN.” You should now see that file name next to “Choose File.”
4. Click “Upload AP1 to c.pco.” You will see the file upload.
5. Once 100% on the upload, switch back to the RUT screen to see the upgrade taking place.
6. On the controller the program will see the file and require you to push “ENTER.” You can see
that on the front of the controller itself or on the RUT page of the web pages.
7. Restore the parameters using the
General Save and Restore
method. Make sure you choose
IMPORT! Use the Export_XX number you chose in step 1.
8. Cycle power.
12.0 GENERAL SYSTEM MONITORING
This section describes the general system monitoring. It is here only to provide a general
sense of how to monitor the system. Specific screens and information appear depending upon
the features you have selected. Refer to the documentation on the specific function for the
information on specific monitoring screens.
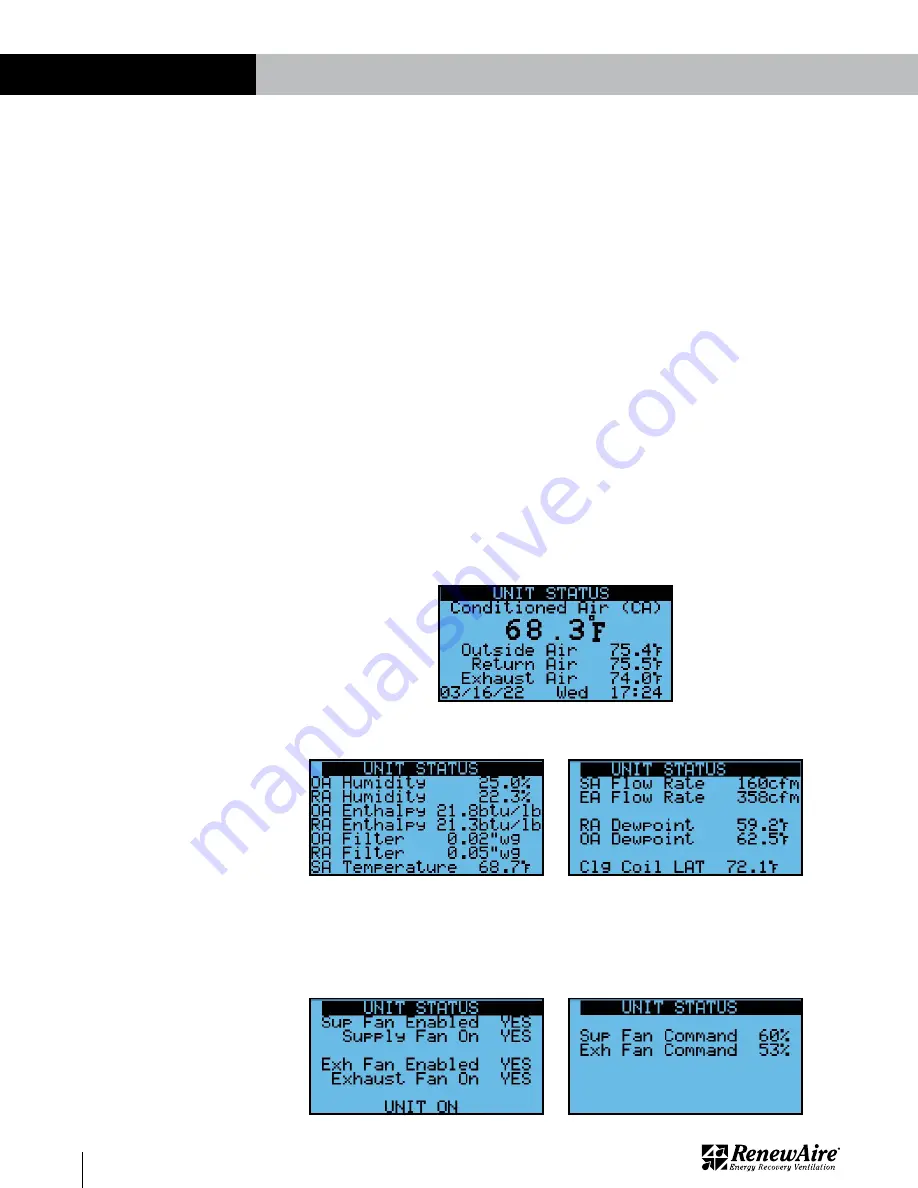
The unit is monitored through
Unit Status
.
The main screen shows either the SA temperature coming off the core, or the CA temperature,
depending upon whether the unit has tempering or not. It also shows the other four
temperatures near the core.
12.1 MAIN SCREEN
These screens also show standard values.
12.2 OTHER STANDARD SCREENS
The first screen is helpful on starting the unit. It shows whether the fan is being asked to turn
on (enabled), and whether the current sensor is detecting that it has turned on.
It also shows the
Unit Status
conditions, described in the chart below.
The seconds screen shows the speed of the fans.
12.3 FAN AND UNIT STATUS SCREENS
SYSTEM MONITORING


