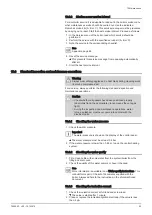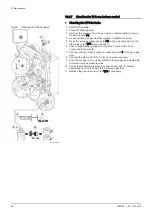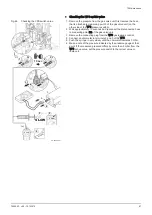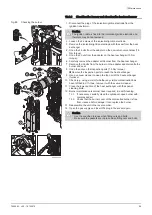
1. Undo the 3 bolts from the adapter on the non-return valve holder (15
Nm torque).
2. Remove the ionisation/ignition electrode.
3. Undo the 3 nuts from the adapter on the heat exchanger (15 Nm
torque).
4. Carefully remove the adapter with burner from the heat exchanger.
5. Remove the 4 bolts from the fan and remove the non-return valve
holder (5.5 Nm torque).
6. Check whether traces of condensation are visible on the inside of the
fan.
Always replace the non-return valve along with the holder in the
event of visible traces of condensation or damage.
7. Reassemble in the reverse order.
Caution
Use the specified torques when fitting nuts and bolts.
Make sure the gaskets are in place when fitting nuts and bolts.
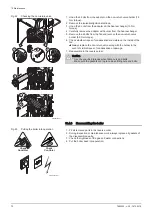
10.4.3 Reassembling the boiler
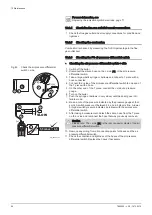
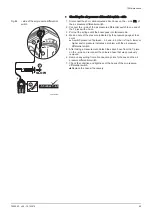
1. Fit all removed parts in the reverse order.
2. During inspection or maintenance work, always replace all gaskets of
the disassembled parts.
3. Check the tightness of the gas and water connections.
4. Put the boiler back into operation.
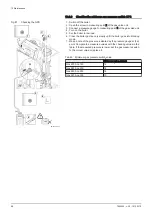
Fig.92
Checking the non-return valve
AD-0001188-01
1
4
4
5
3
6
2
Fig.93
Putting the boiler into operation
AD-0000132-01
Check
Contrôler
Check
Contrôler
10 Maintenance
72
7665063 - v.05 - 18102018
Содержание Gas 220 Ace 160
Страница 88: ...14 Appendix 88 7665063 v 05 18102018 ...
Страница 89: ...14 Appendix 7665063 v 05 18102018 89 ...
Страница 90: ...14 Appendix 90 7665063 v 05 18102018 ...

