background image

© 2019 Real Carriage Door & Sliding Hardware. All rights reserved.

WWW.REALSLIDINGHARDWARE.COM

[email protected]

WWW.REALCARRIAGE.COM

[email protected]

Real Carriage Door & Sliding Hardware

9803 44th Ave NW 
Gig Harbor, WA 98332

P


800.694.5977


F


253.857.9295

A B O U T   U S

Real Carriage Door & Sliding Hardware is 
committed to excellence in creating high 
quality products for customers around the 
world. Built Real in the USA, our original door 
and hardware designs are visually stunning 
and structurally robust. We strive to exceed 
your expectations by combining personalized 
customer service with the highest quality 
products. We invite you to Build Real.™

Real is constantly releasing new, innovative, 
and exclusive products. We always have 
great things in the works, so swing by our 
website to stay completely up to date on 
everything we have to offer. 

O R D E R   T O D A Y

To order please call us at 

800.694.5977

. Our 

experienced designers are ready to help you 
find the perfect doors and hardware for your 
project’s needs. Order your Real Carriage doors 
and hardware today!

Содержание Frankling Autoswing

Страница 1: ...INSTALLATION MANUAL ...

Страница 2: ... Hardware is not liable for any damage that occurs during install and replacements are the sole responsibility of the installer and customer The manufacturer does carry a warranty for any defects or issues that are from manufacturing only and will have to be tested by the manufacturer s technical team before sending replacements It is also a good idea to install a surge protector to avoid any dama...

Страница 3: ...tomation device satisfies the required safety level stan dards However it is advisable to observe some practical rules in order to avoid accidental problems Before using the automation device carefully read the operation instructions and keep them for future reference Keep children persons and things outside the automation working area particularly during op eration An incorrect installation or im...

Страница 4: ...ns and maintenance operations The preset values are indicated between square brackets WARNINGS Correct controller operation is only ensured when the data contained in the present manual are observed The company is not to be held responsible for any damage resulting from failure to observe the installation standards and the instructions contained in the present manual The descriptions and illustrat...

Страница 5: ...the specifications they contain For all programming parameters please refer to the Thalia UL Control Panel from BFT 1 2 3 4 5 6 7 8 9 10 11 12 14 15 18 19 20 21 22 23 24 25 27 28 29 30 34 TABL E OF C ONTENTS APPENDICES Specifications System Overview Motor Installation Limit Switch Installation Manual Operation Mode Mounting the Control Unit Installing Motor Cover Wiring Simplified Autoset Programm...

Страница 6: ...Reaction Torque Limiter on Control Panel Manual Release Release Knob with Personalized Key Operating Cycle Intensive Use Environmental Conditions 5 F 140 F Degree of Protection IP44 Operator Weight 35 lbs Door Leaf Max Length Up to 10 ft Door Leaf Max Surface Area 120 ft2 Maximum Open Angle Up to 125 Weight Limit 550 lbs 1 SPEC IFI CAT IONS S P E C I F I C A T I O N S ...

Страница 7: ...e the panel while drilling Refer to Master Wiring Diagram for more detailed views of Control Panel connec ons Surge protec on and a dedicated circuit are encouraged Motors are low voltage Use braided wire Increase wire gauge if motors mounted more than 20 from control housing From lowest part of jamb to ceiling line A Control Housing dims 7 25 x 8 75 x 3 5 B Left Motor C Right Motor D Receiver Pho...

Страница 8: ...stalla on of Motor TIP Before moun ng refer to Typical System Overview for prewiring For a very clean installa on mount the unit directly on the head casing if at pro le Note that this motor posi oning is for outswing doors only 4 Level and mount the plate with minimum 3 8 x 4 lag bolts not supplied For proper arm clearance the bo om of the plate must no higher than the lowest part of the jamb Alw...

Страница 9: ...release the operator See Manual Opera on Mode 9 Open the door to the desired fully open point approx 105 degrees is recommended With a measuring tape mark the centerline of the door moun ng bracket at 40 from the center of the sha g 2 Making sure that the arm is level Mount the arm to the door with 14 x 1 1 2 pan head screws not supplied 10 Check clearance and movement by swinging door slowly 11 R...

Страница 10: ...to see that the click of mits switch occurs where desired Adjust cessary LEFT MOTOR viewed from inside RIGHT MOTOR viewed from inside CLOSE LIMIT CAM OPEN LIMIT CAM CLOSE LIMIT SWITCH OPEN LIMIT SWITCH OPEN LIMIT CAM CLOSE LIMIT CAM OPEN LIMIT SWITCH CLOSE LIMIT SWITCH Fig 3 Limit Switch installa on FULL CAM RING CAM Franklin Autoswing Installation Manual TM Installa on of Limit Switches 1 Install...

Страница 11: ...ut by turning the external release knob with personalized key 2012 Copyright Real Carriage Door Compan Manual Opera on Mode NOTE When working with limit switches the key cannot be used to manually release motor To release ip the black lever pictured at right and swing the door The lever must be held down while swinging as it is spring loaded Right Motor Le Motor Inside Outside For LEFT motor as vi...

Страница 12: ... damage any wires or components of the board See Typical System Overview for suggested location of the housing MOUNTING THE CONTROL UNIT 7 C ONTRO L U NIT MOU NTING CONTROL UNIT SPECIFICATIONS Wifi Hub plug in location GDC 1 25 amp fuse locations Jumper wires NOTE Once photo eyes are wired in the jumper wire from 70 72 MUST be removed Ground UL alarm NOTE The alarm will sound if the force or photo...

Страница 13: ...8 MOUN TI NG TH E CONTROL UNIT ...

Страница 14: ...ve us a call at 1 800 694 5977 M O T O R C O V E R I N S T A L L Installing the Motor Cover 1 Hold the cover over the motor with the front of the cover angled toward you Rock the cover rearward g 7 un l the cover is seated The cover must be installed in this way so that the Manual Opera on cam engages properly with motor g 8 2 Test the manual release mechanism as described in Manual Opera on Mode ...

Страница 15: ... wiring Connect Motor wires to motor ouput terminal 10 and 11 and the limit input at terminal 42 Motor 2 is the door that will open last and close first For dual motor installations this will be your second motor Motor 2 output terminals are 14 and 15 and the limit input is terminal 43 10 WI RIN G SIMPLIFIED ...

Страница 16: ...NOTE Remove jumper wire out of terminal 72 and 70 Please see page 15 17 for assembly disassembly installation and programming information 11 WIRIN G S IMPLIFIEDN ...

Страница 17: ... down using the minus button until you see ENG English displayed Then press the OK button 2 The word TYPE will be displayed briefly Press the minus button until IGEA is displayed Then press OK 3 The next screen will display N MOT Number of Motors Scroll down with the minus button until 2 is displayed Press OK NOTE if only installing one motor choose 1 then press OK 4 DR Direction will now be displ...

Страница 18: ...are that the doors will run at full torque during the process Press OK when ready The motors will run full open and close cycles more than once to learn the force required to open and close the doors OK will be displayed Press the OK button to continue NOTE If the motors do not run and or KO is displayed press OK to display error code Check all wiring fuses photo eye alignment and wiring PROGRAMMI...

Страница 19: ...g direction If the motors are trying to pull in instead of out then the polarity is incor rect and you want to double check your wiring and make sure it matches the wiring simplified diagram Wrong door is opening first If the wrong door is opening first then you have the wrong motor wired into 10 11 and 42 and will need to switch the motor wiring the 2nd door is 14 15 and 43 If you have checked th...

Страница 20: ... O G R A M M I N G F E A T U R E S The Thalia control provides two command inputs IC1 and IC2 COMMAND INPUTS TERMINAL NAME DESCRIPTION DEFAULT 60 COM Command positive common Common 61 IC 1 Command Input 1 START 62 IC 2 Command Input 2 PED Command input 1 2 can be re programmed to perform any of the following RANGE VALUE FOR IC 1 IC 2 NAME DESCRIPTION 001 START Cycles between open stop and close No...

Страница 21: ...he following functions under Logic menu AUXILIARY OUTPUTS RANGE VALUE FOR AUX 3 FUNCTION DESCRIPTION 0 2nd channel receiver output Output activate when transmitter activates the 2nd channel 1 Door open light Output activate when door is not closed Flashes while closing 2 Courtesy light Output activate during and for 90 seconds after operation 3 Door not closed Output activate until close limit is ...

Страница 22: ...uts are normally closed N C contacts All the FAULT inputs are normally open N O contacts TERMINAL NAME DESCRIPTION DEFAULT 70 COM Safety positive common Common 71 STOP Stop command STOP Overrides all other commands 72 SAFE 1 Safety input 1 PHOT Stops operators during opening reverses on closing 73 FAULT 1 Supervisory circuit for SAFE 1 FAULT Requires opposite relay state from SAFE 1 74 SAFE 2 Safe...

Страница 23: ... edge input with EOL resistor as supervision method Only active on SAFE 2 009 BAR OP Safety edge input During opening it stops and partially reverses During closing it stops 010 BAR OP TEST Same as above Requires device to be supervised FAULT active 011 BAR OP 8K2 Safety edge with EOL resistor as supervision method During opening it stops and partially reverses During closing it stops Active only ...

Страница 24: ...iver into one of the notches between the button frame 1 and button base 2 and carefully pry out the button base 5 Mounting to masonry Hold the button base 1 on the wall and mark the mounting points WARNING Risk of injury from flying chips when drilling Drilling chips can get into the eyes and injure them Using a drill with a masonry bit drill two holes and insert two suitable an chor fittings Scre...

Страница 25: ...on requires that the input command to be reprogrammed on the control board to open and close the doors please see page 13 on pro gramming menu for reference If you do not program the control board the wall button will only open the doors To change the default setting of OPEN to a START input please follow these steps On the control board please press OK twice quickly HALT will appear on the displa...

Страница 26: ... 9 25 x 3 75 Battery Backup powers one Franklin system only ECOSOL Solar Power Get your garage door off the grid with Ecosol solar conversion Allows up to 3 weeks of residential use without sunshine Optional accessory can charge HOMELINK Compatibility Toss out your hand held remote controls and operate your garage door system directly from your car with the Homelink compatibility option Extended R...

Страница 27: ... HIDDEN BUTTON Firmly press and hold the top two buttons on your remote this is the hidden button When the screen reads RELEASE release the two buttons The screen will then read DESIRED BUTTON Press and release the button you wish to operate the doors with 2 The screen will display HIDDEN BUTTON again You can repeat the remote leaning process or press OK to end PROGRAMMING ADDITIONAL REMOTES 22 PR...

Страница 28: ...place TRANSMITTER PROGRAMMING Open up the transmitter by prying on corner as illustrated Change the transmitter code by moving the switches on the dip switch bank Carefully close transmitter by snapping enclosure back in place RECEIVER MEMORY DELETION Press and hold P1 WITHOUT RELEASING P1 when the LED lights up press hold P2 for 10 secs Release both buttons LED will flash 6 times indicating memor...

Страница 29: ...be used for pedestrian command If you do need Ch 2 Orange goes into 60 Green into 62 Lastly be sure to program IC1 value to 000 on your control board for Ch 1 On the control board please press OK twice quickly HALT will appear on the display Press OK twice again and PARAM will appear on the display Press the button one time and the display show LOGIC Press the OK button TCA will appear on the disp...

Страница 30: ...ls available Each opener needs its own channel to operate Opening 1 is Channel 1 and Opening 2 is Channel 2 and so on The default code per each channel is the channel number For example Channel 1 is 1 1 1 1 and Channel 5 is 5 5 5 5 PROGRAMMING THE KEYPAD TO THE CONTROL UNIT 1 Press and hold the ON button on the keypad until the red LED light comes on 2 Press 1 1 1 1 Press ON Red LED light will bli...

Страница 31: ...een LED will blink 3 Enter the current Channel 1 passcode Press OK Red LED light will be fixed and green LED will blink 4 Enter the desired 4 digit code sequence Press OK Red LED light will be fixed and green LED will blink ADDITIONAL CODES 1 Press and hold the ON button on the keypad until the red LED light is on 2 Enter current passcode OK Red LED light will be fixed while the green LED light bl...

Страница 32: ...umper grabbing both legs 3 Insert batteries and wait for unit to stop beeping and flashing 4 Once these alerts stop remove the batteries 5 Remove the jumper off both legs and reinsert onto one leg 6 Insert batteries and start over with instructions OUTDOOR KEYPAD RESET 27 OU TDOOR KEYPAD PROG RAMMING ...

Страница 33: ...will read Add StArt Press OK The display will read hIddEn bUtton NOTE The hidden button is the top two buttons on the wall button Top left button channel one and top right button channel two 3 Press and hold the hidden button on the wall button until the display reads RELEASE 4 Let go of both buttons and press the DESIRED BUTTON one time 5 Programming is now complete 28 WIRE LESS WAL L BUT TON PRO...

Страница 34: ...ires feeding from the transformer to the opener controller board bottom two wires on JP30 3 The two neutral white or grey wires running from the transformer to the controller board top two wires on JP30 need to be split 4 Run a wire from terminal 4 on the battery controller board to the trans former side of the neutral wire pair then run a wire from terminal 5 on the battery controller board to th...

Страница 35: ...A2 WPA Personal and WEP WI FI HUB SPECIFICATIONS The Wi Fi hub allows your Franklin Autoswing to connect to Wi Fi so that way you can operate the openers with an app on your smart phone Before you proceed you must have the following Wi Fi Hub accessory Thalia model Franklin it will say Thalia in the control box or it has grey control unit housing instead of black Have strong Wi Fi connection where...

Страница 36: ...l board ON 3 Download the U Control app from your app store 4 Start up the U Control app 5 Click on Register and enter in your details Fig A Once your email address and password are entered click Register Fig B If you have already registered then you will select Access and continue 6 Open your Wi Fi connections on your phone Fig C 31 WI FI HU B ...

Страница 37: ...ect to the Wi Fi signal of your Wi Fi Hub which is identified as BeBA WI FI_00xxxxxxxxxx Fig D 8 Enter in the password BEBAWIFI Fig E 9 Click connect 10 Return to the App Click on Proceed Fig F 32 WI FI HU B ...

Страница 38: ...fields Fig G Click on Next 12 Connect to the Wi Fi network on your router Fig H Enter the name of your Wi Fi network Enter the password for your Wi Fi network Click Done 13 Confirm pairing by click Proceed Fig I 33 WI FI HU B ...

Страница 39: ...e WI FI HUB pressing the key on the card for at least 5 seconds to make it visible again to the phone and return to step 6 14 The U Control app configuration is now complete Now it is possible to Open and close your doors Fig K Share the app with other members Fig L Create scenarios Activate geolocating Fig M 34 WI FI HU B ...

Страница 40: ...180 PARAM TRF LGHT CLR T Traffic zone clear time adjustment in seconds 40 1 180 PARAM OP DIST SLOWD Slowdown starting distance from end of open travel espressed in percentage 10 0 50 PARAM CL DIST SLOWD Slowdown starting distance from end of close travel expressed in percentage 10 0 50 PARAM DIST DECEL Slowdown starting distance from end of open and close travel expressed in percentage 15 0 50 PAR...

Страница 41: ...6 closes 3 sec before gate movement 0 OFF 1 ON 0 0 1 LOGIC HOLD TO RUN Requires continous OPEN or CLOSE command input for gate to operate 0 OFF 1 ON 0 0 2 LOGIC IBL OPEN Ignores START imput during the opening cycle 0 0 1 LOGIC IBL TCA Ignores the START input while counting down for automatic closing 0 OFF 1 ON 0 0 1 LOGIC IBL CLOSE Ignorse the START input during the closing cycle O OFF 1 ON 0 0 1 ...

Страница 42: ...ote programming 0 disabled 1 enabled 1 0 1 LOGIC SERIAL MODE 0 Slave unit 1 Master unit 0 0 1 LOGIC ADDRESS Unit s network identification number 0 0 127 LOGIC EXPI 1 Configuration of Expansion board input 1 Defaulted as Start command 1 0 14 LOGIC EXPI 2 Configuration of Expansion board input 2 Defaulted as Start command 0 0 10 LOGIC EXP0 1 Configuration of Expansion board output 1 Defaulted as Tra...

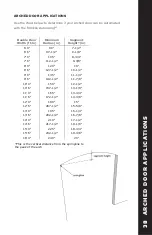
Страница 43: ... 195 16 1 4 13 6 202 1 2 16 7 8 14 0 210 17 1 2 14 6 217 1 2 18 1 8 15 0 225 18 3 4 15 6 232 1 2 19 3 8 16 0 240 20 This is the vertical distance from the springline to the peak of the arch 2012 Copyright Real Carriage Door Company Inc Appendix C Door Top Radius Table to determine if your arched door can be automated with the Minimum Radius in Segment Height in 90 7 1 2 97 1 2 8 1 8 105 8 3 4 112 ...

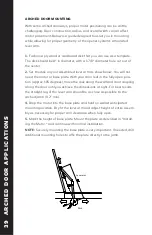
Страница 44: ... base plate is very important If needed drill additional mounting holes to affix the plate directly to the jamb ARCHED DOOR MOUNTING Appendix D Alterna ve Moun ng a plywood or cardboard disk that you can use plate The disk should be 8 in diameter with diameter hole cut out of the center isk on your assembled lever arm as show ou will not need the motor or base plate With r leaf in the fully open p...

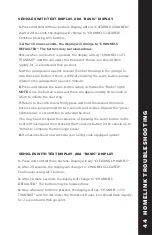
Страница 45: ...exhaust contains carbon monoxide a dangerous gas Do not run the vehicle s engine while programming HomeLink Exhaust gas can cause serious injury or death When programming a garage door opener it is advised to park outside of the garage Do not use HomeLink with any garage door opener that lacks safety stop and reverse features as required by U S federal safety standards this includes any garage doo...

Страница 46: ...hich activates the Radio light NOTE Once the button is pressed there are approximately 10 seconds in which to initiate the next step 5 Return to the vehicle and firmly press and hold the desired HomeLink button to be programmed for two seconds and release Repeat the press hold release a second time to activate the door You may need to repeat this sequence of pressing the Learn button on the Contro...

Страница 47: ...elease a second time to activate the door You may need to repeat this sequence of pressing the Learn button on the Control Housing and then pressing the HomeLink button in the vehicle up to 3 times to complete the training process 9 HomeLink should now activate your rolling code equipped opener 1 Press and hold the outer two buttons for approximately 10 seconds releasing only when the HomeLink ind...

Страница 48: ...on for approximately 20 seconds releasing only when the HomeLink LED shows a constant light Please ignore the message Program button 2 now A second person may make the following steps quicker easier As a safety precaution DO NOT stand on your vehicle Use a stepladder or other stable safe device 4 At the garage door opener receiver Control Housing in the garage locate the Learn button If there is d...

Страница 49: ...7 Return to the vehicle and firmly press and hold the desired HomeLink button to be programmed for two seconds and release Repeat the press hold release a second time to activate the door You may need to repeat this sequence of pressing the Learn button on the Control Housing and then pressing the HomeLink button in the vehicle up to 3 times to complete the training process 8 HomeLink should now a...

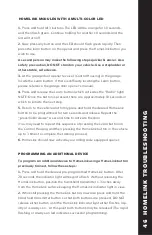
Страница 50: ... HomeLink is in the proper training mode press and hold each of the buttons individually When pressed the individual HomeLink button should make the indicator light blink rapidly for at least 2 seconds A second person may make the following steps quicker easier As a safety precaution DO NOT stand on your vehicle Use a stepladder or other stable safe device 3 At the garage door opener receiver Cont...

Страница 51: ...eat the press hold release a second time to activate the door You may need to repeat this sequence of pressing the Learn button on the Control Housing and then pressing the HomeLink button in the vehicle up to 3 times to complete the training process 6 HomeLink should now activate your rolling code equipped opener HOMELINK MODULES WITH A MULTI COLOR LED To program an additional device to HomeLink ...

Страница 52: ... attached to the unit If there is difficulty locating the training button please reference the garage door opener s manual visit our website www homelink com 5 Press and release the training button which activates the training light NOTE Once the button is pressed there are approximately 30 sec onds in which to initiate the next step 6 Return to the vehicle and firmly press and hold the desired Ho...

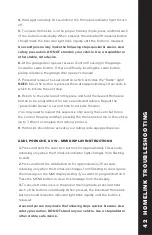
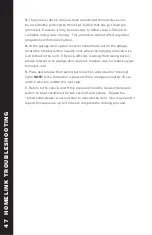
Страница 53: ...de to try and resolve the issue Be sure the wiring matches the diagram in Wiring Simplified or table below Check all three fuse locations shown in specifications chapter Make sure the terminal strip for the photo eyes is not loose on the control board Photo Eye Wire Control Board Terminal Location 1 51 2 50 3 70 4 73 normally open 5 72 normally closed RECEIVER PHOTO EYE Photo Eye Wire Control Boar...

Страница 54: ...obeams 8 If photobeam continuity checks out then remove the cables 70 72 from the board and put your meter to them and set it to ohms Now put your hand in and out of the way and see if the continuity is changing between short and open NOTE If not check you wiring 9 If all this works then move the receiver s power lead back between 50 52 NOTE 50 52 ONLY have power when the motors are moving 10 Put ...

Страница 55: ......

Страница 56: ...r original door and hardware designs are visually stunning and structurally robust We strive to exceed your expectations by combining personalized customer service with the highest quality products We invite you to Build Real Real is constantly releasing new innovative and exclusive products We always have great things in the works so swing by our website to stay completely up to date on everythin...

Отзывы: