Razberi Monitor™
98
Complete the form, and an email will be sent to you with your credentials and
instructions to verify your account.
2.
On your Razberi System, open Razberi Monitor by clicking on the icon, navigate to
Razberi MonitorCloud tab, and click on Create Account.
Complete the form, and an email will be sent to you with your credentials and
instructions to verify your account.
3.
Contact via email
Razberi Monitor Agent
Razberi Monitor is a .NET agent/application that is installed on all Razberi Core Server
Appliances. This agent runs as a Windows service and is automatically set to start when the
system boots up. To access the User Interface, click on the icon on the desktop labeled
Razberi Monitor. This is the interface to use to review system information, manage
EndpointDefender Layer 2 switches, register your Razberi system with MonitorCloud, and
integration to third party systems like Milestone VMS, Solarwinds, and Syslog messaging
servers. Razberi Monitor uses Windows Authentication for access should you be prompted
when launching.
Registering Core to Razberi Monitor
To register your Core server to Razberi Monitor, you will need to ensure you have already
created a Razberi MonitorCloud account.
1.
On the Core server desktop, launch Razberi Monitor by clicking the Razberi Monitor
icon.
2.
Navigate and click on Razberi MonitorCloud tab.
3.
Enter your MonitorCloud credentials, click register.
4.
You will be prompted with a dialog box to enter the following
a.
Friendly Name of the system.
b.
Account of the tenant that you want to register the system to.
c.
Location
–
if locations are created in the Monitor account, you can select a
location.
d.
Tag
–
if Tags are created in the Monitor account, you can apply them here.
Note: if no Locations or Tags have been created, you can still register the system.
It will appear as "no location assigned" you can assign these items later once you
are logged into your portal.
Содержание V8
Страница 1: ...rcgs20200916 2020 2020 2020 2020 2020 2020 2020 2020 2020...
Страница 27: ...V12 Overview 26 Figure 21 Service Information with System Touch Points...
Страница 37: ...V14 Overview 36 3 OpenManage Mobile OMM label 4 iDRAC MAC address and iDRAC secure password label 5 Service Tag...
Страница 45: ...A8 Overview 44 Figure 39 System touchpoint electrical overview jumper settings and memory information...
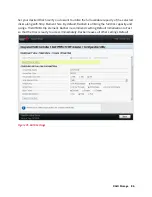
Страница 73: ...RAID Storage 72 Click or Choose Integrated RAID Controller 1 Figure 61 BIOS Device Settings Menu...
Страница 75: ...RAID Storage 74 Select Virtual Disk Management Figure 63 PERC Adapter Server Profile View...
Страница 77: ...RAID Storage 76 Under Operation choose Delete Virtual Disk Figure 65 Virtual Disk Management Select Go...
Страница 78: ...RAID Storage 77 And Confirm that you want to Delete Figure 66 Virtual Disk Management Confirmation...
Страница 79: ...RAID Storage 78 Once the operation has been completed click OK Figure 67 Virtual Disk Management Job Complete...
Страница 80: ...RAID Storage 79 Go Back to the Main Menu and Select Configuration Management Figure 68 Configuration Management...
Страница 81: ...RAID Storage 80 Select Create Virtual Disk Figure 69 Create Virtual Disk...
Страница 82: ...RAID Storage 81 Select RAID level Figure 70 Select RAID Type...
Страница 83: ...RAID Storage 82 Select Physical Disks Figure 71 Select Physical Disks...
Страница 85: ...RAID Storage 84 Scroll up and Click Apply Changes Figure 73 Apply Changes...
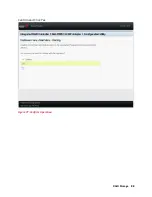
Страница 86: ...RAID Storage 85 Select OK Figure 74 Confirm Completion...
Страница 88: ...RAID Storage 87 Once you have completed your settings click Create Virtual Disk Figure 76 Create Virtual Disk...
Страница 89: ...RAID Storage 88 Confirm and Click Yes Figure 77 Confirm Operation...
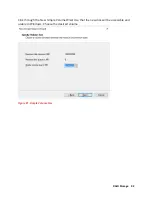
Страница 96: ...RAID Storage 95 Verify all settings and if correct click Finish Figure 84 Complete the Wizard...


