Specifications 56
Ports and Connectors
USB Ports
Front panel
Back panel
Internal USB
•
Two USB 2.0-compliant port
•
One iDRAC Direct (Micro-AB
USB) port
•
Two USB 3.0-compliant port
•
One internal USB 3.0 port
NIC Ports
The Razberi Core system supports two Network Interface Controller (NIC) ports on the back
panel, which have two 1 Gbps configuration.
NOTE:
You can install up to six PCIe add-on NIC cards.
VGA Ports
The Video Graphic Array (VGA) port enables you to connect the system to a VGA display.
The Razberi Core system supports two 15-pin VGA ports
iDRAC Ports
The Razberi Core system supports a single Management Network Interface Controller (NIC)
port on the back panel, which has 1 Gbps configuration
Environmental Specifications
Temperature
Specifications
Storage
–
40°C to 65°C (
–
40°F to 149°F)
Continuous operation (for altitude less than
950 m or 3117 ft)
10°C to 35°C (50°F to 95°F) with no direct sunlight on the
equipment.
Fresh air
For information about fresh air, see the Expanded Operating
Temperature section.
Maximum temperature gradient (operating
and storage)
20°C/h (68°F/h)
Relative humidity
Specifications
Storage
5% to 95% RH with 33°C (91°F) maximum dew point.
Atmosphere must be non-condensing at all times.
Relative humidity
Specifications
Storage
5% to 95% RH with 33°C (91°F) maximum dew point.
Atmosphere must be non-condensing at all times.
Operating
10% to 80% relative humidity with 29°C (84.2°F) maximum
dew point.
Содержание V8
Страница 1: ...rcgs20200916 2020 2020 2020 2020 2020 2020 2020 2020 2020...
Страница 27: ...V12 Overview 26 Figure 21 Service Information with System Touch Points...
Страница 37: ...V14 Overview 36 3 OpenManage Mobile OMM label 4 iDRAC MAC address and iDRAC secure password label 5 Service Tag...
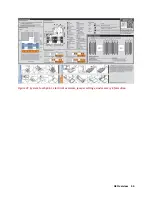
Страница 45: ...A8 Overview 44 Figure 39 System touchpoint electrical overview jumper settings and memory information...
Страница 73: ...RAID Storage 72 Click or Choose Integrated RAID Controller 1 Figure 61 BIOS Device Settings Menu...
Страница 75: ...RAID Storage 74 Select Virtual Disk Management Figure 63 PERC Adapter Server Profile View...
Страница 77: ...RAID Storage 76 Under Operation choose Delete Virtual Disk Figure 65 Virtual Disk Management Select Go...
Страница 78: ...RAID Storage 77 And Confirm that you want to Delete Figure 66 Virtual Disk Management Confirmation...
Страница 79: ...RAID Storage 78 Once the operation has been completed click OK Figure 67 Virtual Disk Management Job Complete...
Страница 80: ...RAID Storage 79 Go Back to the Main Menu and Select Configuration Management Figure 68 Configuration Management...
Страница 81: ...RAID Storage 80 Select Create Virtual Disk Figure 69 Create Virtual Disk...
Страница 82: ...RAID Storage 81 Select RAID level Figure 70 Select RAID Type...
Страница 83: ...RAID Storage 82 Select Physical Disks Figure 71 Select Physical Disks...
Страница 85: ...RAID Storage 84 Scroll up and Click Apply Changes Figure 73 Apply Changes...
Страница 86: ...RAID Storage 85 Select OK Figure 74 Confirm Completion...
Страница 88: ...RAID Storage 87 Once you have completed your settings click Create Virtual Disk Figure 76 Create Virtual Disk...
Страница 89: ...RAID Storage 88 Confirm and Click Yes Figure 77 Confirm Operation...
Страница 96: ...RAID Storage 95 Verify all settings and if correct click Finish Figure 84 Complete the Wizard...


