


84
RayChart 620
2
1
3
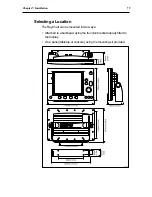
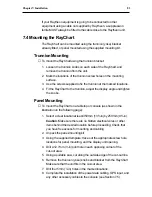
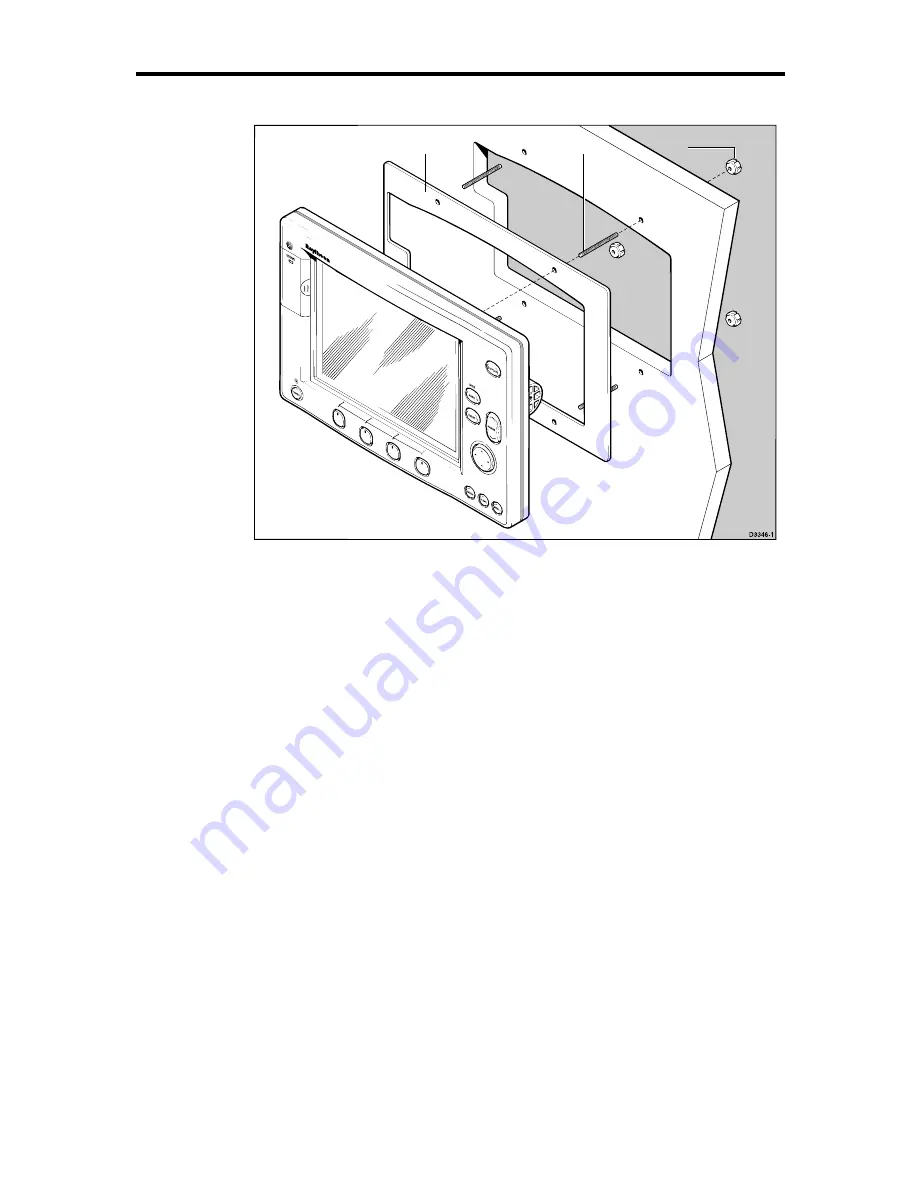
1 Gasket 2 Thumb nuts (4 off) 3 Thumb studs (4 off)
9. Slide the unit into the panel cut-out. A suitable sealant may be used
between the gasket (1) and panel to prevent moisture entering the
panel.
10. Fix the RayChart to the panel using the four thumb studs and four
thumb nuts supplied.
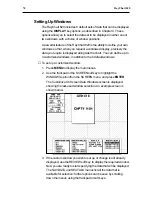
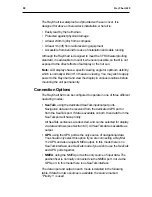
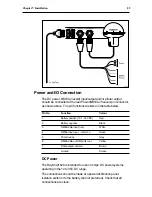
7.5 RayChart Connections
The RayChart has 4 rear panel connectors, as follows:
1. SeaTalk input and output: two 3 pin flat connectors, each providing
data input and output
2. Power and input/output (NMEA and printer): 7 pin male connector
3. GPS input: 5 pin male connector, for a Raytheon GPS only
Note: When making connections to the RayChart 620, you can use
either SeaTalk input/output or NMEA input/output, but not both. If
you wish to use both types of data, you must connect the NMEA
equipment via a unit such as a RayData or NMEA Interface Box,
that repeats NMEA data in SeaTalk format (see Section 7.3).
Содержание RayChart 620
Страница 2: ...ELECTRONIC CHARTING SYSTEM OPERATION MANUAL N 43 34 944 W 72 26 223 N 43 34 944 W 72 26 223 12...
Страница 3: ...RayChart 620...
Страница 89: ...76 RayChart 620...
Страница 105: ...92 RayChart 620...
Страница 109: ...96 RayChart 620...
Страница 111: ...98 RayChart 620...
Страница 115: ...102 RayChart 620...
Страница 119: ...106 RayChart 620 81125 1...
Страница 120: ...RayChart 620...


